WordPress includes a system for processing repeated tasks, often called cron jobs. (Cron stands for Command Run On – it’s a very Unix name) But whatever it stands for, it’s job is to make sure that background tasks are consistently run.
Within WordPress, this is accomplished by default in a less than ideal way. Instead of having a system level cron job that reliably executes any tasks that are due every minute, WordPress has a different approach: whenever someone visits your site, it spins up its own cron mechanism in the background. This happens at the end of the PHP request, so as to cause as little disruption as possible.
When wp-cron spins up, it checks for any behind schedule tasks and processes them. There are two major issues with this approach, which you may have already anticipated:
- If your site is not accessed frequently (or is cached), the WP cron jobs will run infrequently (or never at all)
- If a cron job takes awhile to run, it could lock up multiple PHP threads reducing the number of available resources for your visitors.
Fortunately there are a few of straight forward ways to fix this.
Note: If you’re using a WordPress managed host, chances are they already manage your cron setup for you and you won’t need to do anything. When it doubt, ask your host.
Step 1: Disable WP Cron
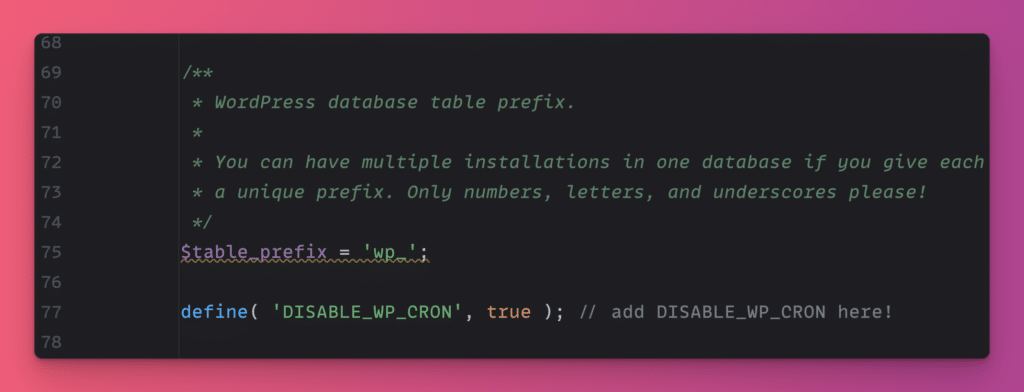
Disabling the WP cron doesn’t prevent tasks from running, it disables the normal method those tasks are executed. To disable WP cron, add the following to your wp-config.php file:
define('DISABLE_WP_CRON', true);Step 2: Setup properly functioning cron scheduling
Option 1: Use cron-job.org (Difficulty: Easy)
cron-job.org solves issue 1: infrequently executed cron jobs
You can use cron-job.org to regularly call WP’s cron script and make sure it executes reliably. Here’s how to do it:
1. Create an account
Create an account, verify your email address, and login. (You don’t need help with this part!)
2. Create a cronjob
Here are the settings you should use for your new cronjob:
Title: Your Awesome Site!
Address: https://yoursite.com/wp-cron.php?doing_wp_cron
Schedule: Every 1 minute(s)
These are example values. Replace yoursite.com with your site’s domain.
Once you’ve created the cronjob, you are done. Cron jobs should execute properly.
Note: Some hosts might improperly detect the once-every-sixty-seconds page load as a threat. You can ensure that this isn’t a problem by asking your host to whitelist these IPs:
- 195.201.26.157
- 116.203.134.67
- 116.203.129.16
- 23.88.105.37
Option 2: Use cpanel (Difficulty: Medium)
If your host uses cpanel, you can add scheduled tasks right from your hosting control panel.
Here is how you can do it:
Set up a Cron job in cPanel: Log in to your cPanel account and look for the Cron jobs tool. This tool is often found in the “Advanced” section. After you open the tool, follow these steps:
- In the “Common Settings” dropdown, select Every Minute (* * * * *).
- In the command field, you need to add the command that will run the wp-cron.php file. The command should look like this:
/usr/local/bin/php /path/to/public_html/wp-cron.php >/dev/null 2>&1 - After you’ve added the command, click on the Add New Cron Job button. The cron job is now set up and will run the wp-cron.php file every minute.
Please note that the PHP cli command might not work on all servers. If it doesn’t work on your server, you can try using one of the following commands:
- For servers with wget installed:
wget -q -O – http://yourwebsite.com/wp-cron.php?doing_wp_cron >/dev/null 2>&1 - For servers that have curl installed:
curl http://yourwebsite.com/wp-cron.php?doing_wp_cron >/dev/null 2>&1
Replace `yourwebsite.com` with your actual website URL!
This setup will reduce the load on your server and ensure that scheduled tasks are run on time, even if your website doesn’t receive much traffic.
Option 3: The best option: Use a real cron job with WP CLI (Difficulty: Hardest)
To set up WP Cron using WP CLI and the system’s crontab, you’ll first need to ensure that WP CLI is installed on your server. WP CLI is a command line interface for WordPress that allows you to manage your site from the command line. Installing WP CLI is outside of the scope of this document – check with your hosting provider.
Here are the steps to do it:
Configure Cron using WP CLI and crontab
- SSH into your server
- Open your crontab for editing. You can do this by executing the following command in your terminal:
crontab -eThis will open your crontab file in your default text editor.
Note: This is the user you are using to SSH into the server’s crontab file. It can only do things your user can do.
- Next, you need to add a new line to your crontab that tells it to run WP CLI’s cron event runner. This line should look something like this:
* * * * * cd /path/to/your/wordpress/install && wp cron event run –due-now >/dev/null 2>&1Replace `/path/to/your/wordpress/install` with the actual directory path of your WordPress installation.
-
This line tells the system to:
- Navigate to your WordPress directory (cd /path/to/your/wordpress/install)
- Run the WP CLI command (wp cron event run –due-now)
- Run this command every minute (* * * * * is crontab syntax for “run this command every minute”)
- Discard any output from the command (>/dev/null 2>&1)
- Save your changes and exit the text editor to save the crontab.
Now, your server will run any due WordPress cron events every minute. This is a more reliable method than the default WordPress cron, especially for sites that don’t receive a lot of traffic.
