When something goes wrong at checkout, the first question is whether CheckoutWC is involved. This page shows how to compare with WooCommerce’s own checkout, what the common error messages mean, and how to track down a conflict with a theme or plugin.
Start here
- Update first. Update WordPress, WooCommerce, CheckoutWC and your other WooCommerce plugins. Many problems are already fixed. See the change log.
- Compare with WooCommerce’s checkout. Add
?bypass-cfw=trueto your checkout URL. If the problem also happens on WooCommerce’s own checkout, it isn’t caused by CheckoutWC. See Turn CheckoutWC off for testing. - Check the template loader. Under CheckoutWC » Advanced, Template Loader should be Distraction Free Portal (Recommended). The WordPress Theme option is unsupported and often causes layout problems.
- Look for the error. Note the exact message, then check Common problems and the debug log.
Test on a staging site where you can. CheckoutWC doesn’t use a license activation on staging or local sites.
Turn CheckoutWC off for testing
Compare the same order on WooCommerce’s own checkout to see whether CheckoutWC is involved. There are several ways to switch CheckoutWC off, and they differ in who they affect.
| Method | How | Who it affects |
|---|---|---|
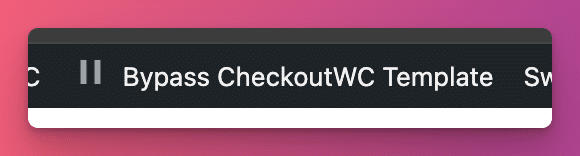
| Admin bar button | On the checkout, click Bypass CheckoutWC Template in the WordPress admin bar. Click Unbypass CheckoutWC Template to switch back. | Only you, on that page load. The button shows on CheckoutWC’s checkout, order pay and thank you pages, for administrators. |
| URL parameter | Add ?bypass-cfw=true to the checkout URL, for example https://yoursite.com/checkout/?bypass-cfw=true. If the URL already has a ?, add &bypass-cfw=true instead. |
Only that page load, in whichever browser uses the URL. You don’t need to be logged in. |
| Live or Preview | In the Checkout Editor, open the Live menu next to the title, choose Preview, and click Save Changes. | All customers. Administrators still see CheckoutWC, with an “Admin preview” notice at the top of the checkout. |
CFW_DISABLE_TEMPLATES constant |
Add define( 'CFW_DISABLE_TEMPLATES', true ); to wp-config.php. |
Everyone, including administrators, until you remove it. |
While CheckoutWC is bypassed, its other features are off for that page load too, including the side cart and order bumps. The bypass lasts for one page load, so the thank you page after a test order shows CheckoutWC’s template again.
Don’t deactivate CheckoutWC to test. Deactivating clears its scheduled tasks, including pending abandoned cart emails.
Common problems
Customers don’t see CheckoutWC, but I do
CheckoutWC isn’t live yet. Until it is, only administrators see CheckoutWC, and they see the notice “Admin preview: CheckoutWC is off for customers. Turn it on in WP Admin > CheckoutWC > Dashboard.” at the top of the checkout. If your license isn’t valid on this site, the notice says so and points you to the Your plan card on CheckoutWC » Dashboard. Click Go live on CheckoutWC » Dashboard, or set the Checkout Editor to Live and save.
Only users who can manage the site’s settings count as administrators here. Shop managers see WooCommerce’s checkout until you go live.
The checkout is blank, or shows a 500 error or “There has been a critical error”
This is almost always a PHP error in a plugin, theme or snippet. CheckoutWC hides PHP errors on its pages, so you need the log to see what happened. See See PHP errors. Use ?bypass-cfw=true if you need to keep taking orders while you fix it.
If the checkout shows the header and order summary but no form, an optimization plugin is usually combining or delaying CheckoutWC’s scripts. See Fix caching and hosting conflicts.
An error appears when placing the order
| Message | What it usually means |
|---|---|
| “We could not confirm whether your order went through. Please check for any charges in your payment method and review your order history before placing the order again.” | The browser got no response at all: a dropped connection, or the request was blocked by an ad blocker, a security plugin, or a mismatch between http and https or www and non-www. The order may still have been placed, so check for a charge and the customer’s order history before asking them to try again. |
| “Requested resource could not be found. Please contact site administrator. (404)” | The checkout request (?wc-ajax=checkout) didn’t reach WooCommerce. A firewall, security plugin or server rule may be blocking it. |
| “An internal server error occurred. Please contact site administrator. (500)” | A PHP error while processing the order, often in a payment gateway or another plugin. See See PHP errors. |
| “Server response could not be parsed. Please contact site administrator.” | The response wasn’t valid checkout data, usually because a plugin, theme or a firewall or maintenance page sent HTML instead. |
| “The server timed out while processing your request. Please check for any charges in your payment method and review your order history before placing the order again.” | Your server or host returned a 504 timeout. Usually a slow server or payment gateway, not CheckoutWC. The order may have gone through, so check for a charge first. |
| “Request was aborted. Please contact site administrator.” | The browser cancelled the request, for example because the customer left the page or reloaded it while the order was processing. |
| “Uncaught Error:” followed by text or HTML | The server returned an unexpected status, such as a 403 from a firewall or a 502 or 503 from the host. The text after it is the server’s response. |
| “Error processing checkout. Please try again.” | WooCommerce reported a problem without a message. Check the debug log. |
CheckoutWC logs these failures, with the server’s response, to the WooCommerce log even when the debug log is off. See Read the CheckoutWC debug log.
“We were unable to process your order, please try again.”
This is WooCommerce’s message when the checkout’s security token has expired or doesn’t match the customer’s session. CheckoutWC refreshes the token after this error, so placing the order again usually works. If customers see it often, check that your checkout page isn’t cached. See Fix caching and hosting conflicts.
“Sorry, your session has expired.”
WooCommerce shows this when the customer’s cart no longer exists: the session ran out, the cart was emptied in another tab, or a cached page or blocked cookie lost the session. Customers can return to the shop and add the products again. If it happens often, check the checkout isn’t cached and that WooCommerce’s session cookie isn’t blocked.
“Account username is a required field.”
This only appears when Registration under CheckoutWC » Pages is set to WooCommerce Default and WooCommerce isn’t set to generate usernames. Set Registration back to Enhanced (Recommended), which creates the username for the customer. Or, under WooCommerce » Settings » Accounts & Privacy, turn on Generate account login (recommended).
The checkout doesn’t match my theme’s styling
That’s expected. CheckoutWC uses its own templates and leaves out your theme’s stylesheets and scripts. Style the checkout under CheckoutWC » Appearance or in the Checkout Editor. If a theme setting is breaking the layout, see CheckoutWC theme compatibility.
A plugin’s checkbox, form or message is missing
The plugin probably adds it to a part of WooCommerce’s checkout that CheckoutWC doesn’t show. See CheckoutWC plugin compatibility.
Abandoned cart emails, A/B tests or other scheduled tasks don’t run
These rely on WordPress cron. See Make sure WordPress cron is working.
Find the cause of a conflict
If the problem only happens with CheckoutWC, another plugin or your theme is usually involved. On a staging copy of your site:
- Plugins: deactivate every plugin except WooCommerce, CheckoutWC, your payment gateway and your shipping plugins, then test. If the problem is gone, reactivate the plugins one at a time, testing after each, until it comes back. With many plugins, reactivate half at a time to narrow it down faster.
- Payment and shipping plugins: if the problem is still there, try another payment gateway or shipping method, so you can still complete a test order.
- Theme: switch to a default WordPress theme, such as Twenty Twenty-Five, and test again.
For custom checkout fields, use CheckoutWC’s own custom checkout fields where you can. CheckoutWC supports WooCommerce’s Checkout Field Editor and ThemeHigh’s Checkout Field Editor. Other field editor plugins may not work with its templates.
When you find the plugin or theme, check plugin compatibility and theme compatibility, then contact support with what you found.
Read the CheckoutWC debug log
- Turn on Enable Debug Log under CheckoutWC » Advanced, in the Other section, and save.
- Repeat what caused the problem.
- Go to WooCommerce » Status » Logs and open the most recent log with the source checkout-wc.
The debug log explains, for example, why an order bump didn’t show (“Order Bump Rule Failure”), why a cart wasn’t tracked for abandoned cart recovery, each Turnstile check, and why the express checkout buttons did or didn’t show: express checkout turned off in CheckoutWC, no gateway adding buttons, or a required custom field that express payments can’t collect. Turn it off again when you’re done, because it adds a lot of detail.
Some entries are logged even with the debug log off: failed checkout requests (“CheckoutWC Client Side Error”) with the server’s response, PHP Snippets errors, and failed recovery emails. License checks log under the source checkout-wc-license.
If no logs appear, check that logging is turned on under WooCommerce » Status » Logs » Settings.
The log can include customer details, such as email addresses and cart contents. Share only the lines that relate to the problem.
Use your browser’s developer tools
The browser console and network panel show errors that never reach the page.
- Open the checkout and open the developer tools:
- Chrome and Edge: press F12, or Ctrl+Shift+J (Cmd+Option+J on a Mac), and open the Console tab.
- Firefox: press F12, or Ctrl+Shift+K (Cmd+Option+K on a Mac), and open the Console tab.
- Safari: turn on the developer features in Safari’s settings, under Advanced, then press Cmd+Option+C.
- Reload the page and repeat the problem. Red lines in the Console are errors.
- To see the server’s reply when placing an order fails, open the Network tab, place the order again, and click the request containing
wc-ajax=checkout. The Response shows what the server sent back.
For more detail, add ?cfw-debug to the checkout URL. CheckoutWC then logs its activity to the console and adds the server’s response to place-order error messages. For express checkout, the console lists each button CheckoutWC found and, if none appears, whether the cart needs payment and the usual causes, such as Apple Pay needing Safari with a card in Apple Wallet, or Stripe needing your domain registered.
See PHP errors
CheckoutWC hides PHP errors on its pages so they don’t break the checkout, so a blank page or 500 error needs the error log:
- In
wp-config.php, setdefine( 'WP_DEBUG', true );,define( 'WP_DEBUG_LOG', true );anddefine( 'WP_DEBUG_DISPLAY', false );. - Repeat the problem.
- Open
wp-content/debug.logand look for “Fatal error” near the time of your test. The file path in the error usually names the plugin or theme.
Your host’s PHP error log has the same information. Turn WP_DEBUG off again when you’re done.
Contact support
If you’re still stuck, click Contact support in the Support card on CheckoutWC » Dashboard, or use the support form. Include:
- The exact error message, and the steps to reproduce it.
- Whether it also happens with
?bypass-cfw=true. - The plugin or theme you narrowed it down to, if any.
- Your WooCommerce system report: click Get system report under WooCommerce » Status, then Copy for support.
- The relevant lines from the CheckoutWC log.
Don’t send API keys, passwords or a full settings export. Support doesn’t need them to investigate.