Configure Apple Pay Gateway in WooCommerce
Table of Contents
- Apple Pay setup with payment gateways
- Payment Plugins for Stripe WooCommerce
- WooPayments
- Square for WooCommerce
- Braintree
- Step-by-step Payment Plugins for Stripe WooCommerce configuration for Apple Pay
- Step-by-step setup for Apple Pay with WooCommerce Payments
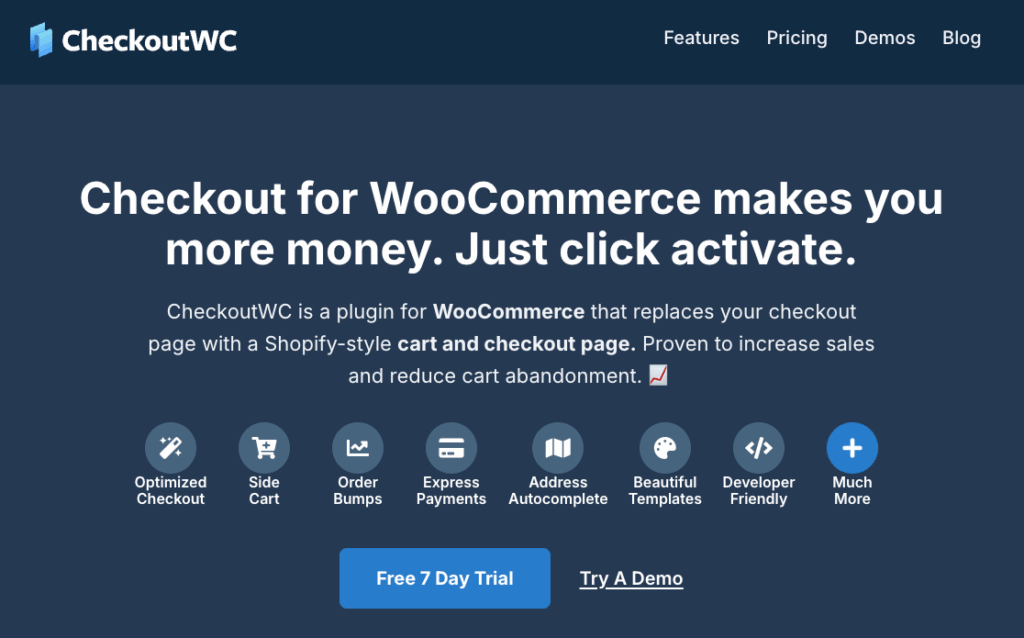
- How CheckoutWC simplifies Apple Pay button integration
- Effortless integration
- Seamless theme compatibility
- Optimized for all devices
- Direct checkout options
- Fixing common Apple Pay display and payment issues
- 1. Apple Pay button is missing from checkout
- 2. Mobile users can't see Apple Pay
- 3. Payments fail to process
- 4. Button appears but doesn't work
- 5. Product or location restrictions
- Transform your checkout experience with seamless Apple Pay button integration
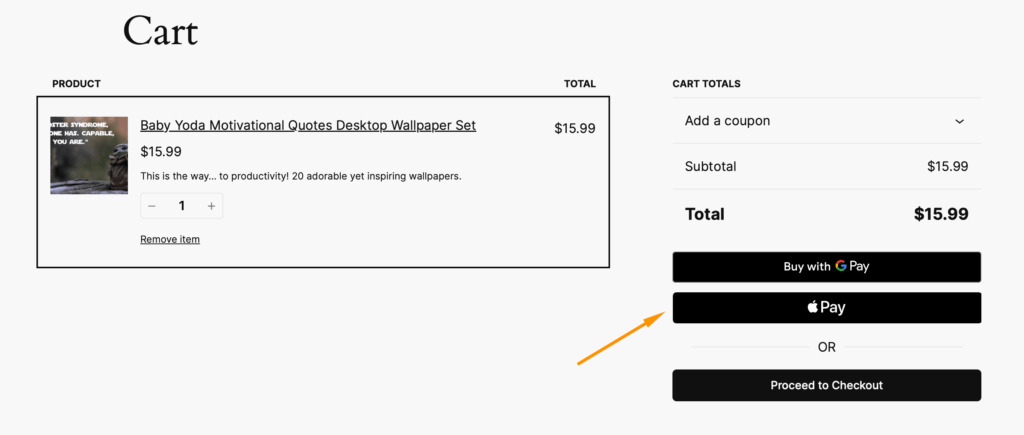
If you have an online store, one of the first things you’ve probably done is enable your preferred payment gateway with the expectation that your checkout page will become a conversion miracle. But wait – where’s the Apple Pay button? You’ve activated and set everything up, so why isn’t it showing?
Don’t worry, this issue is much more common than you might think.
Apple Pay has become the preferred payment method for over 507 million users worldwide, and it’s no wonder why:
- Lightning-fast checkout that takes seconds, not minutes.
- Bank-level security with tokenization and Face ID/Touch ID authentication.
- Mobile optimization that works perfectly where 77% of shopping happens – on phones.
Besides the convenience, the more payment options you offer, the more completed purchases you’ll enjoy.
However, setting it up in WooCommerce can be a bit complicated. This guide cuts through the confusion and shows you exactly how to get that Apple Pay button working on your WooCommerce store. Let’s begin!
Apple Pay setup with payment gateways
As we mentioned, to set up Apple Pay, you need the right payment gateway, and fortunately, several reliable options support this popular payment method. Each gateway offers distinct advantages depending on your business needs and technical requirements.
Payment Plugins for Stripe WooCommerce
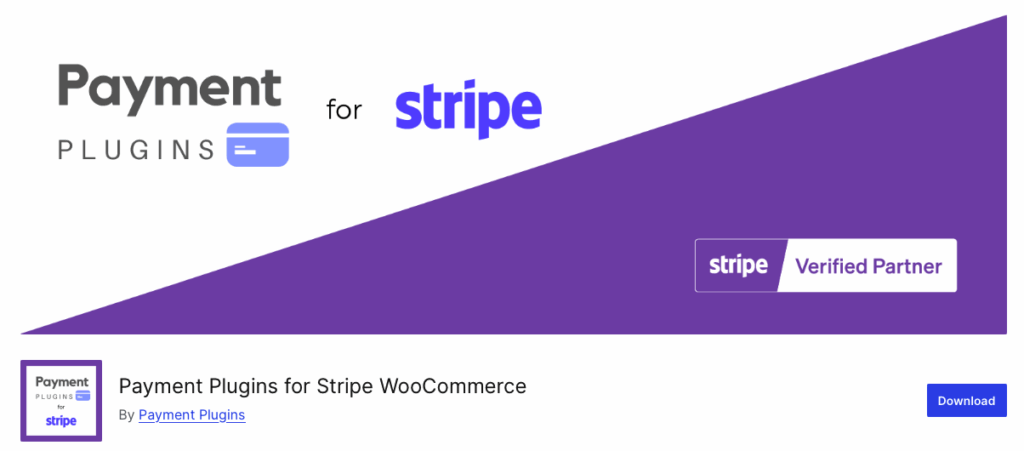
Payment Plugins for Stripe is the perfect companion for any Stripe power-user plugin. It offers dedicated tabs for each payment method, including Apple Pay, making the configuration crystal clear. With automatic domain registration and built-in testing tools, it’s perfect for stores that want granular control over their payment options. Plus, it’s free and actively maintained with over 100,000 active installations.
WooPayments
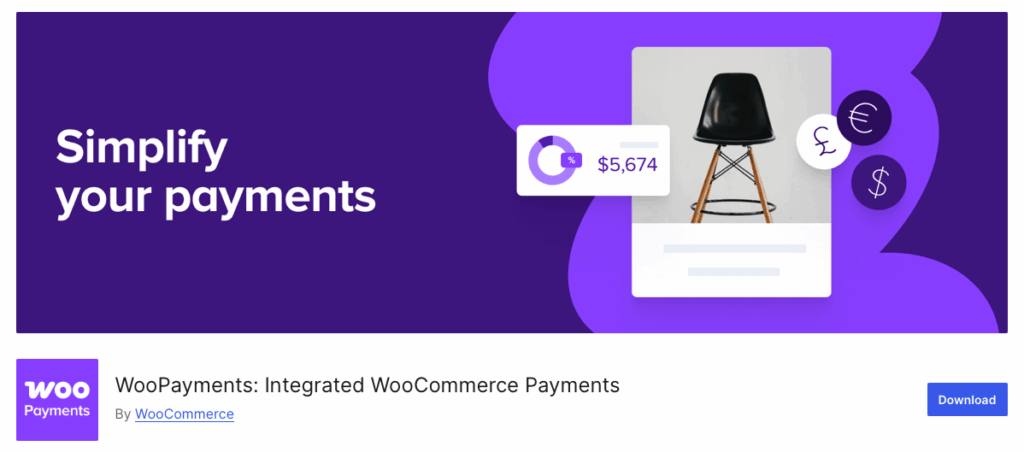
WooPayments builds on Stripe’s infrastructure while keeping everything within your WordPress dashboard. This native integration means you can manage Apple Pay settings without jumping between different platforms, making it ideal for store owners who prefer centralized control. Since it’s developed by WooCommerce itself, compatibility issues are virtually non-existent.
Square for WooCommerce
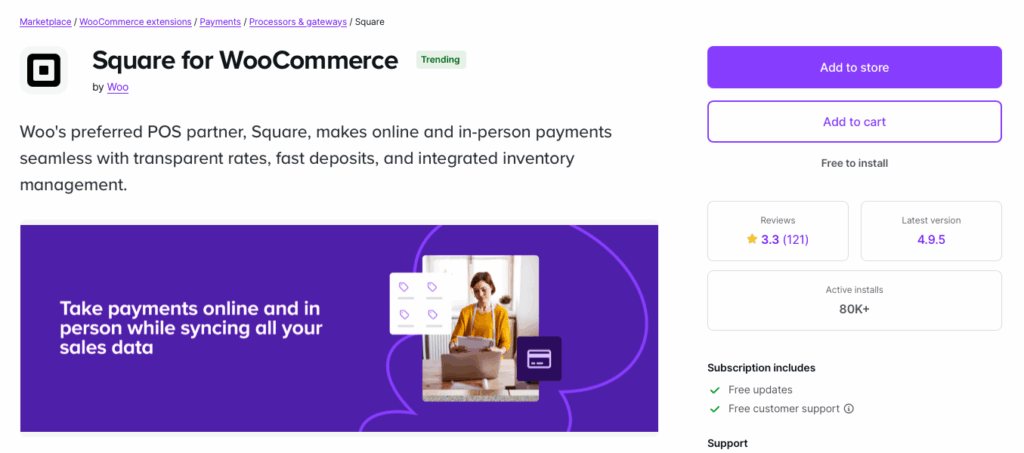
Square offers unique value for businesses operating both online and offline. Beyond Apple Pay support, Square synchronizes inventory between physical and digital stores, making it particularly attractive for retailers with multiple sales channels. Their transparent pricing structure and small business focus have made them increasingly popular among WooCommerce merchants.
Braintree
From the creators of the Payment Plugins for Stripe WooCommerce, Braintree is a PayPal service that provides Apple Pay functionality while maintaining existing PayPal and Venmo integrations. This makes it the logical choice for stores already invested in the PayPal ecosystem but wanting to expand their payment options.
In this article, we’ll show you how to use the two choices recommended by the team at CheckoutWC: Payment plugins for Stripe WooCommerce and WooPayments.
Step-by-step Payment Plugins for Stripe WooCommerce configuration for Apple Pay
Here’s exactly how to set it up:
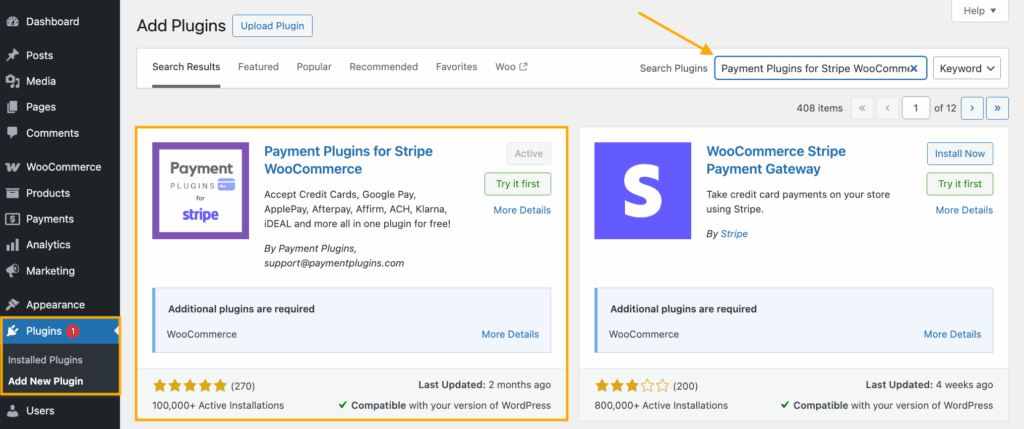
- Head to Plugins > Add New and search for “Payment Plugins for Stripe WooCommerce” or download it from WordPress.org.
- Go to the plugin settings and connect your Stripe account. We recommend enabling the test environment beforehand so that you can ensure everything works properly before opening to customers. To do that, you have to go to the Stripe developers dashboard and input the publishable and secret keys.
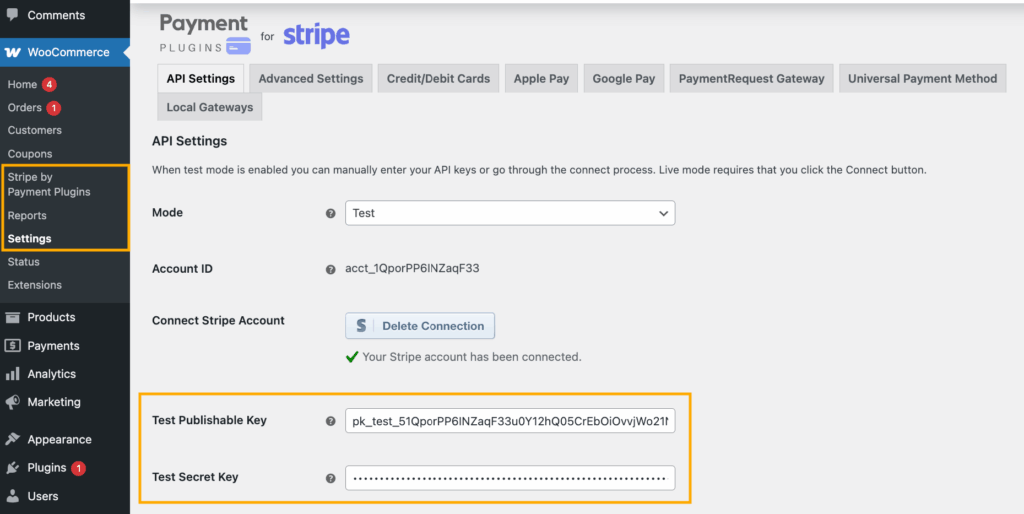
Enabling test environment in Payment Plugins for Stripe WooCommerce and adding the Publishable and Secret Keys
Here is how they look in the Stripe dashboard.
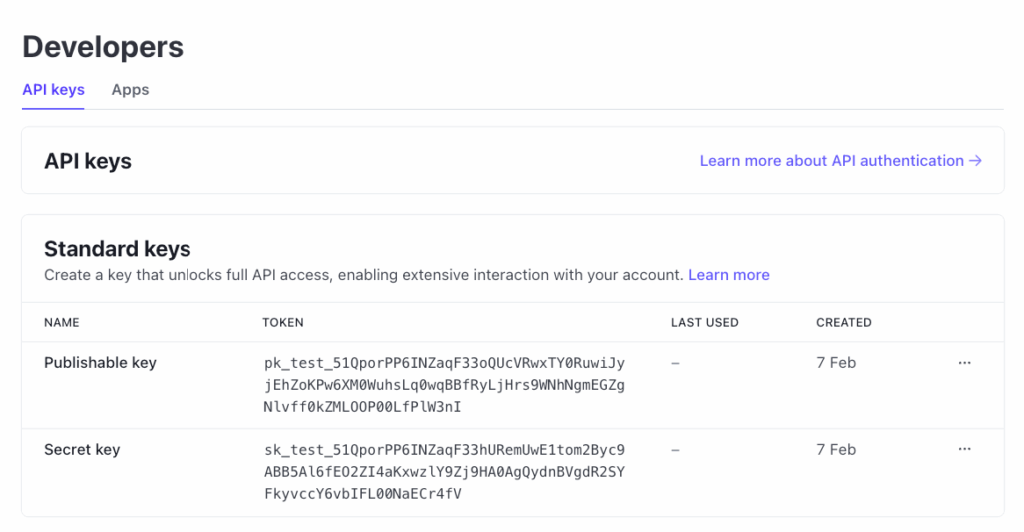
Publishable and Secret Keys in the Stripe dashboard
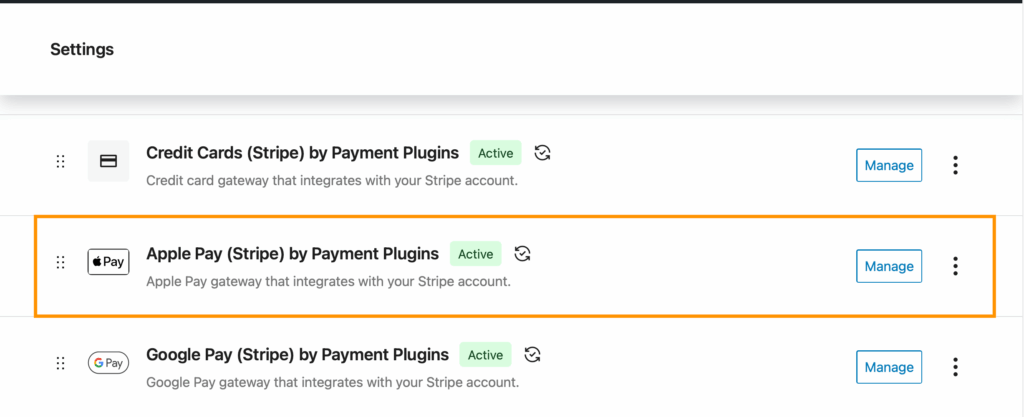
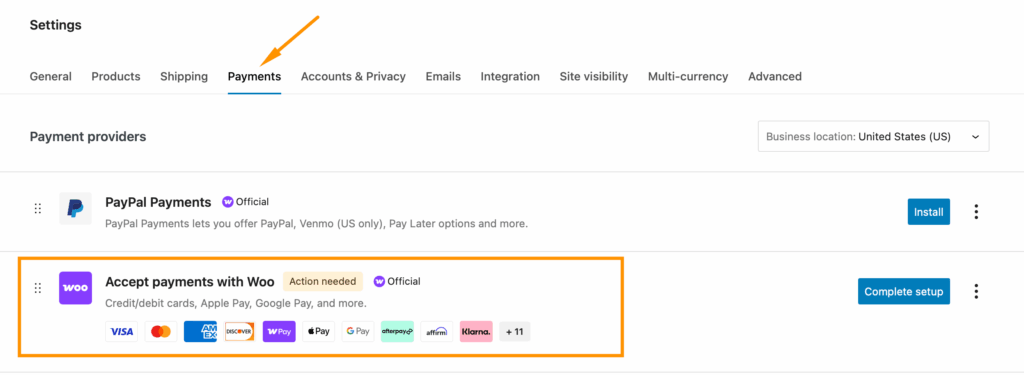
- Next, go to WooCommerce > Settings > Payments, where you will see all the available payment methods the plugin unlocks. Scroll down until you find “Apple Pay (Stripe) by Payment Plugins.”
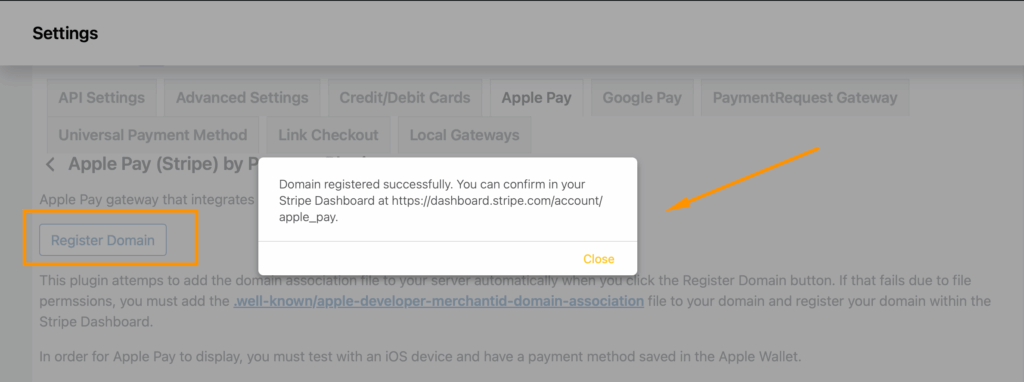
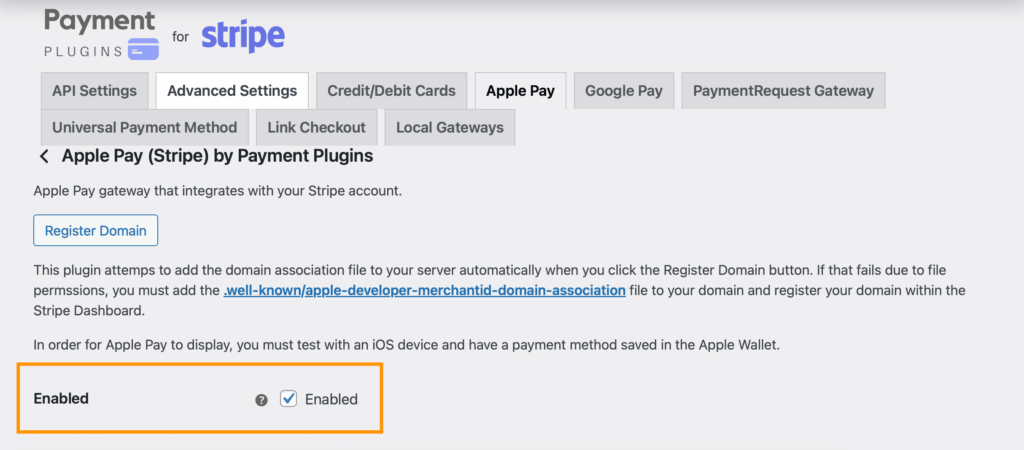
- Click on “Manage” to open the settings and then select “Register Domain”. The plugin handles this automatically – you’ll see a success message when complete.
- Toggle “Enable Apple Pay” to ON.
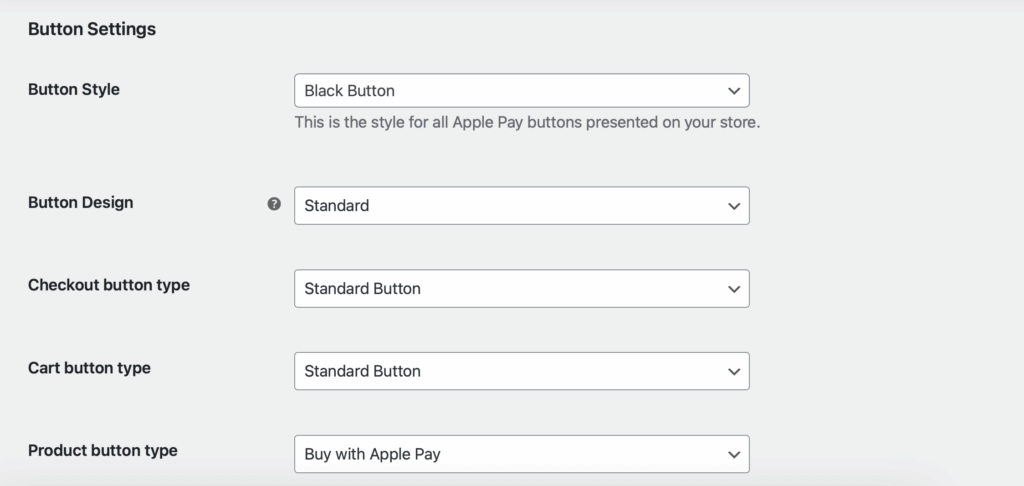
- Further down, you can choose where the button can appear, including the product page, cart page, mini cart, and express checkout.

- You can also adjust the appearance of the button itself, although we recommend keeping the default black button – Apple users recognize it instantly, which builds trust and increases conversions.
- Save everything and visit your site on an Apple device. The Apple Pay button should appear on the product, cart, and checkout pages. Place a test order to confirm the full flow works.
🧠If you want to learn more about placing test orders, check out our detailed guide on setting up a payment test environment in WooCommerce.
Step-by-step setup for Apple Pay with WooCommerce Payments
WooCommerce Payments is WooCommerce’s native payment gateway plugin, built specifically for the platform. This means fewer compatibility headaches and smoother integration with your store’s existing setup.
Setting up Apple Pay takes just five steps:
- Go to Payments > Settings in your WordPress dashboard and click on “Complete setup.”
- In the pop-up window, select the payment methods you want to activate. You can change those later, if needed. Click “Continue.”
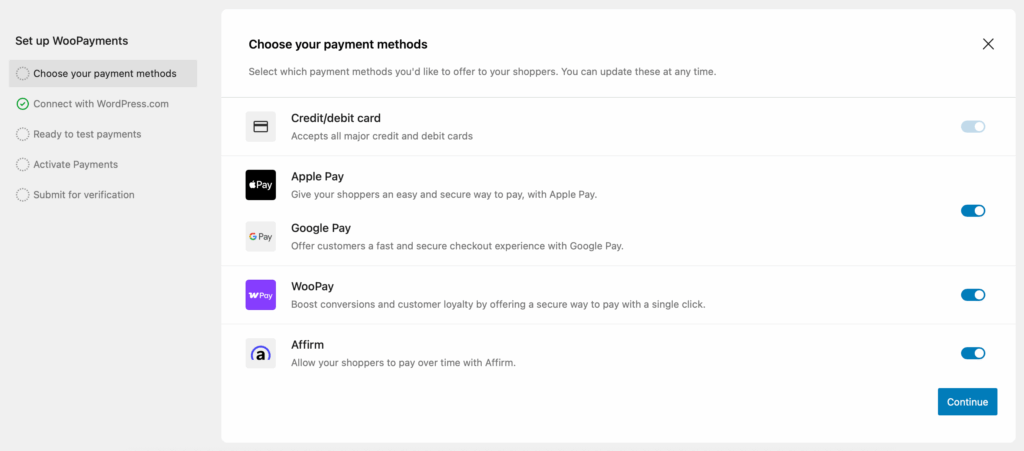
- You should receive a message confirming that a test environment has been created. You can either close the window and test the payment methods or continue the store setup to activate actual payments.

- Go back to the WooPayments settings and click “Manage.”
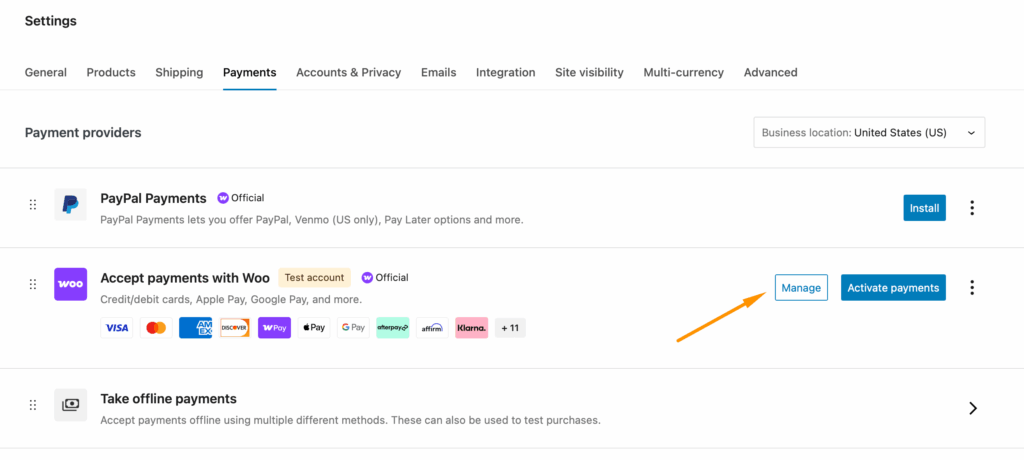
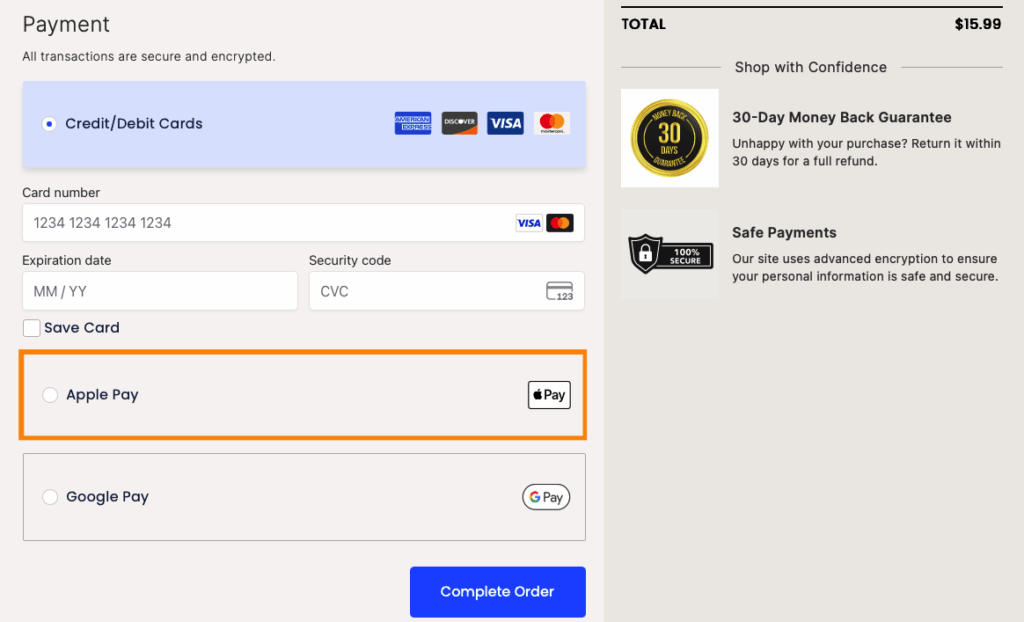
- Find the Express Checkouts section and make sure the box for Apple Pay / Google Pay is checked (they’re bundled together).
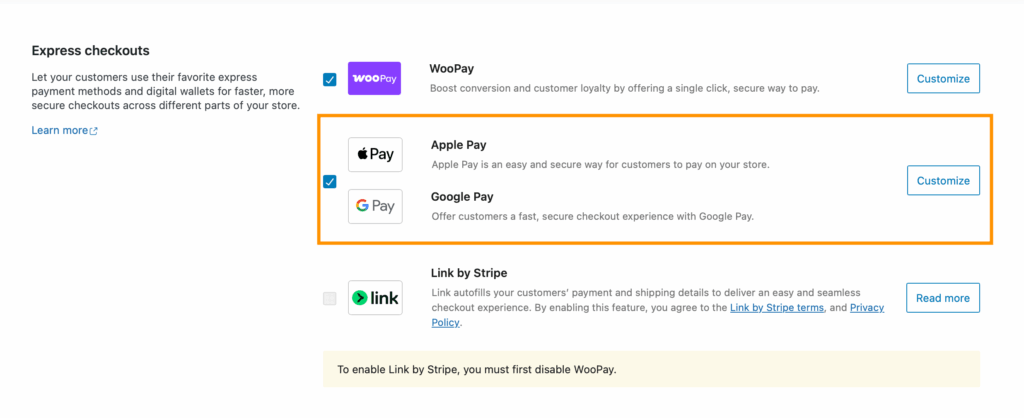
- Scroll down and click Save Changes.
- Test with an Apple device to confirm everything works.
That’s it. WooCommerce Payments handles domain verification automatically – no manual file uploads needed.
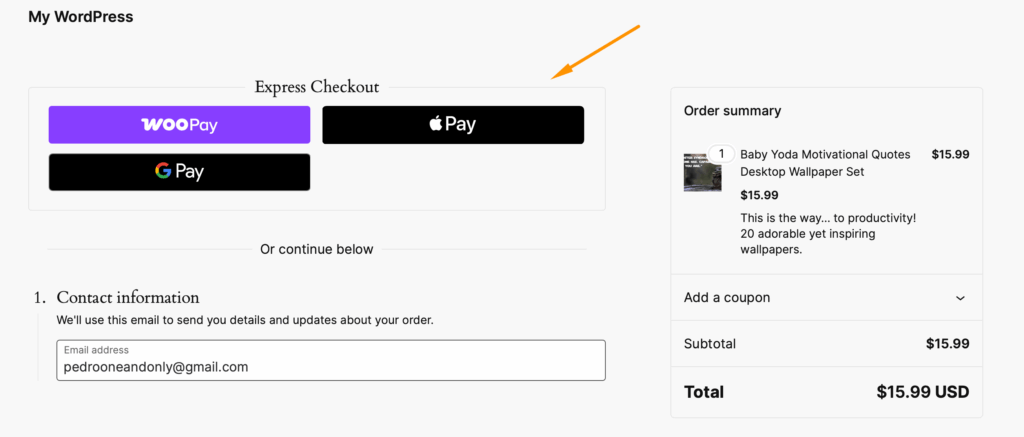
Where will the Apple Pay button appear?
- Checkout page
- Cart page
- Individual product pages
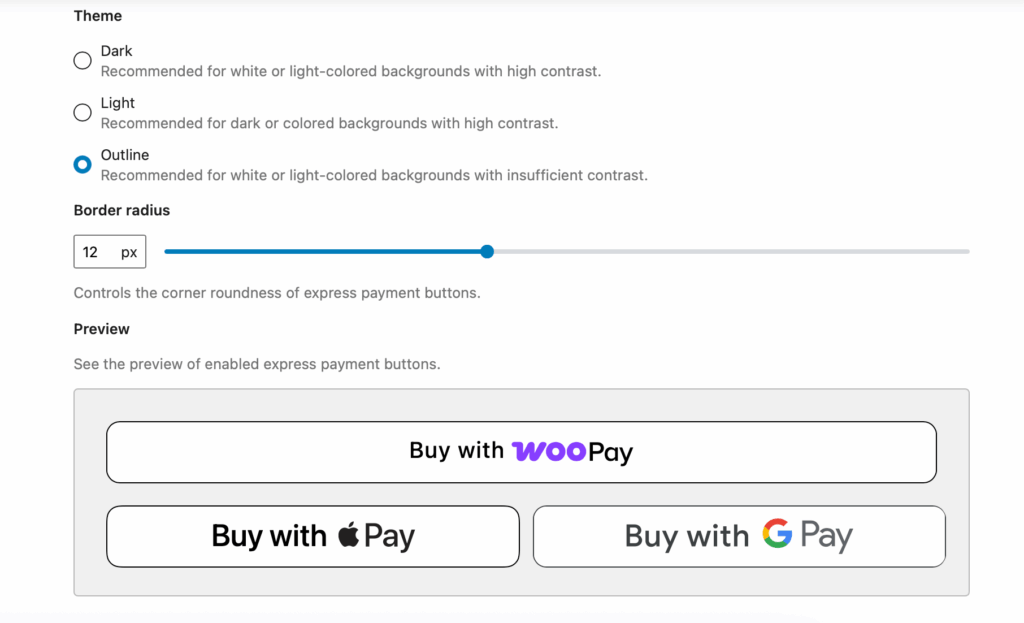
Want to customize the button? Navigate to Payments > Settings and click the Customize link next to Apple Pay / Google Pay.
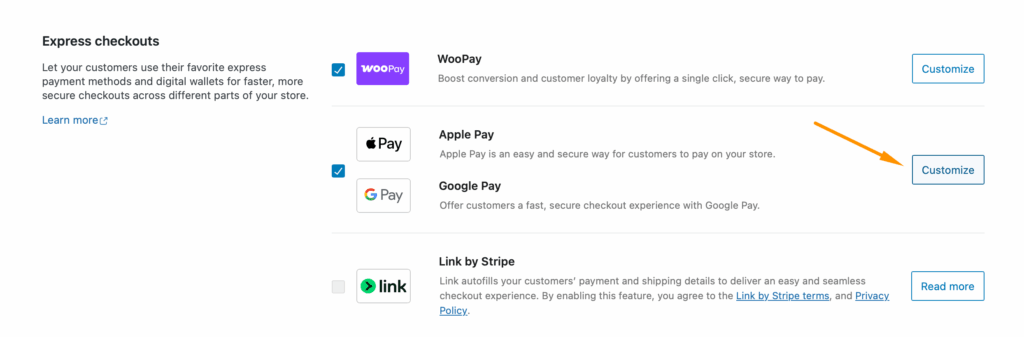
You can adjust:
| Setting | Options |
| Button location | Choose which pages display the button |
| Button text | “Buy with Apple Pay” or custom text |
| Size and color | Match your store’s design |
| Border radius | Sharp corners or rounded edges |
How CheckoutWC simplifies Apple Pay button integration
CheckoutWC is a checkout optimization plugin that supercharges your existing payment setup. Want Apple Pay? We recommend Payment Plugins for Stripe WooCommerce, but most major gateways work perfectly.
Think of CheckoutWC as your checkout’s personal assistant. It takes the technical hassle out of Apple Pay integration and makes everything… just work.
Here’s what CheckoutWC handles for you:
Effortless integration
When you install a compatible payment gateway, CheckoutWC automatically detects Apple Pay support and displays the button on your checkout page. No code editing. No developer needed. It just appears.
Seamless theme compatibility
Whether you’re running Astra, GeneratePress, or that custom theme your developer built in 2019, the Apple Pay button blends in perfectly. No weird spacing issues or style conflicts.
Optimized for all devices
Mobile shoppers see this: A perfectly-sized Apple Pay button
Desktop users get: The same great experience
Tablet buyers enjoy: Yep, works there too
Direct checkout options
CheckoutWC transforms your checkout with:
- One-step checkout: Everything on one page.
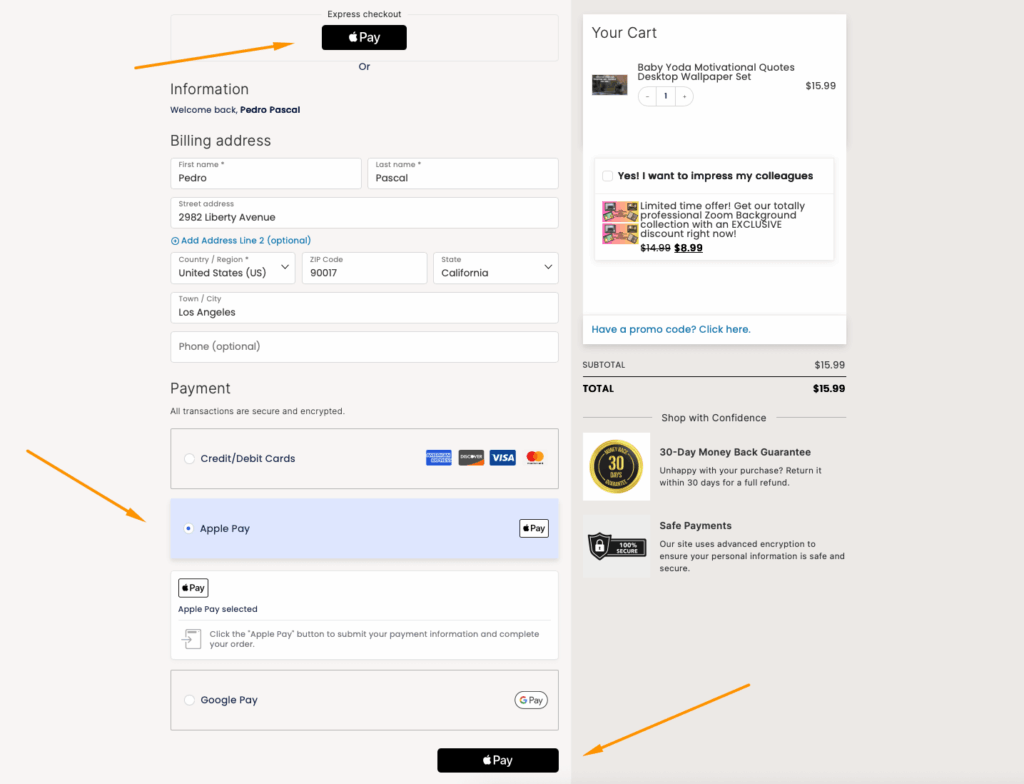
- Side cart: Quick purchases without leaving the page.
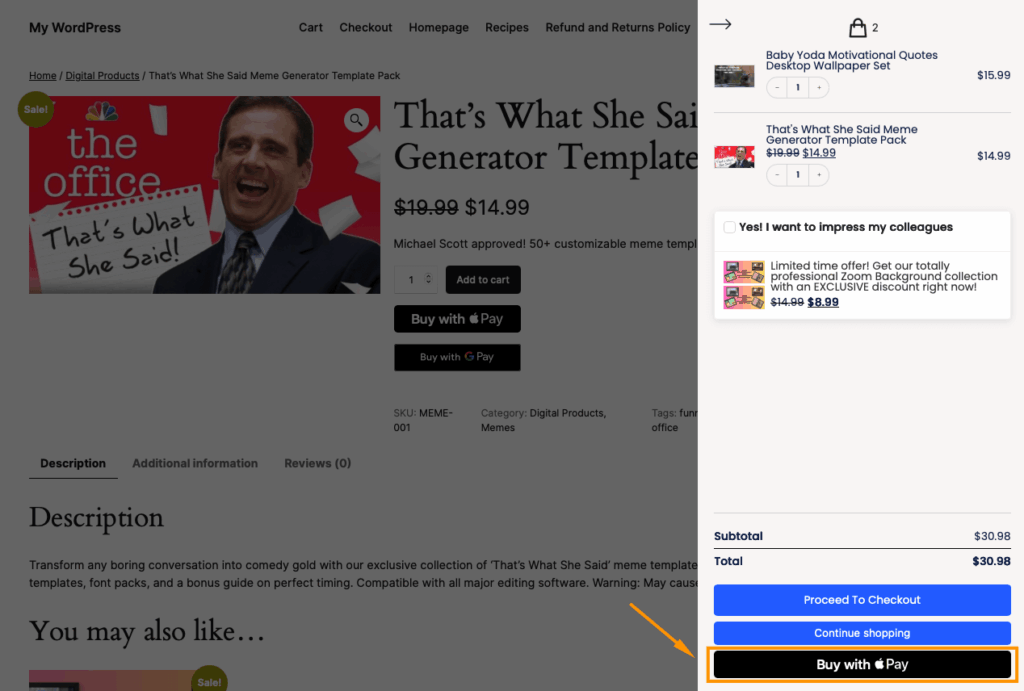
- Multiple express payment methods: Apple Pay, Google Pay, PayPal – all working together.

The result? Your customers get their preferred payment method, and you get more completed purchases.
Fixing common Apple Pay display and payment issues
Most payment plugins, especially the ones we mentioned, should work without any hitches, but there are still some issues that might appear. These include a missing Apple Pay button, failed payments and verifications, incompatible devices, and geographical restrictions.
Let’s take a look at the most common cases and how to solve them.
1. Apple Pay button is missing from checkout
The problem: You’ve enabled everything, but that familiar Apple logo is nowhere to be found.
Quick fixes:
- Verify Apple Pay is enabled in your payment gateway settings.
- Check domain verification status (this trips up 90% of stores).
- Clear your cache – seriously, it helps more than you’d think.
Smart optimization: Position the button above the fold where customers expect it.
CheckoutWC advantage: Handles domain verification automatically and places buttons exactly where conversion data says they should be.
2. Mobile users can’t see Apple Pay
This one’s frustrating – your mobile customers are exactly who need Apple Pay most.
| Issue | Solution | CheckoutWC Fix |
| Non-responsive theme | Update the theme or add CSS media queries | Built-in responsive design |
| JavaScript conflicts | Test with the default theme | Pre-tested compatibility |
| iOS version issues | Require iOS 10.1+ | Automatic detection |
3. Payments fail to process
Debug checklist:
✓ Payment gateway connected properly.
✓ Test mode disabled (yes, check this).
✓ Domain verification complete.
✓ SSL certificate active.
CheckoutWC monitors these settings and alerts you before customers notice problems.
4. Button appears but doesn’t work
Common culprit: Incomplete domain verification
Test this: Click the button on different devices. If it works on some but not others, you’ve got a verification issue. CheckoutWC’s automated setup prevents this entirely.
5. Product or location restrictions
Did you know? Some stores accidentally restrict Apple Pay to specific products or regions.
Check:
- Product-level payment settings.
- Geographic restrictions.
- User role permissions.
CheckoutWC removes these barriers by default, making Apple Pay available everywhere it should be.
Bottom line: Most Apple Pay issues stem from configuration complexity. CheckoutWC eliminates these pain points through automation, letting you focus on selling instead of troubleshooting.
Transform your checkout experience with seamless Apple Pay button integration
Apple Pay on WooCommerce works best when you combine a solid payment gateway (like Payment Plugins for Stripe WooCommerce) with smart checkout optimization.
The gateway handles the money. CheckoutWC handles the magic.
While your payment gateway processes transactions behind the scenes, CheckoutWC ensures those Apple Pay buttons appear exactly where customers expect them – prominently displayed, perfectly styled, and ready for one-tap purchases.
Your customers want fast, familiar payment options. You want more completed purchases. CheckoutWC bridges that gap. Automatic domain verification, intelligent button placement, and built-in mobile optimization mean your express checkout options work flawlessly from day one.
Ready to give your checkout the upgrade it deserves? Start using CheckoutWC to display Apple Pay buttons prominently and effectively alongside your chosen payment gateway.

The simplicity of Shopify with the power of WooCommerce. Replace your WooCommerce checkout page with CheckoutWC to boost sales and reduce cart abandonment.