How to Add High-Converting Order Bumps to WooCommerce
Table of Contents
- How to set up order bumps with CheckoutWC
- Configuring the general settings for order bumps
- Creating a new order bump
- Tracking order bump performance
- Best practices for order bumps in your WooCommerce store
- Understand your target audience
- Complement the customer's current purchase
- Incorporate psychological triggers
- Optimize offer presentation
- Create order bumps that convert with CheckoutWC
Ever added AirPods to your cart and got an offer to add an AppleCare+ protection plan right at checkout? That’s a classic example of an order bump in action!
These clever additions to the checkout process are designed to boost your average order value by tempting shoppers to add related items to their cart. Order bumps come in two main types:
- Upselling: Offering a higher-end version of a product.
- Cross-selling: Suggesting related or complementary products.
If you’re wondering whether order bumps really work, just consider Amazon, which reportedly generates a staggering 35% of its revenue through product recommendation techniques like upsells and cross-sells.
So, why do order bumps work so well? It’s all about understanding how shoppers think. Factors like urgency, scarcity, and the fear of missing out play a big role. When customers see a limited-time deal or a product that pairs perfectly with what they’re buying, they’re more likely to add it to their cart.
In this article, we’ll show you how to set up these sales-boosting features using CheckoutWC, a WooCommerce checkout plugin that lets you create and manage order bumps. We’ll also provide a detailed tutorial for adding high-converting order bumps to your store, helping you make the most of your checkout process!

The simplicity of Shopify with the power of WooCommerce. Replace your WooCommerce checkout page with CheckoutWC to boost sales and reduce cart abandonment.
How to set up order bumps with CheckoutWC
Configuring the general settings for order bumps
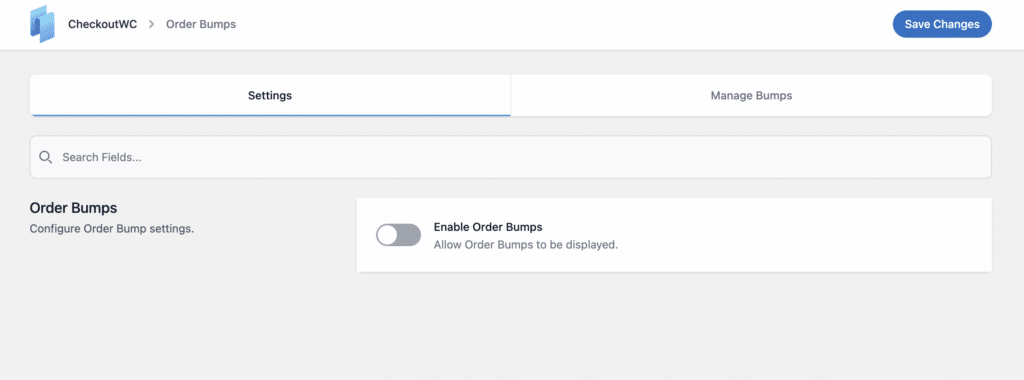
1. Head over to WP Admin > CheckoutWC > Order Bumps. Here’s what you’ll see:
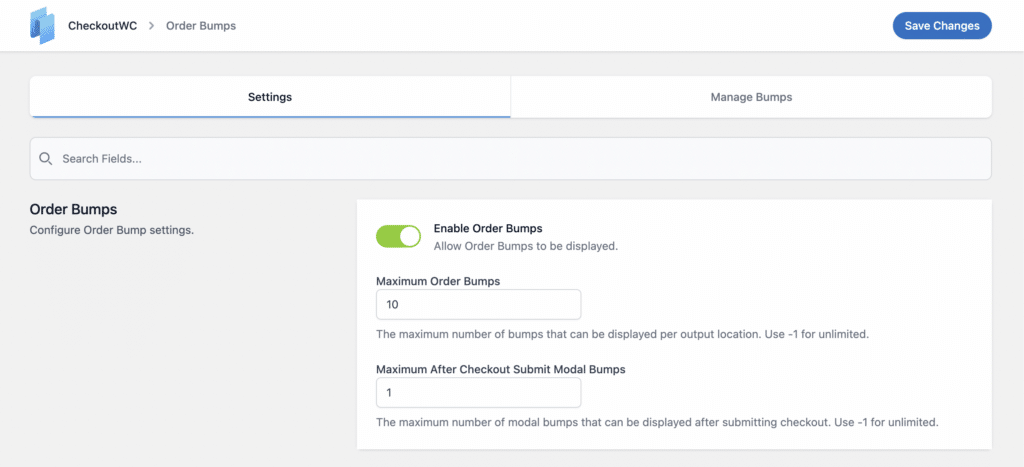
2. If you toggle Enable Order Bumps ON, you’ll see the following options under the settings:
- Set the maximum number of order bumps per location.
- Choose the number of bumps to display after checkout.
Creating a new order bump
Now, let’s create your first order bump:
1. Navigate to WP Admin > CheckoutWC > Order Bumps > Manage Bumps and select Add New.

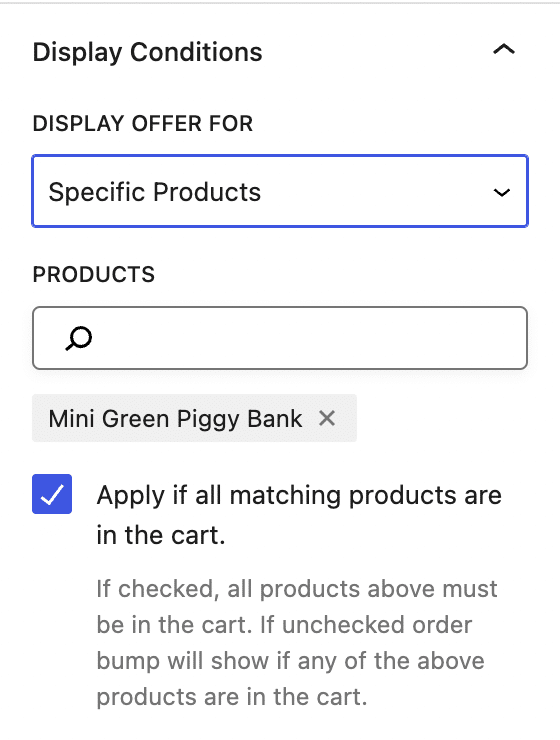
2. Select which product to offer as your order bump. CheckoutWC gives you flexibility here. You can select specific products, entire categories, or even offer the bump for all products.
Don’t want the bump to appear for certain items? No problem! You can also exclude products to fine-tune your offer.
3. Choose the display location. You have various options for displaying your order bumps on the checkout page, side cart, as well as after the checkout submit modal. Your options also include deciding where on these pages the order bumps appear, such as below cart items, above the Terms and Conditions, at the bottom of the shipping step, below the ‘Complete Order’ button, and more. Pick the spot that you think will catch your customers’ attention without disrupting their shopping experience.

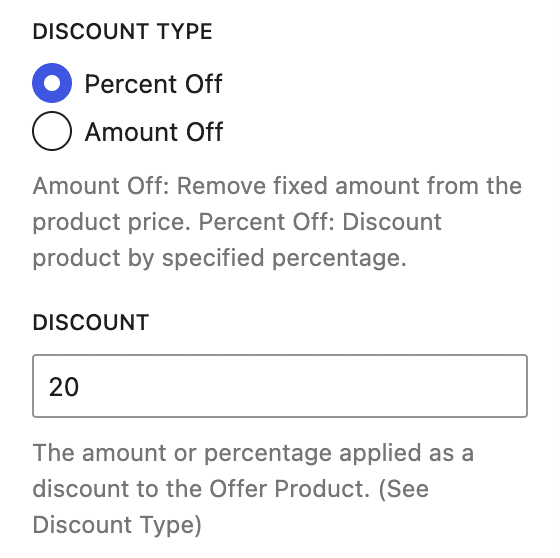
4. Configure the settings. Set a minimum subtotal for the bump to appear, decide on the number of products to add, and choose between a percentage or fixed amount discount to add to the bump product.
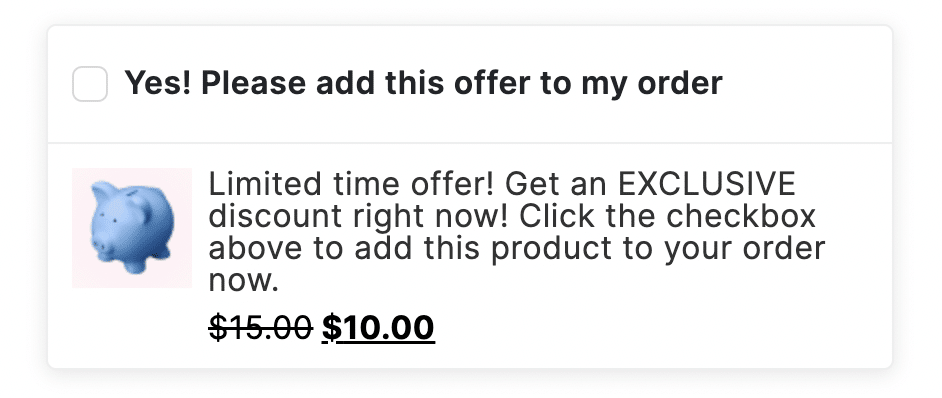
For example, if you set the amount to $5 off, your preview will look like this:
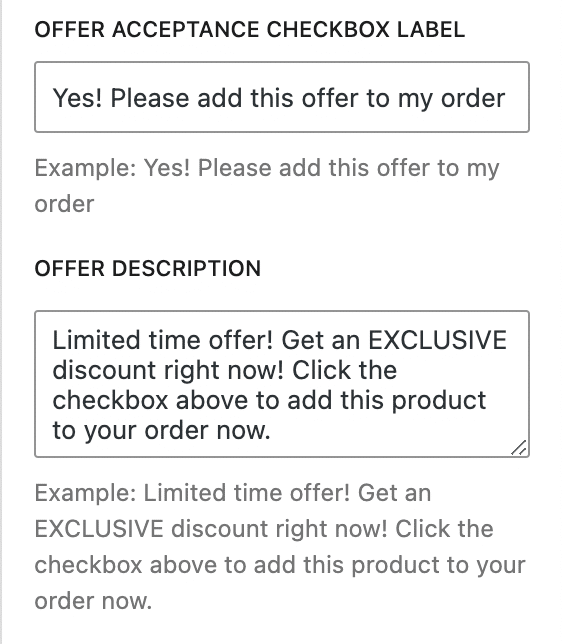
5. Now, it’s time to write your offer description. This needs to clearly and quickly communicate the value of adding the bump product to the cart. Keep it short, snappy, and focused on the benefit to the customer.
6. Decide what happens if the customer removes the product that triggered the bump offer. Should the bump product stay in the cart or be removed as well? By default, CheckoutWC keeps the order bump product in the car, but any special discount on the bump product is removed.
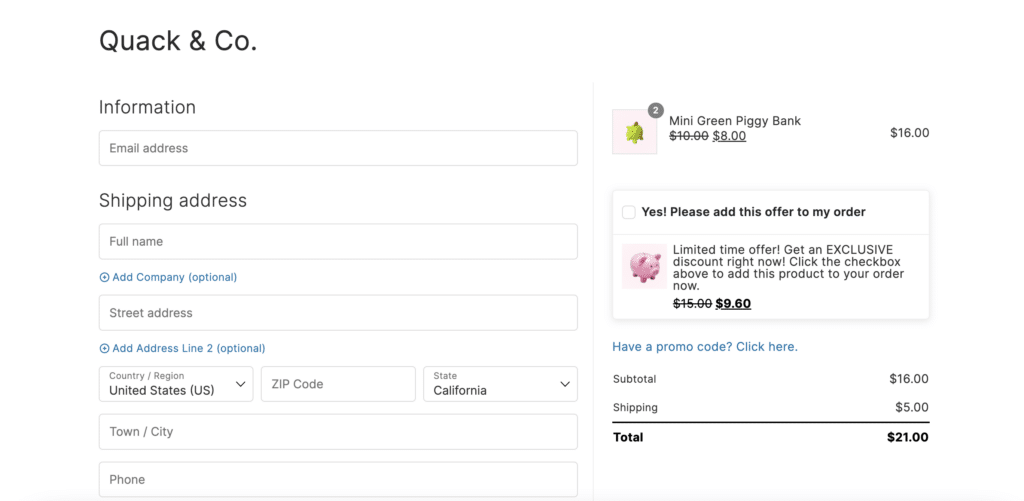
7. After saving your changes, navigate to your store’s checkout page to preview your newly created order bump. Here’s an example:
Tracking order bump performance
If you’ve enabled order bumps, CheckoutWC’s overview in the Manage Bumps section provides a clear picture of their performance. Here’s what you’ll find in the metrics dashboard:
- Order Bump ID: Each bump’s unique identifier.
- Conversion rate: How often customers accept the offer.
- Total revenue: The extra income generated by the bump.
- Location: Where the bump shows up during checkout.
- Type: The style or category of the order bump.
- Date created: When you first set up the bump.
These metrics help you see which bumps are hitting the mark and which ones might need a tweak or two. By keeping an eye on these numbers, you can adjust your approach and get the most out of your order bumps.
Best practices for order bumps in your WooCommerce store
Let’s explore some effective strategies to make your order bumps more appealing and boost your conversions.
Understand your target audience
First up, get to know your customers by digging into your analytics tools. What products do your customers often buy together? If you notice folks who buy running shoes often grab socks, too, consider offering socks as an order bump. It’s about making relevant, timely offers that make sense to your shoppers.
“WooCommerce Analytics and GA4 are packed with valuable data about your store. You can see which products are often bought together, track your average order value, and even figure out which traffic sources bring in your best customers. And when you connect your store to GA4, you can dive even deeper, like seeing how customers interact with your store across different devices. The key is to actually use this information. Maybe you’ll spot a product category with lots of abandoned carts – that’s your cue to improve those pages. Or you might find certain promotions driving more sales, so you know where to focus your marketing. The more you use your data, the smarter your decisions become, and that’s how you’ll grow your store.”
– Ian Misner, General Manager at Kestrel
Complement the customer’s current purchase
Offer products that naturally go together and enhance the customer’s purchase. Selling a smartphone? Consider offering a screen protector or a case. Think about what would make your customer’s experience even better.
Also, suggest products that add real value. If someone’s buying a coffee maker, a milk frother or some gourmet beans is a solid choice. You want your customer to think, “Oh, that’s exactly what I need!”
Incorporate psychological triggers
A little psychology can go a long way. Here’s how to use it effectively:
- Urgency and scarcity: Use limited-time discounts or highlight limited stock. Something like “Only 5 left!” or “This deal vanishes in 24 hours!” can give that little nudge towards a decision.
- Social proof: Show off how many happy customers have already jumped on board. A simple “Join the 500+ customers who love this add-on!” can be very effective.
Optimize offer presentation
Make your offer stand out in a good way by keeping the following in mind:
- Clear and concise messaging: Use language that’s easy to understand and buttons that stand out. Instead of a generic “Add to Cart,” try “Yes, Protect My Screen!” or “Upgrade My Coffee Game!”
- Visual appeal: Use great images and keep descriptions short and sweet. Show the product in action or highlight its best features. Your description should answer the question, “Why do I need this?” in just a sentence or two.
Create order bumps that convert with CheckoutWC
Order bumps are a powerful tool for boosting your store’s revenue, and now you’ve got the know-how to implement them effectively. The next step is finding the right tools to bring your strategy to life!
CheckoutWC offers all the features you need to create order bumps for both your checkout page, side cart, and even post-purchase. With its extensive customization options, you can tailor your order bumps to perfectly match your store’s style and your customers’ needs.
The results speak for themselves. One of CheckoutWC’s users, Richard Osborne from The Fairy Boutique, says:
“We were only achieving around an average 2.3% conversion rate, and when checking our Analytics, found most drop-offs were at the checkout stage. A friend recommended CheckoutWC, so we took the free trial and was hoping for maybe a few percentage increase in sales. Holy Cow!!! We only installed this plugin 2 weeks ago and we had a 17.2% conversion rate the first week and 20.8% the second week. This plugin has made such a huge difference to our website sales, it’s phenomenal!”
Ready to boost your average order value with high-converting order bumps? Start your journey with CheckoutWC today!
The simplicity of Shopify with the power of WooCommerce. Replace your WooCommerce checkout page with CheckoutWC to boost sales and reduce cart abandonment.