Trust Badges are a great way to build last-minute buyer confidence on your checkout page. They help reinforce key value propositions like secure payment, fast shipping, or hassle-free returns which is especially helpful for converting first-time customers who don’t know you yet. They allow you to communicate key value propositions right at the point of purchase, such as secure checkout, guaranteed returns, or free shipping. These visual cues help ease any final reservations your customers might have, especially first-time buyers.
How to Set Up Trust Badges for WooCommerce
To enable and configure Trust Badges in CheckoutWC:
- Navigate to WP Admin > CheckoutWC > Trust Badges
- Fill in the badge fields with your desired value props and upload accompanying icons
- Save changes to display badges below the order summary on the checkout page
Each badge is made up of:
- An icon image – use a simple, clear graphic (transparent PNG or SVG is ideal)
- A short label – 1–3 words that reinforce trust or credibility
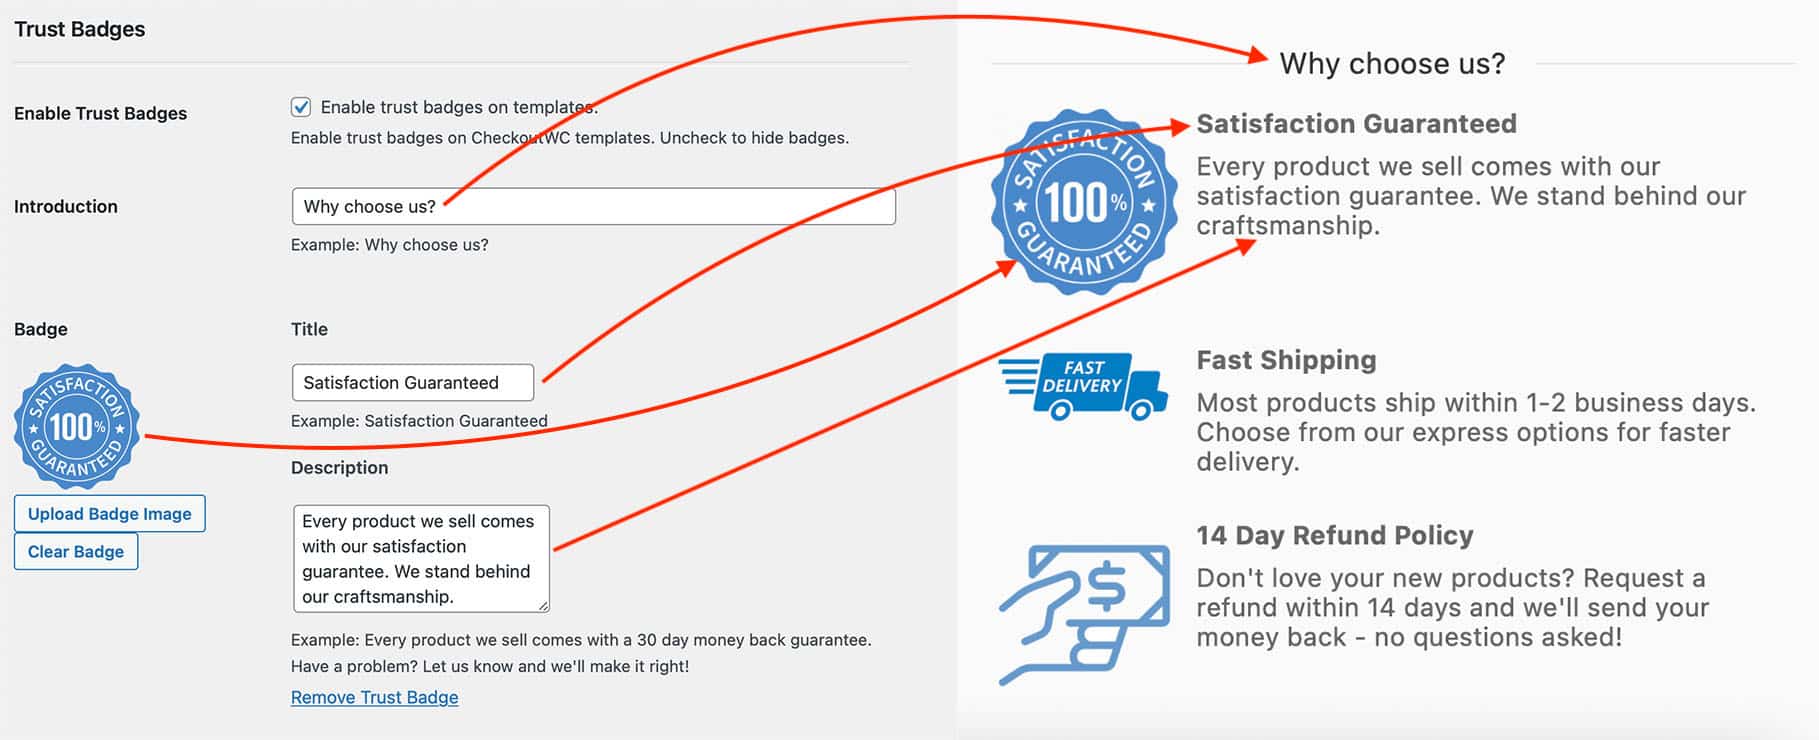
Here’s how the fields in the admin map to the badge display on your checkout page:

Note: The images we used in our example were found using Google Image Search and may or may not be licensed for reuse. We recommend finding your own images.
Best Practices
- Use short, clear messages (e.g., “30-Day Guarantee” or “SSL Secured Checkout”)
- Choose icons that are simple and recognizable
- Stick to a consistent visual style (line icons, color palette, etc.)
- Avoid clutter, stick to 2 to 4 key trust signals
But most importantly, match your trust signals to your audience. If your customers care most about fast shipping, highlight that. If your products are expensive or niche, lead with a money-back guarantee or “Secure Checkout.” Choose the badges that address your buyer’s biggest hesitation. Not sure what would work best? Reach out to us and we’ll help you!
Want to go deeper on WooCommerce trust badges?
Check out these related resources: