Checkout Slots: Put order bumps, trust badges, and more where you want
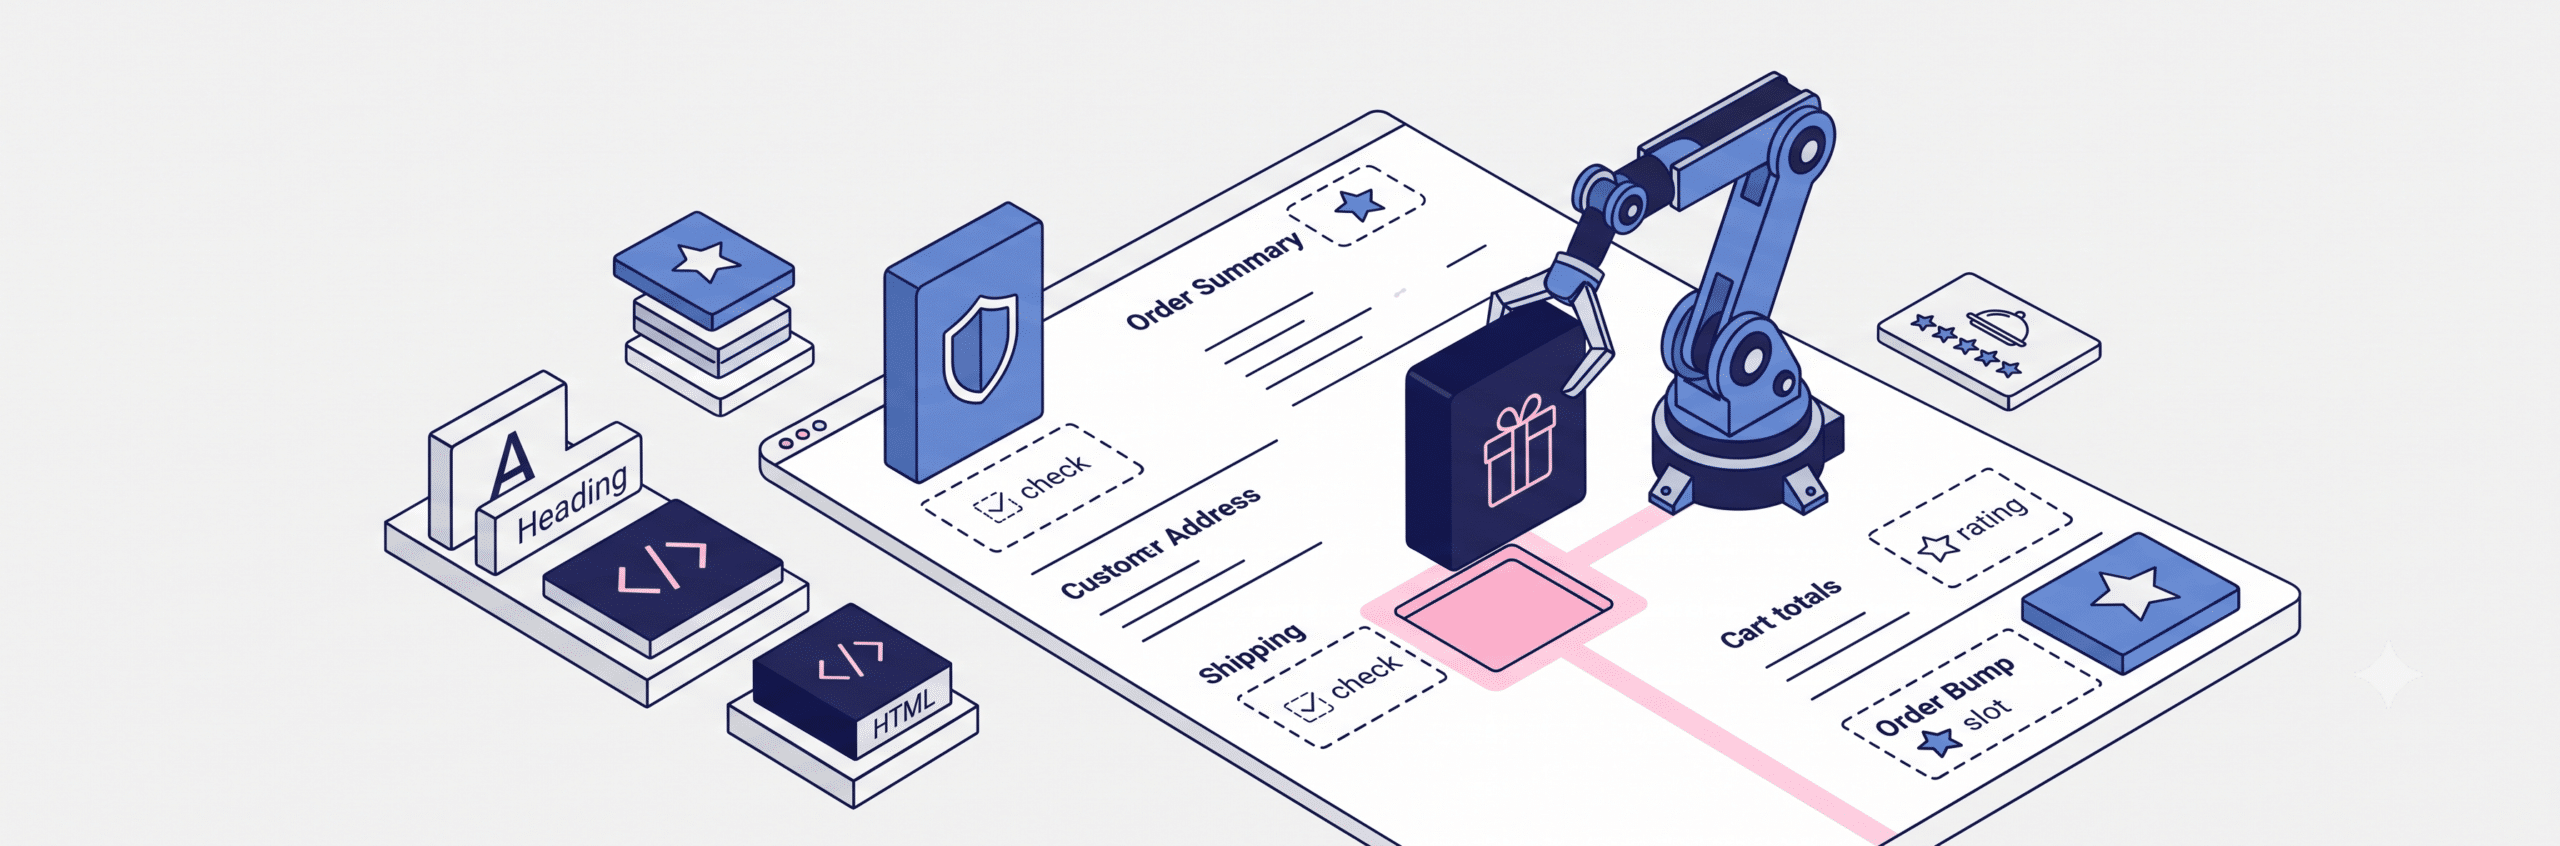
Table of Contents
- See slots in action
- What a slot is
- What you can place in a slot
- Where the slots are on your checkout
- Through the customer and delivery step
- Through the payment step
- Around the order summary
- Across the page
- Working with slots in the Checkout Editor
- Drag to reorder
- See each slot on the live preview
- Set spacing per item
- Start from an empty slot
- Trust badges and reviews get real placement control
- Your existing setup migrates automatically
- What is free and what needs a paid plan
- A few ways to use slots
- Getting started
- Sources
Your WooCommerce checkout has always had a limited set of places to add things like trust badges, review badges, and order bumps. Moving them somewhere else usually meant custom hooks and snippets.
We wanted to open that up – to make putting your own spin on the checkout easier, without the code.
The latest CheckoutWC release introduces slots – named positions across your checkout where you can place order bumps, trust badges, customer reviews, headings, and custom HTML, then drag them into the exact order you want.
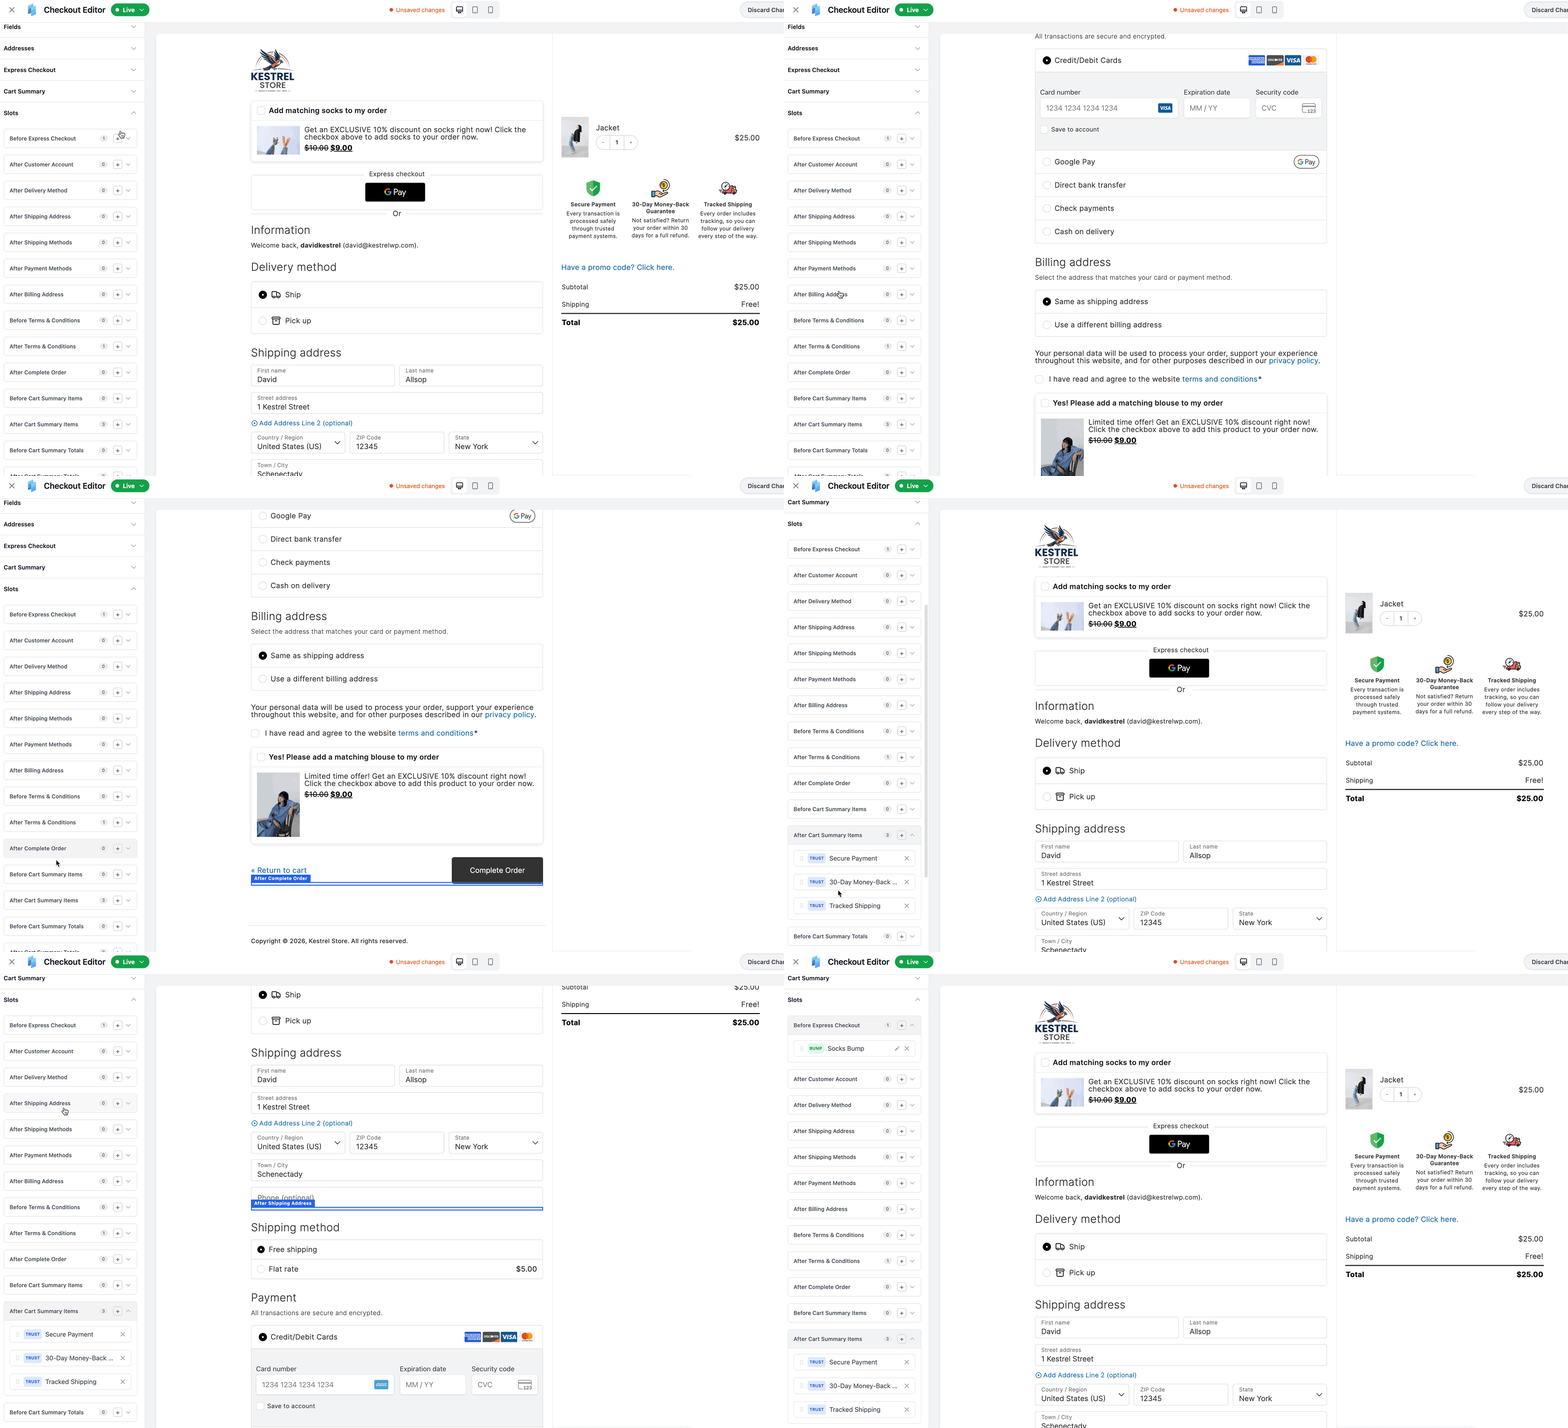
It all happens in the Checkout Editor – the full-screen visual editor we added in CheckoutWC 11.1. It gives you a live preview of your checkout on one side and settings panels on the other, so you shape the page and see the result as you go. Slots are the newest part of it.
This post walks through what slots are, where they sit on your checkout, and how to use them.
See slots in action
Before we dig into the details, here is a short walkthrough. In it, I work through slots in the Checkout Editor – adding trust and review badges, dropping in an order bump, and placing custom HTML and headings, then dragging each one into position on the live preview.
What a slot is
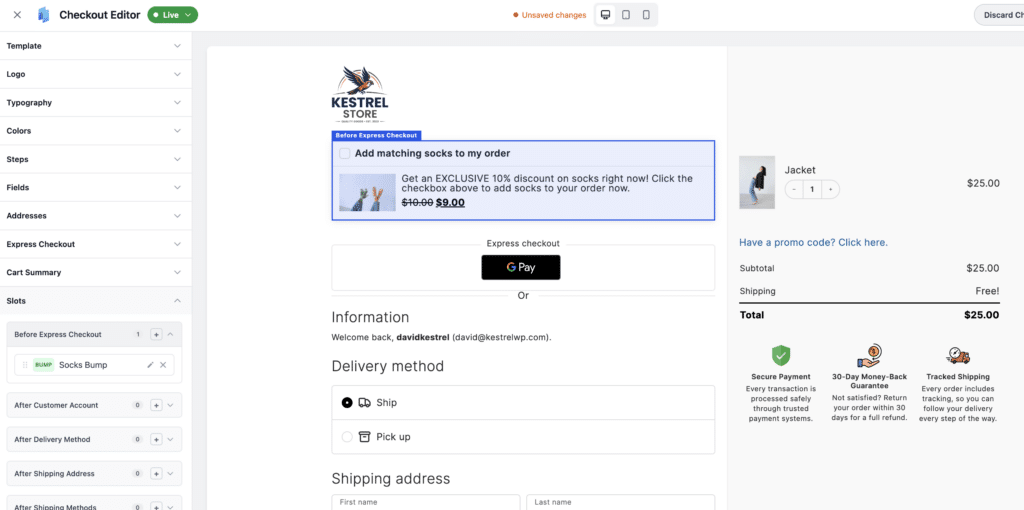
A slot is a named position on your checkout that holds an ordered list of items. Instead of a feature owning one hardcoded location, every position on the page is now an addressable spot you can fill.
Each slot can hold as many items as you need, in any order. You decide what goes where – a guarantee badge after the payment methods, an order bump before the terms checkbox, a “Secure checkout” heading above your card fields. The checkout renders each item in the position and order you set.
Because slots are positions rather than a single fixed placement, you are no longer limited to “one trust badge area” or “one order bump location.” You build the layout your store needs.
What you can place in a slot
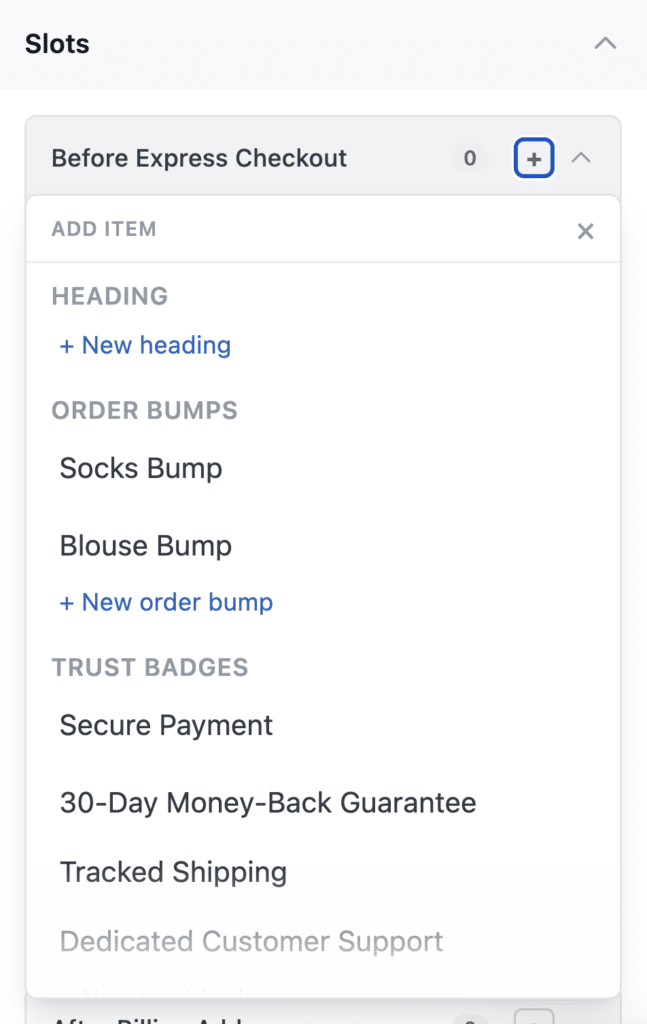
Five item types can be assigned to any slot:
- Order bumps – surface a targeted add-on offer at the moment that fits your funnel
- Trust badges – place guarantees, security, and payment reassurance where hesitation peaks
- Customer reviews – show review badges as social proof close to the buying decision
- Headings – add a short H2–H6 label to introduce a section or reassure the shopper
- Custom HTML – drop in your own markup for anything the built-in blocks do not cover
Headings and custom HTML are created inline, right inside the editor – type the text, pick a heading level, and it appears in the slot. Order bumps, trust badges, and reviews are pulled from the ones you have already set up.
Where the slots are on your checkout
Slots run the length of the checkout, grouped around the natural steps your customers move through. The named positions are:
Through the customer and delivery step
- Before Express Checkout
- After Customer Account
- After Delivery Method
- After Shipping Address
- After Shipping Methods
Through the payment step
- After Payment Methods
- After Billing Address
- Before Terms & Conditions
- After Terms & Conditions
- After Complete Order
Around the order summary
- Before Cart Summary Items
- After Cart Summary Items
- Before Cart Summary Totals
- After Cart Summary Totals
Across the page
- Before Footer
- After Footer
That spread means you can reach the two spots that tend to matter most for conversion – next to the payment section and beside the Place order button – as well as the order summary, where shoppers double-check what they are buying.
Working with slots in the Checkout Editor
Everything below happens in the Checkout Editor. Here is what you can do.
Drag to reorder
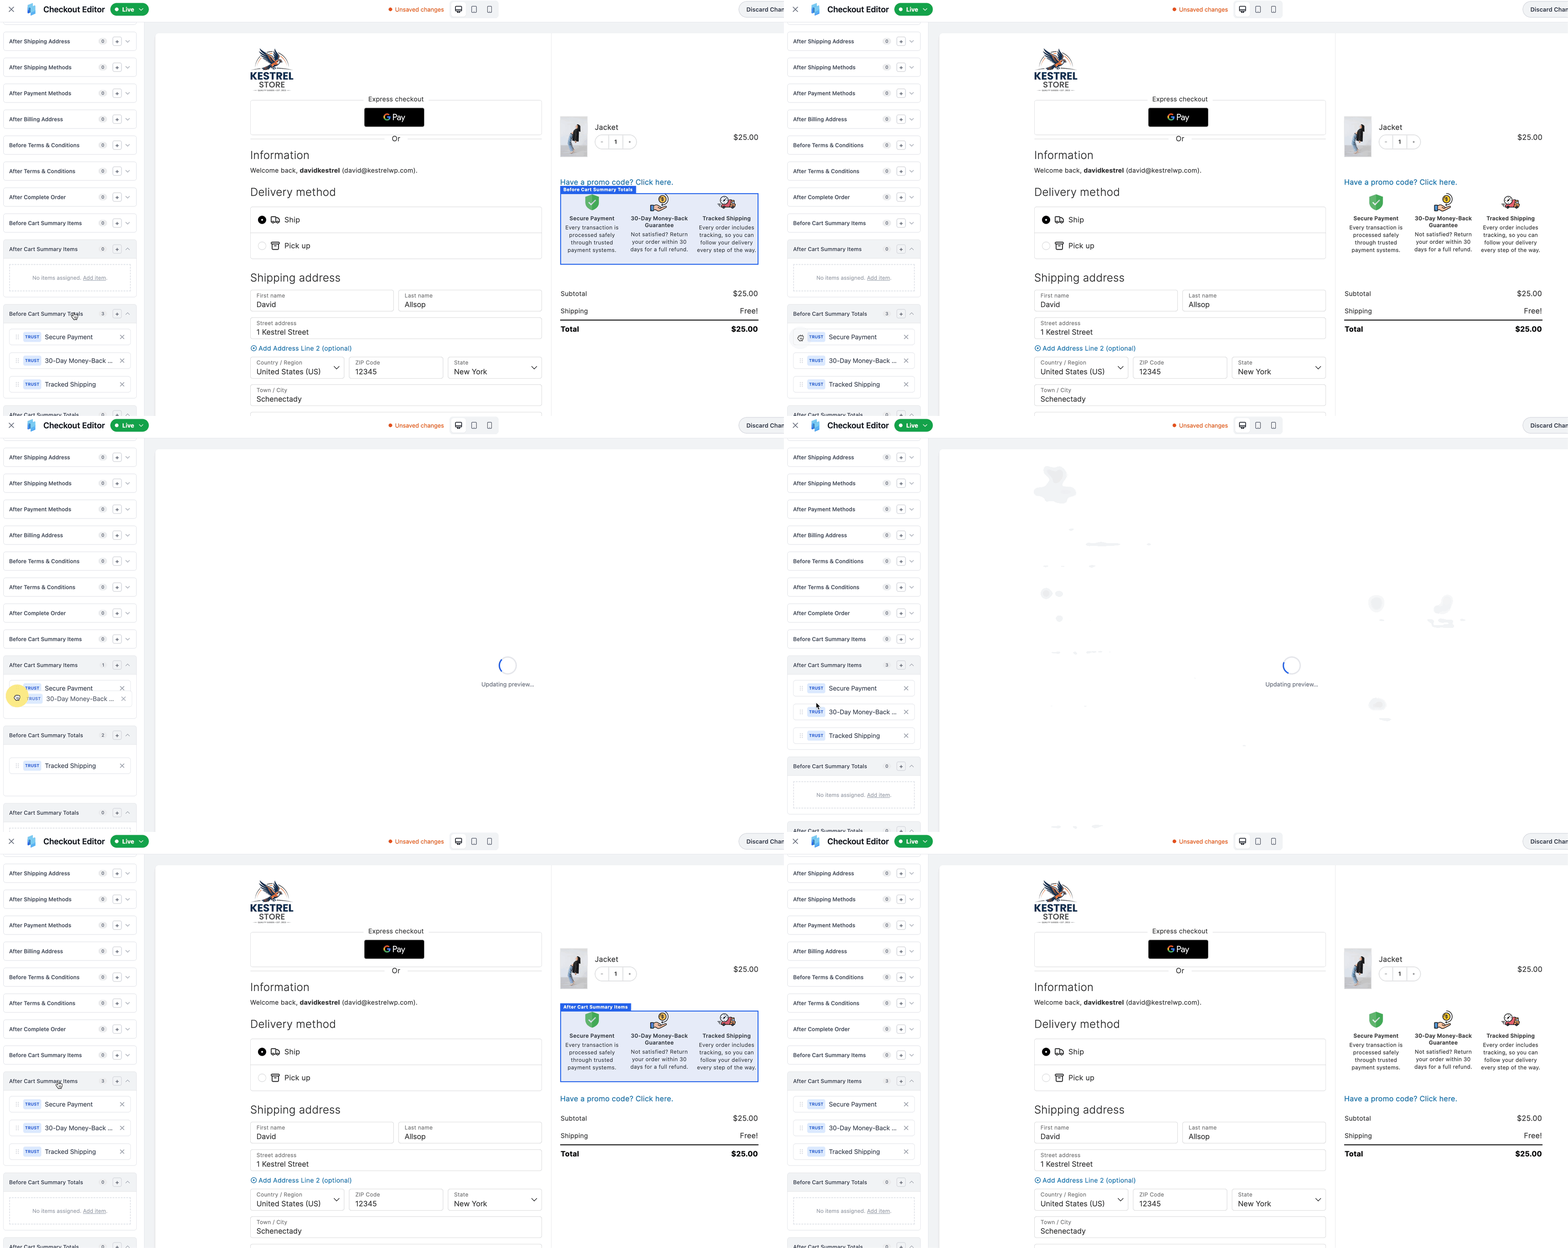
Every item in a slot can be dragged into a new position – within the same slot or into a different one. The order you set is the order your customers see. No shortcodes, no template edits.
See each slot on the live preview
Hover a slot in the editor and its position is highlighted directly on the checkout preview, with an outline and a label so you know exactly where an item will land. If a slot sits in a step that is not currently on screen – an inactive panel, or the shipping address section when a customer has chosen local pickup – the editor tells you the slot is hidden rather than leaving you guessing.
Set spacing per item
Each item takes an optional spacing value, so you can add breathing room above or below a badge or heading without touching CSS. Placement and spacing are controlled from the same panel.
Start from an empty slot
An empty slot shows a clear “no items assigned” placeholder with an add control, so building a fresh layout is a matter of picking a slot and choosing what goes in it.
Trust badges and reviews get real placement control
Before this release, trust badges shared a single global location, and review badges rode along with them. Slots break that open.
Now each trust badge is placed individually – one badge after the payment methods, another beside the order totals, wherever it does the most work. Review badges get their own placement too, independent of your trust badges. If you have ever wanted your guarantee near the button and your star rating up by the cart summary, you can now place each one exactly there.
Placement is a big part of whether trust badges actually help, so putting each badge where it does the most good is worth the couple of minutes.
Your existing setup migrates automatically
Updating will not scramble your checkout. When you update, CheckoutWC migrates your existing order bump locations and trust badge placement into the new slot system for you. Your badges and bumps keep the positions they had, now expressed as slot assignments you can adjust.
One thing worth doing after the update: open the Checkout Editor and confirm your order bumps and trust badges sit where you expect. The migration carries your placements over, and a quick look lets you fine-tune now that every position is on the table.
What is free and what needs a paid plan
Checkout Slots are part of the Checkout Editor, and some item types depend on your plan:
- Free with CheckoutWC Lite: headings and custom HTML blocks, plus dragging and repositioning items across every slot
- Paid plans: order bumps, trust badges, and customer review badges, depending on your plan level

The simplicity of Shopify with the power of WooCommerce. Replace your WooCommerce checkout page with CheckoutWC to boost sales and reduce cart abandonment.
In the editor, item types your plan does not include are shown as locked entries labelled “Paid plan required,” so you can see what is available and decide whether to upgrade.
If you are still on the default WooCommerce checkout, CheckoutWC Lite is free on WordPress.org and gives your store a modern, multi-step checkout – the bigger lever before you start fine-tuning badge placement.
A few ways to use slots
- Reassure at the payment step – place a “Secure checkout” heading and a guarantee badge after the payment methods, where card nerves peak
- Add proof by the summary – drop a review badge near the cart totals so shoppers see social proof while they review their order
- Time an order bump – move a bump to just before the terms checkbox, the last calm moment before the button
- Label a section – use a heading to add a plain-language returns promise or a short lead-in where a section needs one
- Handle the edge cases – use a custom HTML block for a shipping cutoff notice, a localized message, or anything the built-in items do not cover
Placement matters. Cart abandonment across ecommerce sits at roughly 70% [1], and a reassurance a shopper never sees does nothing. Slots let you put the right item at the moment of hesitation instead of hoping a fixed location happens to line up.
Getting started
- Update CheckoutWC and open the Checkout Editor from your WordPress admin
- Confirm your existing order bumps and trust badges migrated where you expect
- Hover the slots in the live preview to see where each one sits
- Add headings, custom HTML, badges, reviews, or bumps to the slots that fit your checkout
- Drag items into order, set spacing, and publish
Slots turn your checkout layout into something you arrange directly, instead of something you inherit. Start with the payment step and the order summary – the spots closest to the decision – and build out from there.
The simplicity of Shopify with the power of WooCommerce. Replace your WooCommerce checkout page with CheckoutWC to boost sales and reduce cart abandonment.