How to Set Up Local Pickup in WooCommerce
Table of Contents
- How to enable local pickup in WooCommerce
- Local pickup setup with CheckoutWC: A complete guide
- Enabling local pickup with CheckouWC
- Setting up multiple pickup locations
- Customizing local pickup times and dates
- Best practices for managing local pickup
- Writing effective pickup instructions
- Setting optimal pickup windows
- Inventory management for pickup orders
- Staff training guidelines
- Enhance your local pickup with CheckoutWC
Imagine the following scenario: A customer browsing your online store spots the perfect birthday gift for their friend. The party’s tonight, and shipping won’t get it there in time. They add the item to their cart but abandon it at checkout when they realize pickup isn’t an option. Just like that – poof – you’ve lost a sale.
This scenario plays out more often than you might think. Many store owners make the mistake of assuming all customers want home delivery, but that’s not always true. Some want to grab items same-day, examine products before taking them home, or simply avoid shipping fees.
Local pickup does more than just save your customers money on shipping. It brings foot traffic to your physical location (hello, impulse purchases!), reduces wait times for customers, and gives you a competitive edge against online-only retailers.
Without this option, you’re creating unnecessary friction in your checkout process and potentially leaving money on the table. Thankfully, setting up local pickup in WooCommerce isn’t rocket science, and the benefits are well worth the effort.
Let’s walk through how to create a pickup experience that not only satisfies customers but keeps them coming back for more.
How to enable local pickup in WooCommerce
Before diving into the setup instructions, it’s important to understand that WooCommerce offers two different checkout systems, but only one has the option for local pickup:
- The legacy checkout is the traditional checkout system that’s been around for years. It’s stable and compatible with most themes and plugins.
- The blocks-based checkout is the newer approach that uses WordPress Gutenberg blocks. It offers a more modern, customizable checkout experience with different configuration options.
Currently, you can only enable local pickup with the blocks-based WooCommerce, even though there’s active documentation that says otherwise. Before, you could just add local pickup as a regular shipping method for a specific shipping zone, but now that’s no longer available.
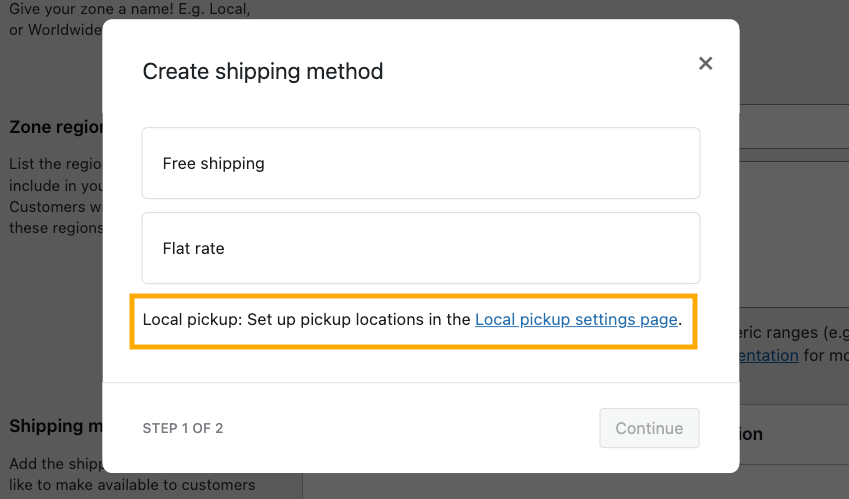
So, instead of that, here’s what you need to do.
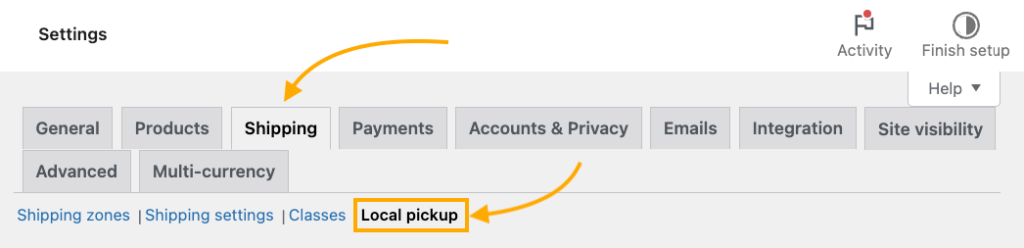
- Go to the Shipping settings for WooCommerce and open the Local pickup tab.
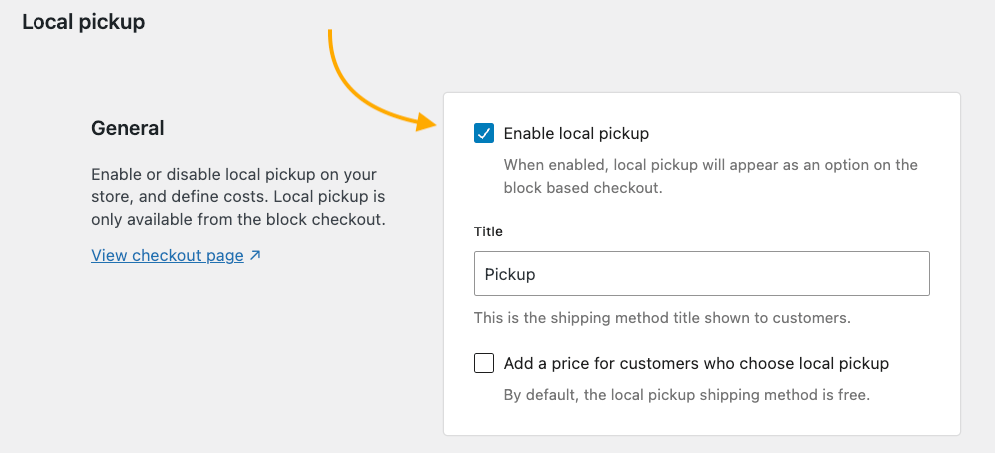
- Enable the feature, choose the shipping method title, and choose whether you want to add a price (usually, it’s free).
- Click on Add pickup location.
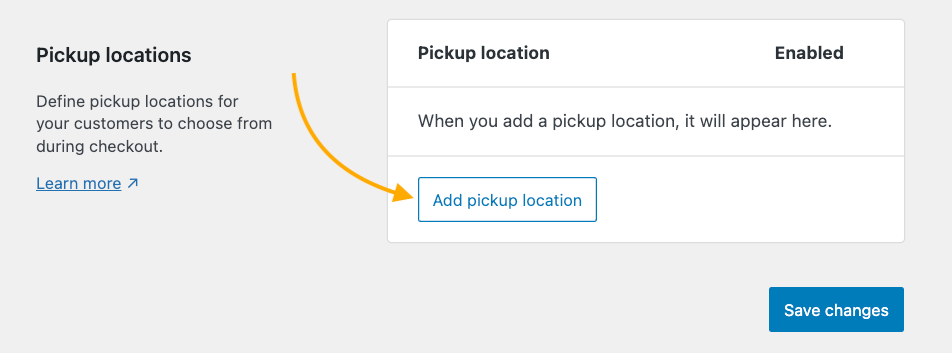
- Add the location name, address, and pickup details.

- Save your settings and test.
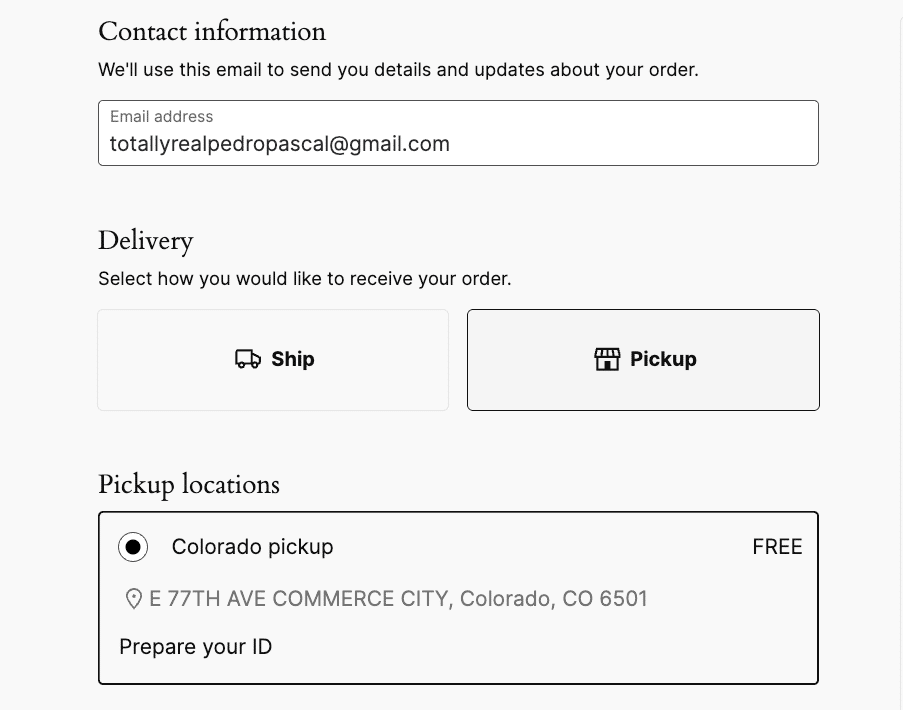
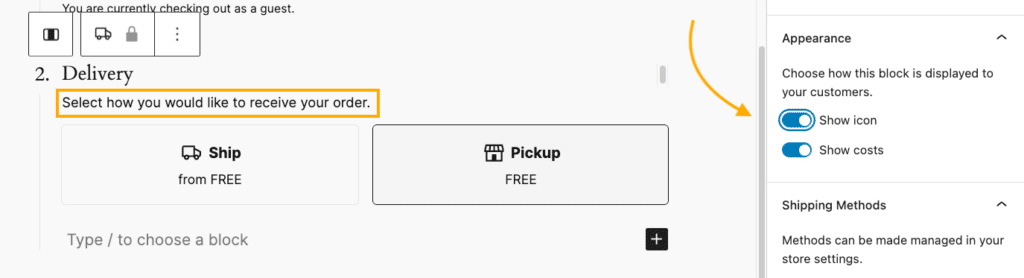
This is the default version, but you can customize the block using the Pages editor. For example, you could decide to hide or show icons and prices for the Delivery block or choose different wording for some of the microcopy.
This modern pickup method offers perks like not requiring customers to enter a shipping address and calculating taxes based on the pickup location rather than your store address.
However, be aware of a few limitations:
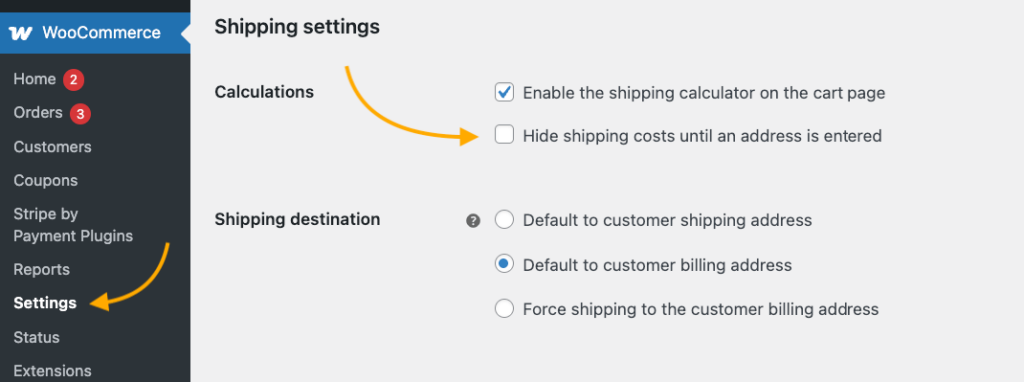
- Pickup locations won’t display if you’ve enabled “Hide shipping costs until address entered.”
- Multiple packages appear combined at checkout.
- If any item doesn’t support pickup, the option is disabled for the entire order.
By now, you’re probably wondering if there’s a better way to organize local pickup, and the answer is yes, absolutely! Let’s see how.
Local pickup setup with CheckoutWC: A complete guide
While the default WooCommerce local pickup options cover basic needs, they lack the customization features that can truly transform the customer experience. This is where CheckoutWC flies in to save the day.
CheckoutWC transforms local pickup from a mere shipping option into a complete pickup management system. As a premium WooCommerce extension, it lets you add multiple pickup locations and dramatically improves the entire checkout flow, reducing cart abandonment and boosting sales.
For $149/year, CheckoutWC delivers these pickup-specific benefits:
- Smart adaptability: The checkout form automatically hides shipping fields when customers select pickup.
- Multiple locations: Set up as many pickup points as your business needs.
- Detailed instructions: Add custom pickup information like hours, special directions, and estimated wait times.
- Mobile-friendly design: The optimized interface works perfectly on all devices.
- Frictionless experience: Customers find it easier to complete their purchase with fewer fields to fill.
But what really makes CheckoutWC special is how it integrates pickup options into a completely revamped checkout experience, increasing your sales and making customers happy. Let’s see how.
Enabling local pickup with CheckouWC
Setting up local pickup in CheckoutWC takes just a few minutes:
- First, disable the WooCommerce setting “Hide shipping costs until an address is entered” (under WooCommerce > Settings > Shipping > Shipping Options).
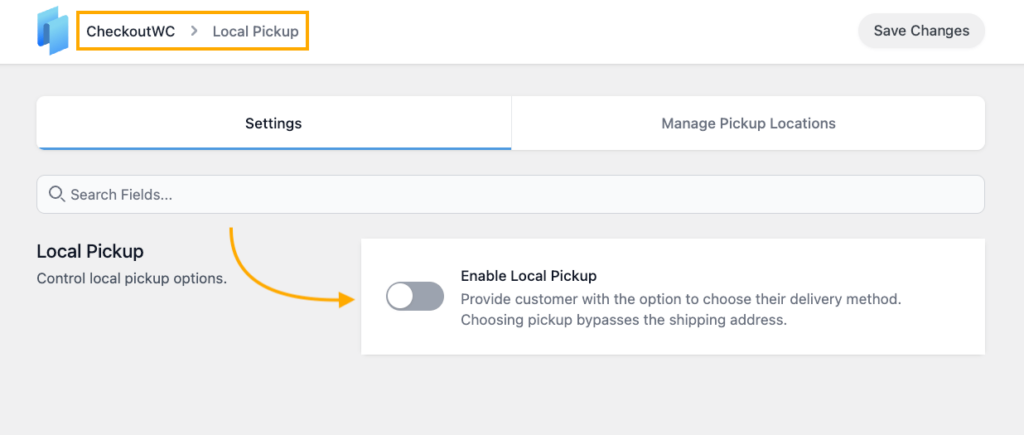
- Navigate to WP Admin > CheckoutWC > Local Pickup and check the box to enable it.
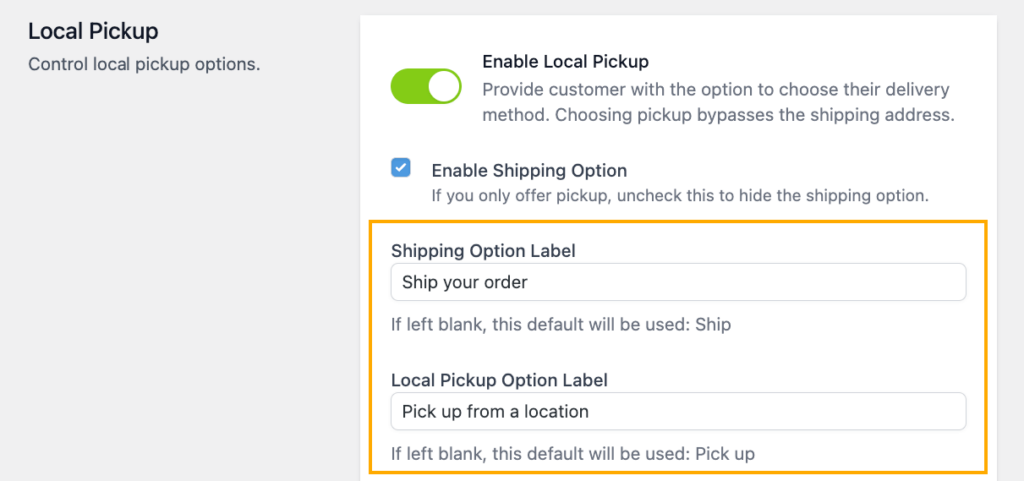
- Customize the pickup option label (default is “Pick up”) to match your brand’s voice.
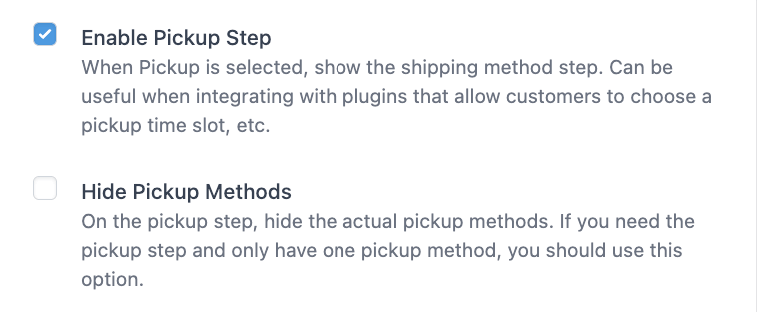
- If you offer multiple pickup options or use time slot plugins, enable the Pickup Step option.
Setting up multiple pickup locations
Like WooCommerce, with CheckoutWC you can add multiple pickup locations:
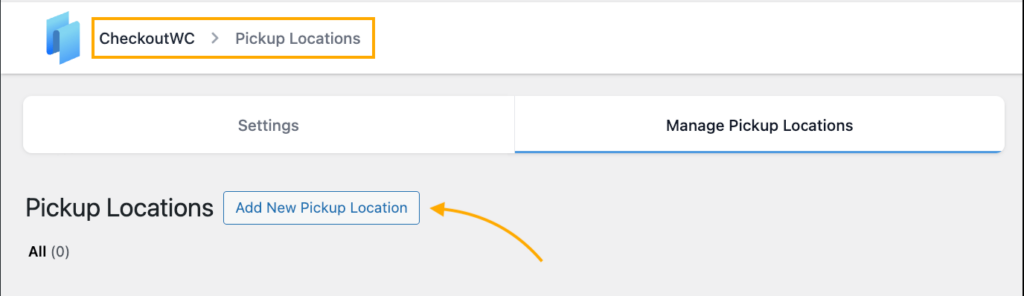
- Go to WP Admin > CheckoutWC > Pickup Locations and click the “Add Pickup Location” button.
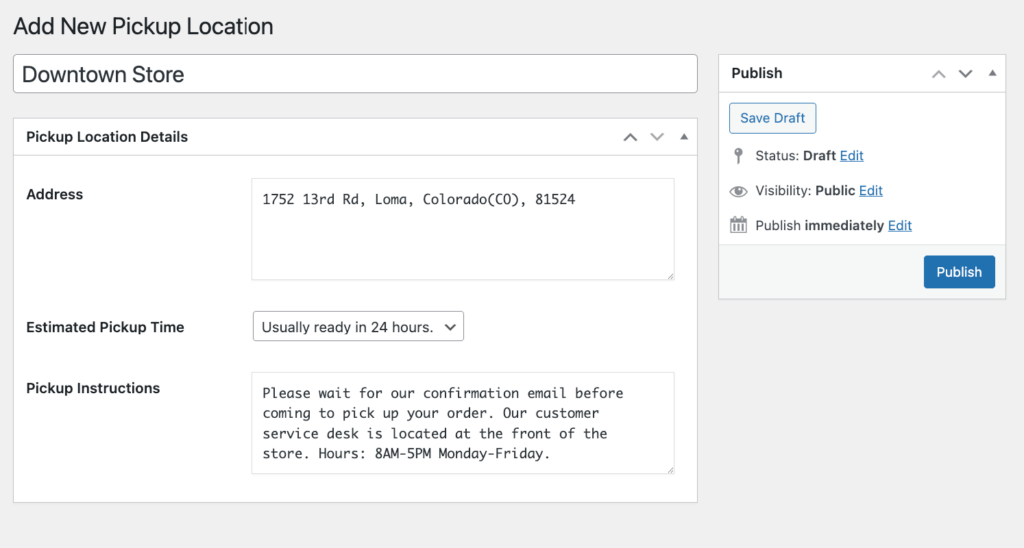
- Enter a clear title (like “Downtown Store” or “Main Warehouse”).
- Add the complete address where customers should go.
- Set an estimated pickup time (how long they’ll need to wait for order preparation).
- Add detailed pickup instructions, such as: “Please wait for our confirmation email before coming to pick up your order. Our customer service desk is located at the front of the store. Hours: 8AM-5PM Monday-Friday.“
When customers select pickup, the checkout immediately transforms – hiding shipping address fields, relabeling shipping totals as “Pickup,” and displaying your pickup location information.
Customizing local pickup times and dates
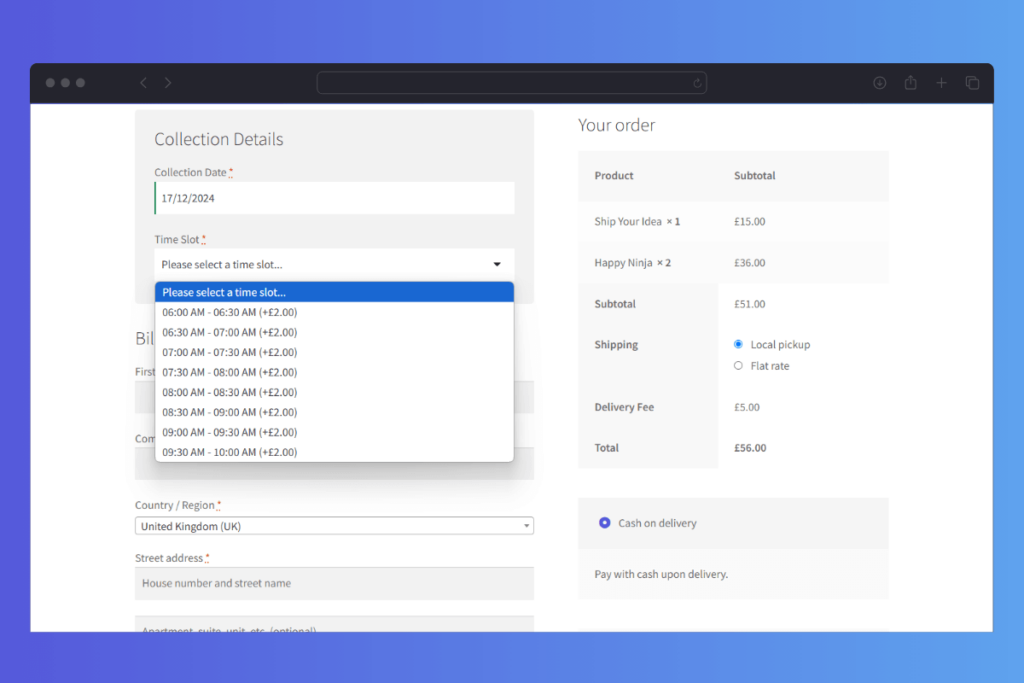
For businesses needing scheduled pickup slots, CheckoutWC recommends pairing with IconicWP’s Delivery Slots plugin. This combination allows you to:
- Set available pickup time windows.
- Limit the number of pickups per time slot.
- Block out holidays and unavailable dates.
- Let customers select their preferred pickup time during checkout.
Best practices for managing local pickup
Writing effective pickup instructions
The quality of your pickup instructions can make or break the customer experience. Be explicit and thorough by including:
- Store name and clear address with landmark references.
- Business hours with specific pickup counter hours if different.
- Parking information (free parking locations, time limits, nearby garages).
- Entry directions (“Enter through the side door on Oak Street”).
- What to bring (order number, ID, confirmation email).
- Contact information for pickup-related questions.
For example: “Your order will be available at Joe’s Bike Shop (123 Main St) within 2 hours of receiving your ready-for-pickup email. Park in our dedicated customer spots marked with green signs. Bring your ID and order number to the pickup counter just inside the main entrance. Hours: 10AM-7PM weekdays, 9AM-5PM weekends.“
Setting optimal pickup windows
Finding the right balance for pickup timing is crucial:
- Set realistic preparation times based on your operation’s capacity.
- Consider offering shorter windows during slower periods and longer ones during peak times.
- Create special handling procedures for seasonal rushes (holidays, back-to-school).
- Use data to analyze when most customers prefer to pick up and staff accordingly.
- If using time slots, leave buffer periods between slots to prevent overcrowding.
Inventory management for pickup orders
Proper inventory handling prevents disappointed customers:
- Use dedicated inventory locations for pickup orders when possible.
- If using multiple pickup locations, ensure your system tracks stock per location.
- Implement a holding policy (e.g., “Orders held for 7 days before returning to inventory”).
- Consider integration between your ecommerce and point-of-sale systems.
- Have a clear process for substitutions when items become unavailable.
Staff training guidelines
A well-trained team ensures smooth pickup operations:
- Create a documented pickup fulfillment workflow with clear responsibilities.
- Establish a verification process to prevent giving out the wrong orders.
- Train staff on handling special situations like late pickups or disputed orders.
- Role-play common customer service scenarios during training.
- Implement a feedback system to continuously improve the process.
Enhance your local pickup with CheckoutWC
CheckoutWC transforms local pickup from a basic shipping option into a complete fulfillment solution. Compared to the traditional (and quite restricted) WooCommerce options, this plugin is filled with useful and unique features:
- When customers select “Pick up,” the checkout instantly adapts, removing unnecessary shipping fields and focusing only on what matters for a pickup order.
- The plugin’s floating side cart allows customers to toggle between shipping and pickup options without losing their progress or reloading the page.
- It maximizes revenue with compatible features like order bumps. These targeted product recommendations can be shown to pick up customers at strategic points in the checkout flow, increasing your average order value while customers are already planning to visit your store.
Simply put, with CheckoutWC’s local pickup solution, you’ll create the flexible fulfillment experience modern shoppers demand while driving more foot traffic to your physical location. This means more opportunities for additional in-store purchases and stronger customer relationships.
Ready to transform your local pickup experience? Visit CheckoutWC and start converting more online browsers into in-store customers.