Shopify-style checkout for WooCommerce: how to set it up

Table of Contents
- Before you start
- What makes Shopify's checkout flow so effective for conversions
- Mobile-first development
- Integrated ecosystem
- Pre-optimized conversion elements
- Where the default WooCommerce checkout falls short
- Why Shopify isn't the only answer
- Why WooCommerce is still a strong choice
- Customizable
- Scalability
- Wide range of payment gateways
- Large plugin ecosystem
- Open source with no platform fee
- Create a Shopify-style checkout with CheckoutWC
- How to set up your Shopify-style WooCommerce checkout
- Tips to optimize your checkout
- Express checkout
- Address autocomplete
- Multi-step or one-page checkout
- Cart editing
- Order bumps
- Trust badges
- Abandoned cart recovery
- Mobile options
- Get a Shopify-style checkout on WooCommerce
If you’re watching customers abandon their carts at checkout, you’re not alone.
WooCommerce’s standard checkout, in both its legacy and block-based versions, covers the essentials but leaves the conversion work to you. Long forms, little customization, and buried payment options all cost sales, which leaves some store owners wondering if they’re on the right platform.
They are. WooCommerce gives you control that closed platforms don’t, and the one piece worth perfecting is the checkout. Shopify’s checkout sets the standard for a reason: clean design, express payment options, and progress indicators that guide customers. You can bring all three to WooCommerce.
To get a Shopify-style checkout on WooCommerce, use CheckoutWC, a WooCommerce extension built by Kestrel and used on over 25,000 stores. In short: install the plugin, add your license on the Dashboard, pick the Copify template in the Checkout Editor, switch the editor from Preview to Live, and save. No platform migration and no custom development.
Before you start
- A WooCommerce store where you can install plugins.
- The CheckoutWC plugin and your license key, both in your account.
- A few minutes on a staging copy of your store if you’d rather test first. The Preview setting in the fifth step also lets you check the new checkout while shoppers still see the old one.
What makes Shopify’s checkout flow so effective for conversions

Shopify’s checkout has become the benchmark through years of optimization by a dedicated team analyzing data from millions of transactions. Every improvement reaches all stores on the platform at once. WooCommerce’s distributed nature means checkout updates don’t land on every store automatically, so platform-wide optimization is slower.
Here’s what else makes their approach work:
Mobile-first development
Shopify built its checkout mobile-first, with touch-optimized inputs, smart keyboard behavior, and responsive layouts that work well on phones.
Integrated ecosystem
As a closed platform, Shopify connects these out of the box:
- Shop Pay for one-click purchasing across stores.
- Built-in abandoned cart recovery.
- Unified analytics and conversion tracking.
- Address validation without third-party services.
Pre-optimized conversion elements
- Progress indicators showing checkout steps.
- Smart form validation with inline error messages.
- Express checkout positioned above the traditional form.
The difference is distribution. Shopify deploys these optimizations centrally, while on WooCommerce you add them through themes, plugins, or custom development. That flexibility is WooCommerce’s strength, and it also means extra work to match a polished checkout.
Where the default WooCommerce checkout falls short

WooCommerce’s default checkout is a solid foundation, but as a free solution it leaves the conversion optimizations modern shoppers expect to you:
- Mobile layout: the default checkout is responsive, but its form fields and buttons aren’t designed around thumb navigation.
- Payment display: express options like Apple Pay need extra configuration to show prominently, even when your payment plugin supports them.
- Cart recovery: there’s no automated follow-up for abandoned purchases without adding plugins or custom code.
- Address entry: without address autocomplete, customers type every detail by hand, which adds friction and shipping errors.
- Customization: changing the look or flow takes code or additional plugins.
Why Shopify isn’t the only answer
Shopify offers a polished checkout out of the box, but it brings a different set of compromises. If you use a payment gateway other than Shopify Payments, you pay additional transaction fees on every sale. Checkout customization is also tiered. According to Shopify’s help center, UI extensions on the information, shipping, and payment steps and the Checkout Branding API are available on Shopify Plus only, while thank-you and order-status extensions and standard branding are available on all plans.
With WooCommerce, the checkout limitation is one you can solve with the right tool, on a platform you fully control. CheckoutWC brings Shopify-style checkout optimizations to WooCommerce and adds checkout features informed by research from groups such as the Baymard Institute.

The simplicity of Shopify with the power of WooCommerce. Replace your WooCommerce checkout page with CheckoutWC to boost sales and reduce cart abandonment.
Why WooCommerce is still a strong choice
Thanks to its open-source nature, WooCommerce remains a flexible platform for building online stores:
Customizable
You control the features, design, and functionality of your store. Nutribullet’s website is a good example of a memorable, optimized experience that guides customers toward a purchase.
Scalability
WooCommerce scales from small boutiques to enterprise operations. With the right hosting and optimizations, it handles:
- Large catalogs.
- High-traffic events.
- Complex inventory management.
- Multi-currency transactions.
Soul Brother is a record shop with a large catalog, built on WooCommerce.

Wide range of payment gateways
- PayPal and Stripe.
- Regional payment processors.
- Bank transfers.
- Offline payment methods.
- Cryptocurrency gateways.
Customers can pay the way they prefer, so a limited choice of payment methods doesn’t add checkout friction.
Large plugin ecosystem
WooCommerce’s plugin marketplace offers extensions for marketing automation, inventory management, shipping calculations, customer loyalty programs, and advanced reporting.
Open source with no platform fee
WooCommerce itself is free. You pay for hosting, premium plugins, and any optional features you add. That gives you:
- Complete code access.
- No platform transaction fees.
- Full data ownership.
- The freedom to switch hosts.
Create a Shopify-style checkout with CheckoutWC

CheckoutWC replaces your WooCommerce checkout with a purpose-built one, with no platform migration or custom development.
First, you get five mobile-responsive templates ready in minutes. Choose the one that fits your brand:
- Midas: the original CheckoutWC design

- Futurist: a modern take on Midas

- Copify: inspired by Shopify’s checkout, with the order summary in a sidebar

- Glass: a clean, minimal checkout

- Groove: a bold two-column layout with strong accent colors

Each template adapts to mobile screens, and you can add your own logo and colors to make it a branded experience.
Other features that close the gap with Shopify:
- Built-in express checkout options, such as Apple Pay, WooPay, Google Pay, PayPal Express, and other major payment gateways.

- Flexible checkout flows: switch between one-page checkout (a good fit for digital products) and multi-step checkout (a good fit for physical goods).
- Side cart: customers edit their order without leaving the page they’re shopping on.

- Address autocomplete: Google or Fetchify integration reduces typing errors.
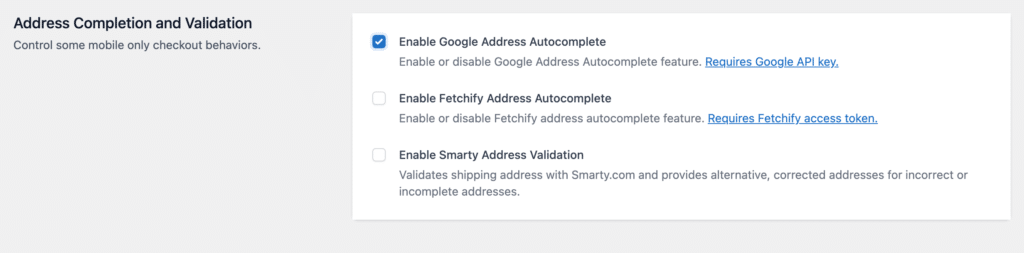
Screenshots are from an earlier version of CheckoutWC, so your screens may look slightly different.
- Order bumps: last-minute offers that raise average order value.

- Abandoned cart recovery: automated reminder emails that bring shoppers back.
How to set up your Shopify-style WooCommerce checkout
Setup takes a few minutes. Here is the process in CheckoutWC 11.5:
- Download the plugin from your account, then upload and activate it under Plugins » Add New Plugin » Upload Plugin.
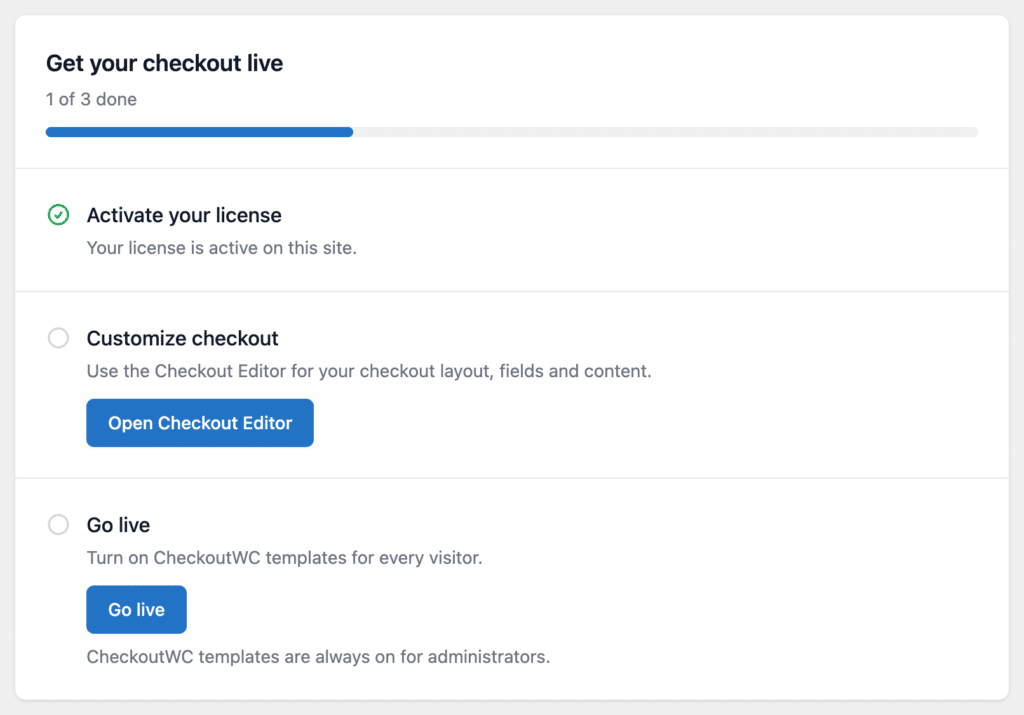
- Go to CheckoutWC » Dashboard. In the Your plan card, open Manage license, paste your license key, and click Save license. The card shows Active when the license is working on your site.
- Click Open Checkout Editor on the Dashboard (or go to CheckoutWC » Checkout Editor). In the Template section, choose your template. Pick Copify for the closest match to Shopify’s checkout.
- Add your brand. The Logo, Typography, and Colors sections cover the basics, and Other holds the footer text. For full control, add rules under CheckoutWC » Appearance » Design, in the CSS section (Custom CSS).
- Use the Live / Preview switch in the editor’s header. In Preview, only logged-in admins see the new checkout, so you can test it first. When you’re happy, set it to Live and save. You can also click Go live on the Dashboard.
- Add a product to your cart and open the checkout page to see the new design.
CheckoutWC’s defaults are sensible. Most payment gateways work with the new checkout, and the templates adapt to mobile screens.
Tips to optimize your checkout
Express checkout
Express checkout puts Apple Pay and Google Pay buttons at the top of checkout.
- In your payment plugin’s settings, make sure the express options are active. This example uses WooPayments, but other payment plugins offer the same.
- Open CheckoutWC » Express Checkout. Express checkout is on by default, so leave Disable Express Checkout off and the supported buttons appear at the top of checkout.


Address autocomplete
Add your Google API key under CheckoutWC » Integrations, then check Enable Google Address Autocomplete in CheckoutWC » Pages » Checkout, under Address Completion and Validation. Fetchify is set up in the same section with its access token. Customers type less, and fewer orders ship to mistyped addresses.
Multi-step or one-page checkout
Multi-step checkout is the default, so there is nothing to enable. It shows a progress indicator so customers can see where they are in the flow.

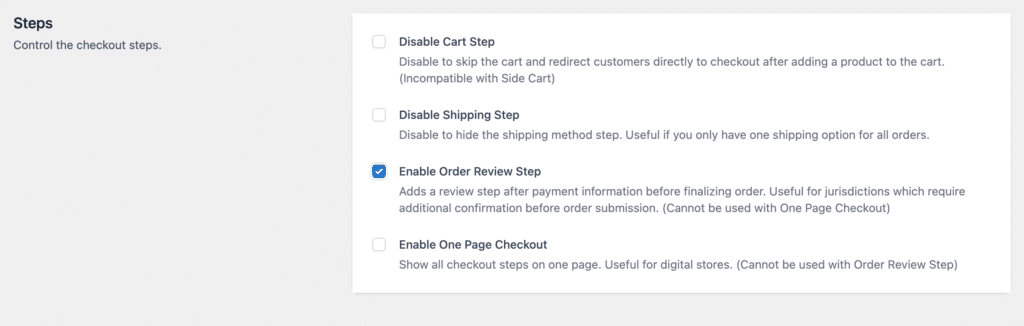
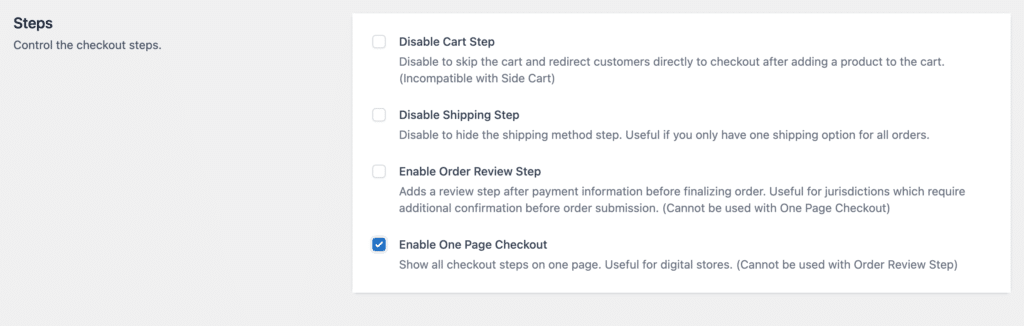
Two settings change the flow. Go to CheckoutWC » Pages » Checkout and look under Steps:
- Enable Order Review Step adds a review step after payment information, before the order is finalized.
- Enable One Page Checkout shows all the steps on one page. It can’t be combined with the Order Review Step. You can also switch it on from the Template section of the Checkout Editor.
Cart editing
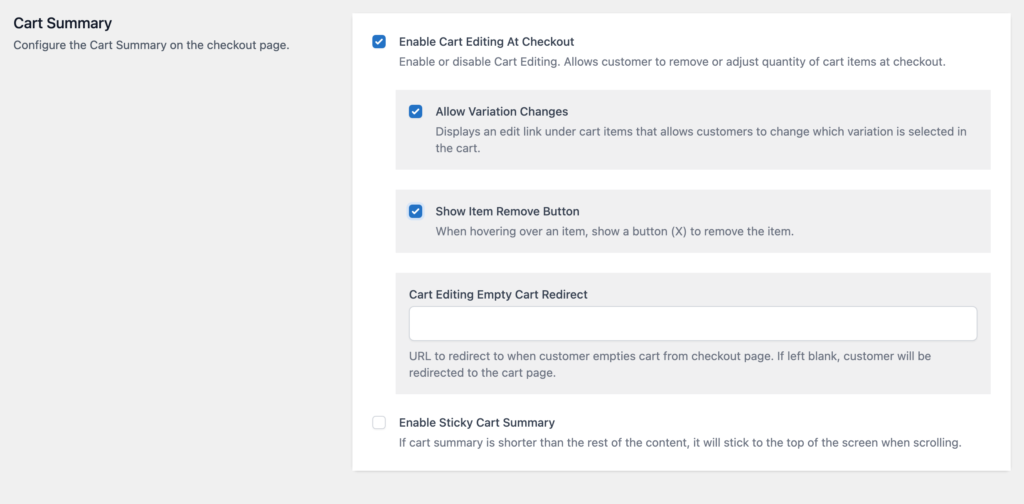
Customers can change quantities, switch variations, and remove items without leaving checkout. In CheckoutWC » Pages » Checkout, open Cart Summary and check Enable Cart Editing At Checkout. Then choose whether to add Allow Variation Changes and Show Item Remove Button. The same controls live in the Cart Summary section of the Checkout Editor, labeled Cart Editing, Variation Edits, and Item Remove. Our guide to changing product quantity at checkout covers each option.
Order bumps
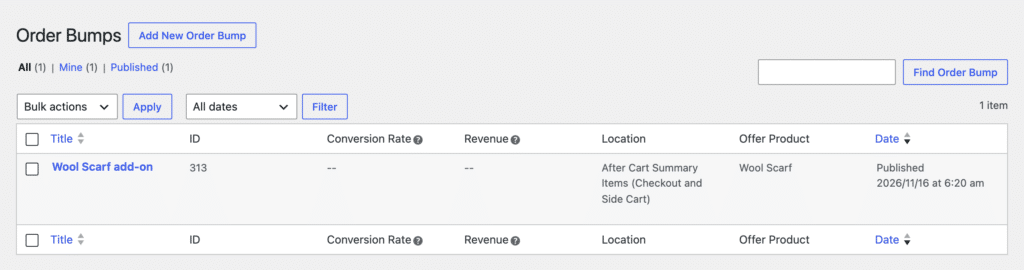
Create targeted offers based on what’s in the cart:
- Digital products: offer an extended license.
- Physical goods: offer shipping insurance.
- Services: offer priority support.
- Go to CheckoutWC » Order Bumps and check Enable Order Bumps on the Settings tab.
- Open the Manage Bumps tab and click Add New.
- Choose the offer’s product and discount type, and write the offer language.
- Pick a Display Location. You can place the bump in a checkout slot (for example, After Payment Methods), in the side cart (also turn on Enable Order Bumps under CheckoutWC » Side Cart, in Options), or in a popup on Place Order Click.
- Add conditions if you want the bump to appear only for specific products.


Trust badges

Place security badges near the payment fields and satisfaction guarantees near the order button.
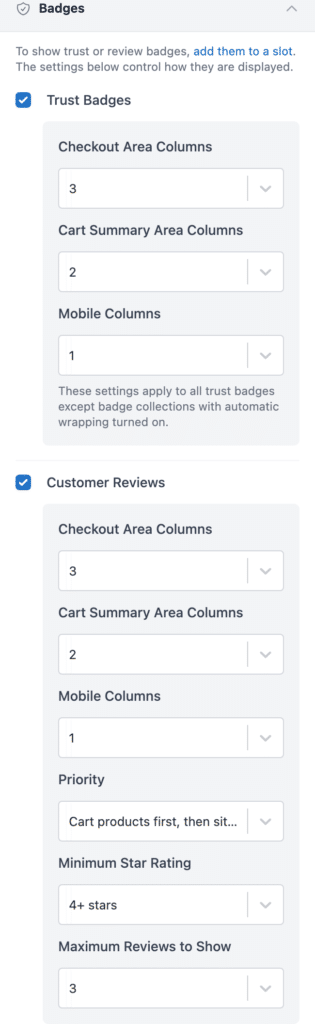
- Go to CheckoutWC » Checkout Editor, open Badges and turn on Trust Badges.
- Open Slots, expand the slot where the badge should go, click + and choose + New trust badge.
- Choose Custom badge, add a title, an image from your Media Library, and a description, then click Add trust badge and Save Changes.
Abandoned cart recovery
Cart recovery sends reminder emails to shoppers who left items behind.
- Go to CheckoutWC » Cart Recovery and check Enable Abandoned Cart Tracking.
- Open the Emails tab to write the reminder emails.
- Check results on the Report tab.



For recovery emails to arrive reliably, your site needs a dependable way to send email, such as an SMTP or transactional email service.
Mobile options
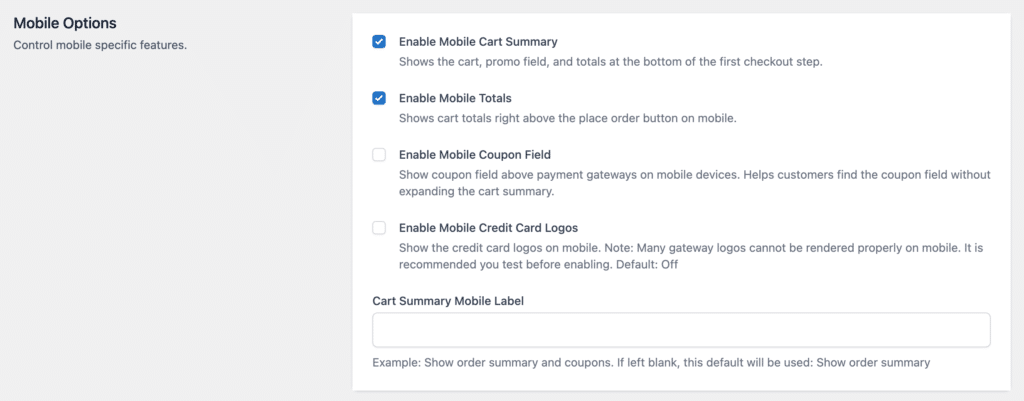
Fine-tune the mobile checkout in CheckoutWC » Pages » Checkout, under Mobile Options. For example, Enable Mobile Cart Summary shows the cart, promo field, and totals at the bottom of the first checkout step, and Enable Mobile Totals shows totals right above the place order button.
After you’ve made these changes, run an A/B test of different configurations and watch your conversion rate for at least two weeks to see which combination works best for your audience.
Get a Shopify-style checkout on WooCommerce
A Shopify-style checkout adds:
- A short, focused design that keeps shoppers moving toward purchase.
- Progress indicators and a two-column layout that reduce the effort of filling in a form.
- Express checkout and address autocomplete that turn lengthy forms into quick transactions.
- Mobile-ready templates that adapt to the screen without extra configuration.
You keep WooCommerce’s flexibility and gain a checkout built for conversion. CheckoutWC is one plan with every feature, from $249 a year for one site. See the plans, or read the getting started guide first.