Post Purchase One-Click Order Bumps let you display offers on the thank you page immediately after checkout. Customers who saved a payment method during checkout can accept these offers with a single click – no re-entering payment details required. The product gets added to their existing order instantly.
This feature is perfect for complementary products, warranties, or add-ons that make sense after a customer has committed to their purchase.
Requirements
Post Purchase One-Click Order Bumps require:
- CheckoutWC Plus plan or higher
- A supported payment gateway (see Compatible payment gateways below) with saved payment methods enabled
- Customers must have a saved payment method (or save one during checkout)
Compatible payment gateways
One-click order bumps need a gateway that can charge a saved payment method without the customer re-entering their details. CheckoutWC does not provide that itself. Each gateway plugin registers its own one-click support, which is why the list below is specific.
Gateway plugins that currently register one-click support:
A different Stripe or PayPal integration will not work in their place, including WooCommerce’s own core Stripe and PayPal gateways. Having Stripe on your store is not enough on its own. The gateway plugin has to register one-click support with CheckoutWC.
We’re actively adding support for more gateways. See Supported payment gateways for One-Click Order Bumps for setup instructions and how to request support for your gateway.
How to set up a post purchase one-click order bump
Creating a post purchase one-click order bump follows the same process as creating any order bump. The only difference is selecting Post Purchase One-Click (Thank You) as the display location.
- Go to WP Admin > CheckoutWC > Order Bumps
- Click Add New
- Configure your offer product, discount, and description (see Creating your first order bump for complete setup details)
- Under Display Location, select Post Purchase One-Click (Thank You)
- Configure any targeting rules (see Rules Engine reference)
- Publish your bump

Selecting the Post Purchase One-Click location in the order bump editor
How it works
Here’s what the customer experience looks like:
- Customer completes checkout using a saved payment method (or saves one during checkout)
- The thank you page displays your post purchase offer
- Customer clicks to accept – their saved payment method is charged automatically
- The product is added to their order instantly
- If they decline or dismiss the offer, nothing happens
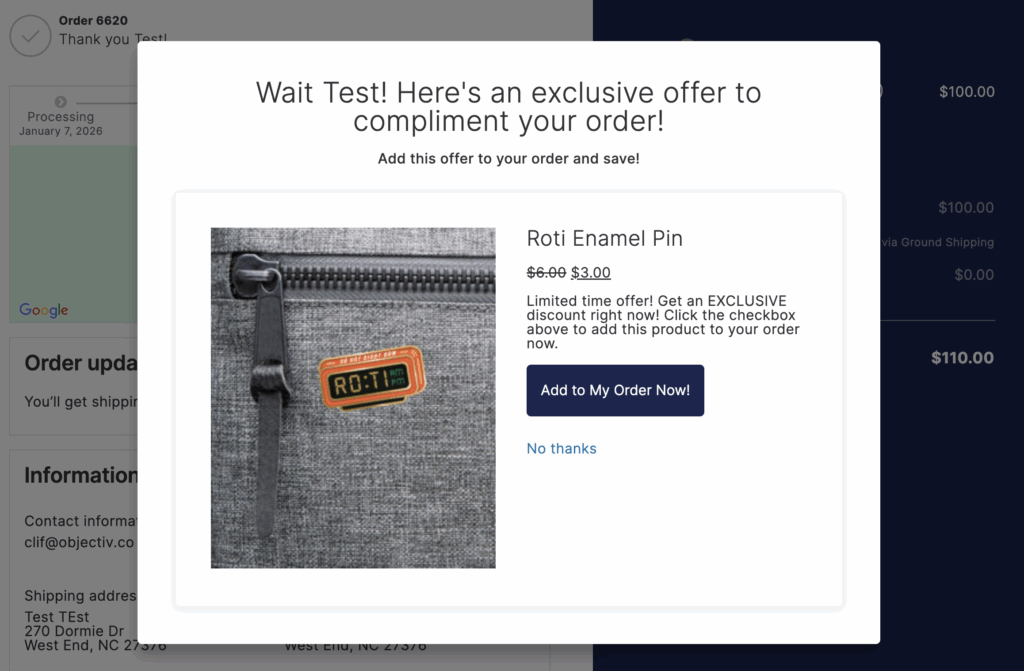
One-click order bump displayed on the thank you page
Smart eligibility
Post purchase one-click order bumps only appear to customers who can actually use the feature. If a customer isn’t using a compatible gateway or doesn’t have a saved payment method, they simply won’t see the offer.
Supported product types
Post purchase one-click order bumps work with:
- Simple products
- Variable products
- Subscription products
Viewing order bump data
When a customer accepts a post purchase order bump, you’ll see the order bump line item in the order admin. For orders with one-click offers, you’ll also see a separate refund button for the bump:
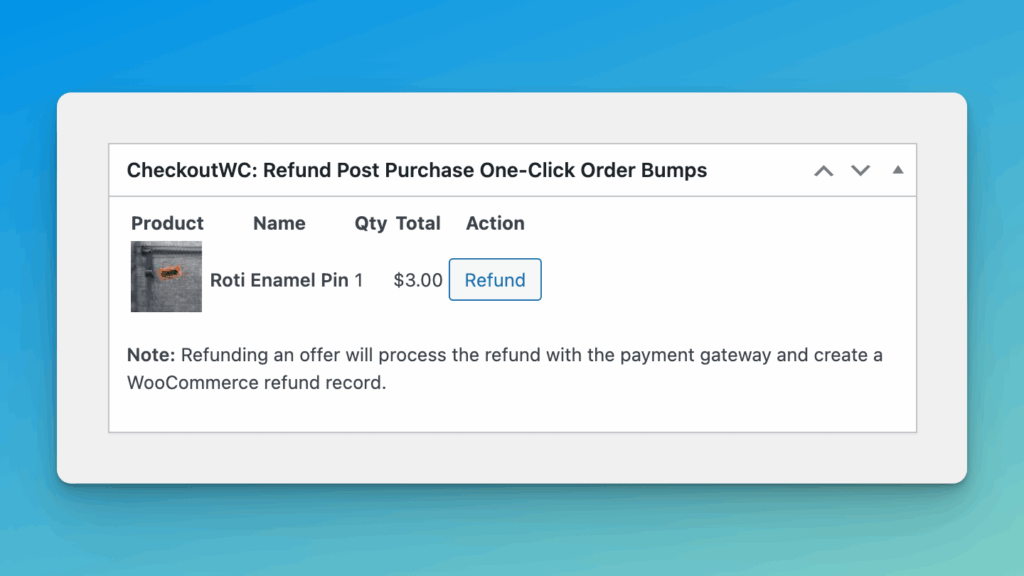
Order admin showing accepted order bump with separate refund option
Limitations
- Requires a compatible payment gateway (see list above)
- Only available on Plus plan and above
Related resources
- Creating your first order bump – Step-by-step setup guide
- Rules Engine reference – Target offers using conditions and rules
- Order Bumps overview – Complete settings reference
Have questions about post purchase one-click order bumps? Reach out to our support team – we’re happy to help you get set up.