Checkout for WooCommerce can quickly and easily replace your store’s default WooCommerce checkout page with an optimized and modern design. Getting started with one of our 5 designs, you can be up and running in minutes.
In this guide, we’ll go through making sure Checkout for WooCommerce is installed and active, as well as testing that the checkout page is ready for your customers.
Table of Contents
- Installation & Activation Guide
- Choose a Template
- Customize Logo & Colors
- Review the Checkout Process
- Activate the Template
- Frequently Asked Questions (FAQ)
- Next Steps
Installation & Activation Guide
This guide will walk you through the process of installing and activating Checkout for WooCommerce on your WordPress site.
Important Notes
- Templates are automatically visible to WordPress administrators.
- An active license is required to replace the checkout page with your chosen template.
- The plugin must be both installed and properly activated to work.
Step 1: Install the Plugin
Once you’ve subscribed to a plan, you can download the plugin .zip file from your account page.
Note: Make sure you review our installation requirements for a smooth working experience.
If you need a hand with the installation, don’t worry. We’ve got you covered with a step-by-step installation guide to make it easy.
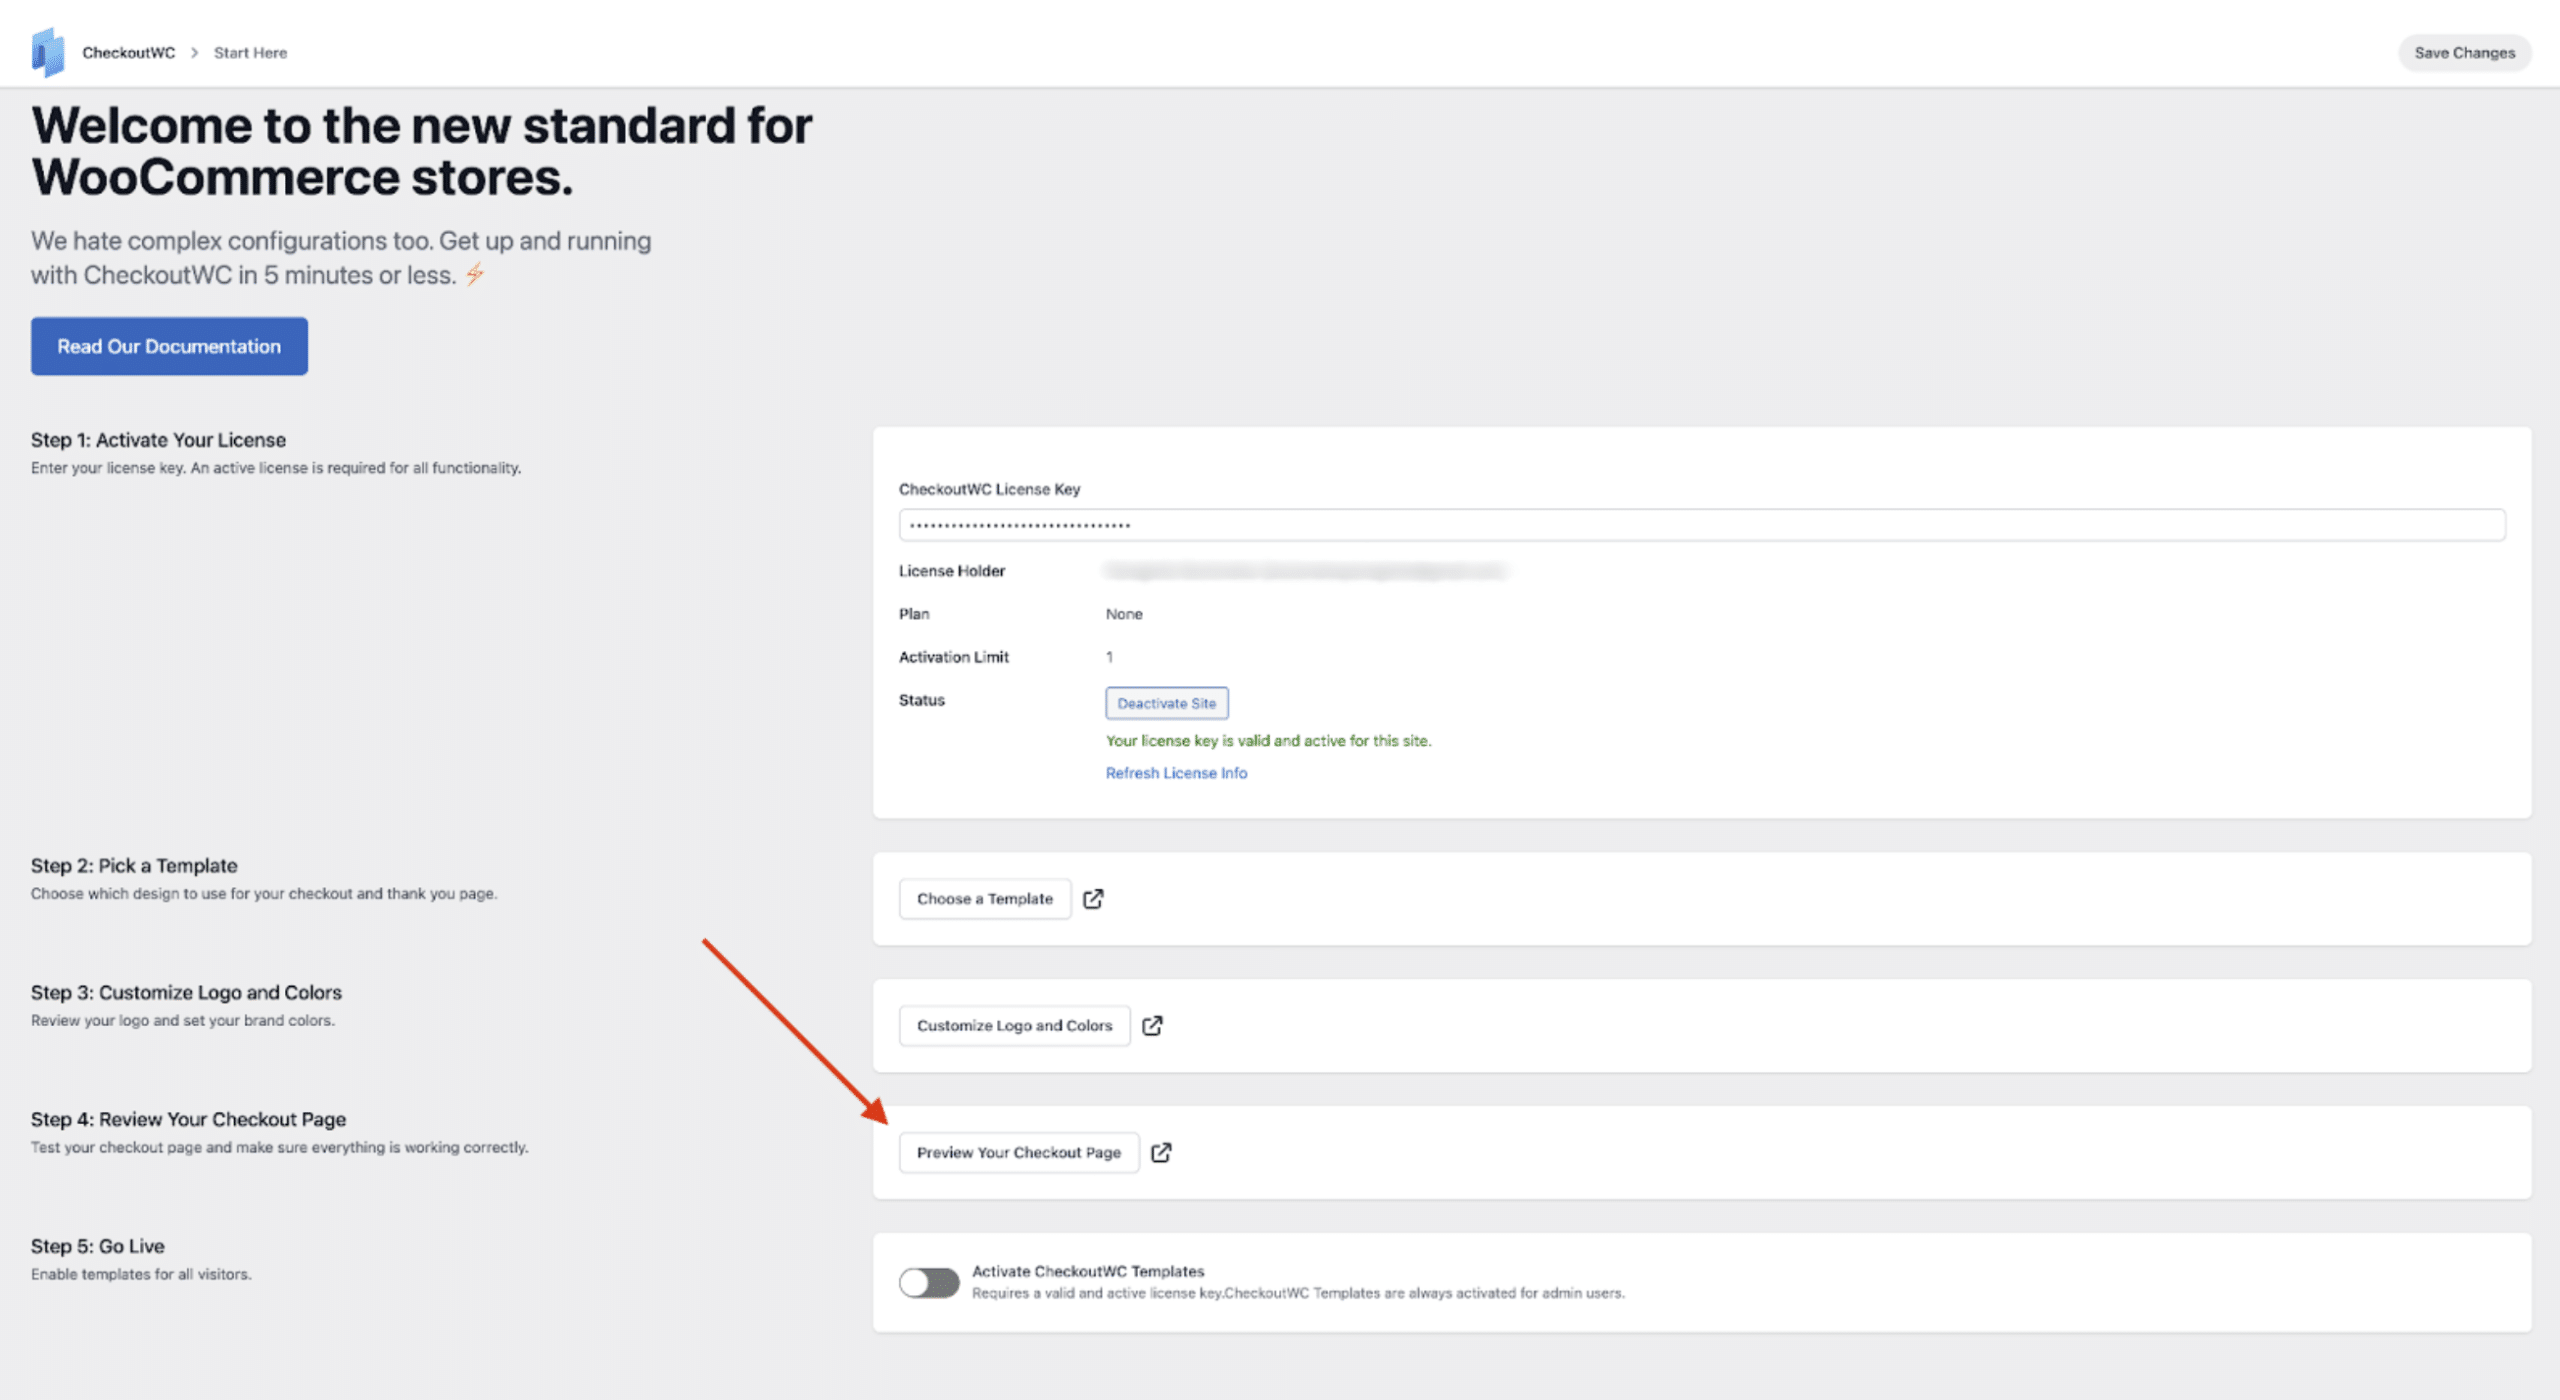
Step 2: Activate Your License
The plugin zip you downloaded and installed in Step 1 will include your license key and it will automatically activate.
To verify this, navigate to CheckoutWC > Start Here in your WordPress dashboard, it will show “Your license key is valid and active for this site.”
If it doesn’t, you can activate your license manually by following the steps below.
- Log in to checkoutwc.com/account.
-
On the Overview tab, click the Copy button next to your plan’s license key.
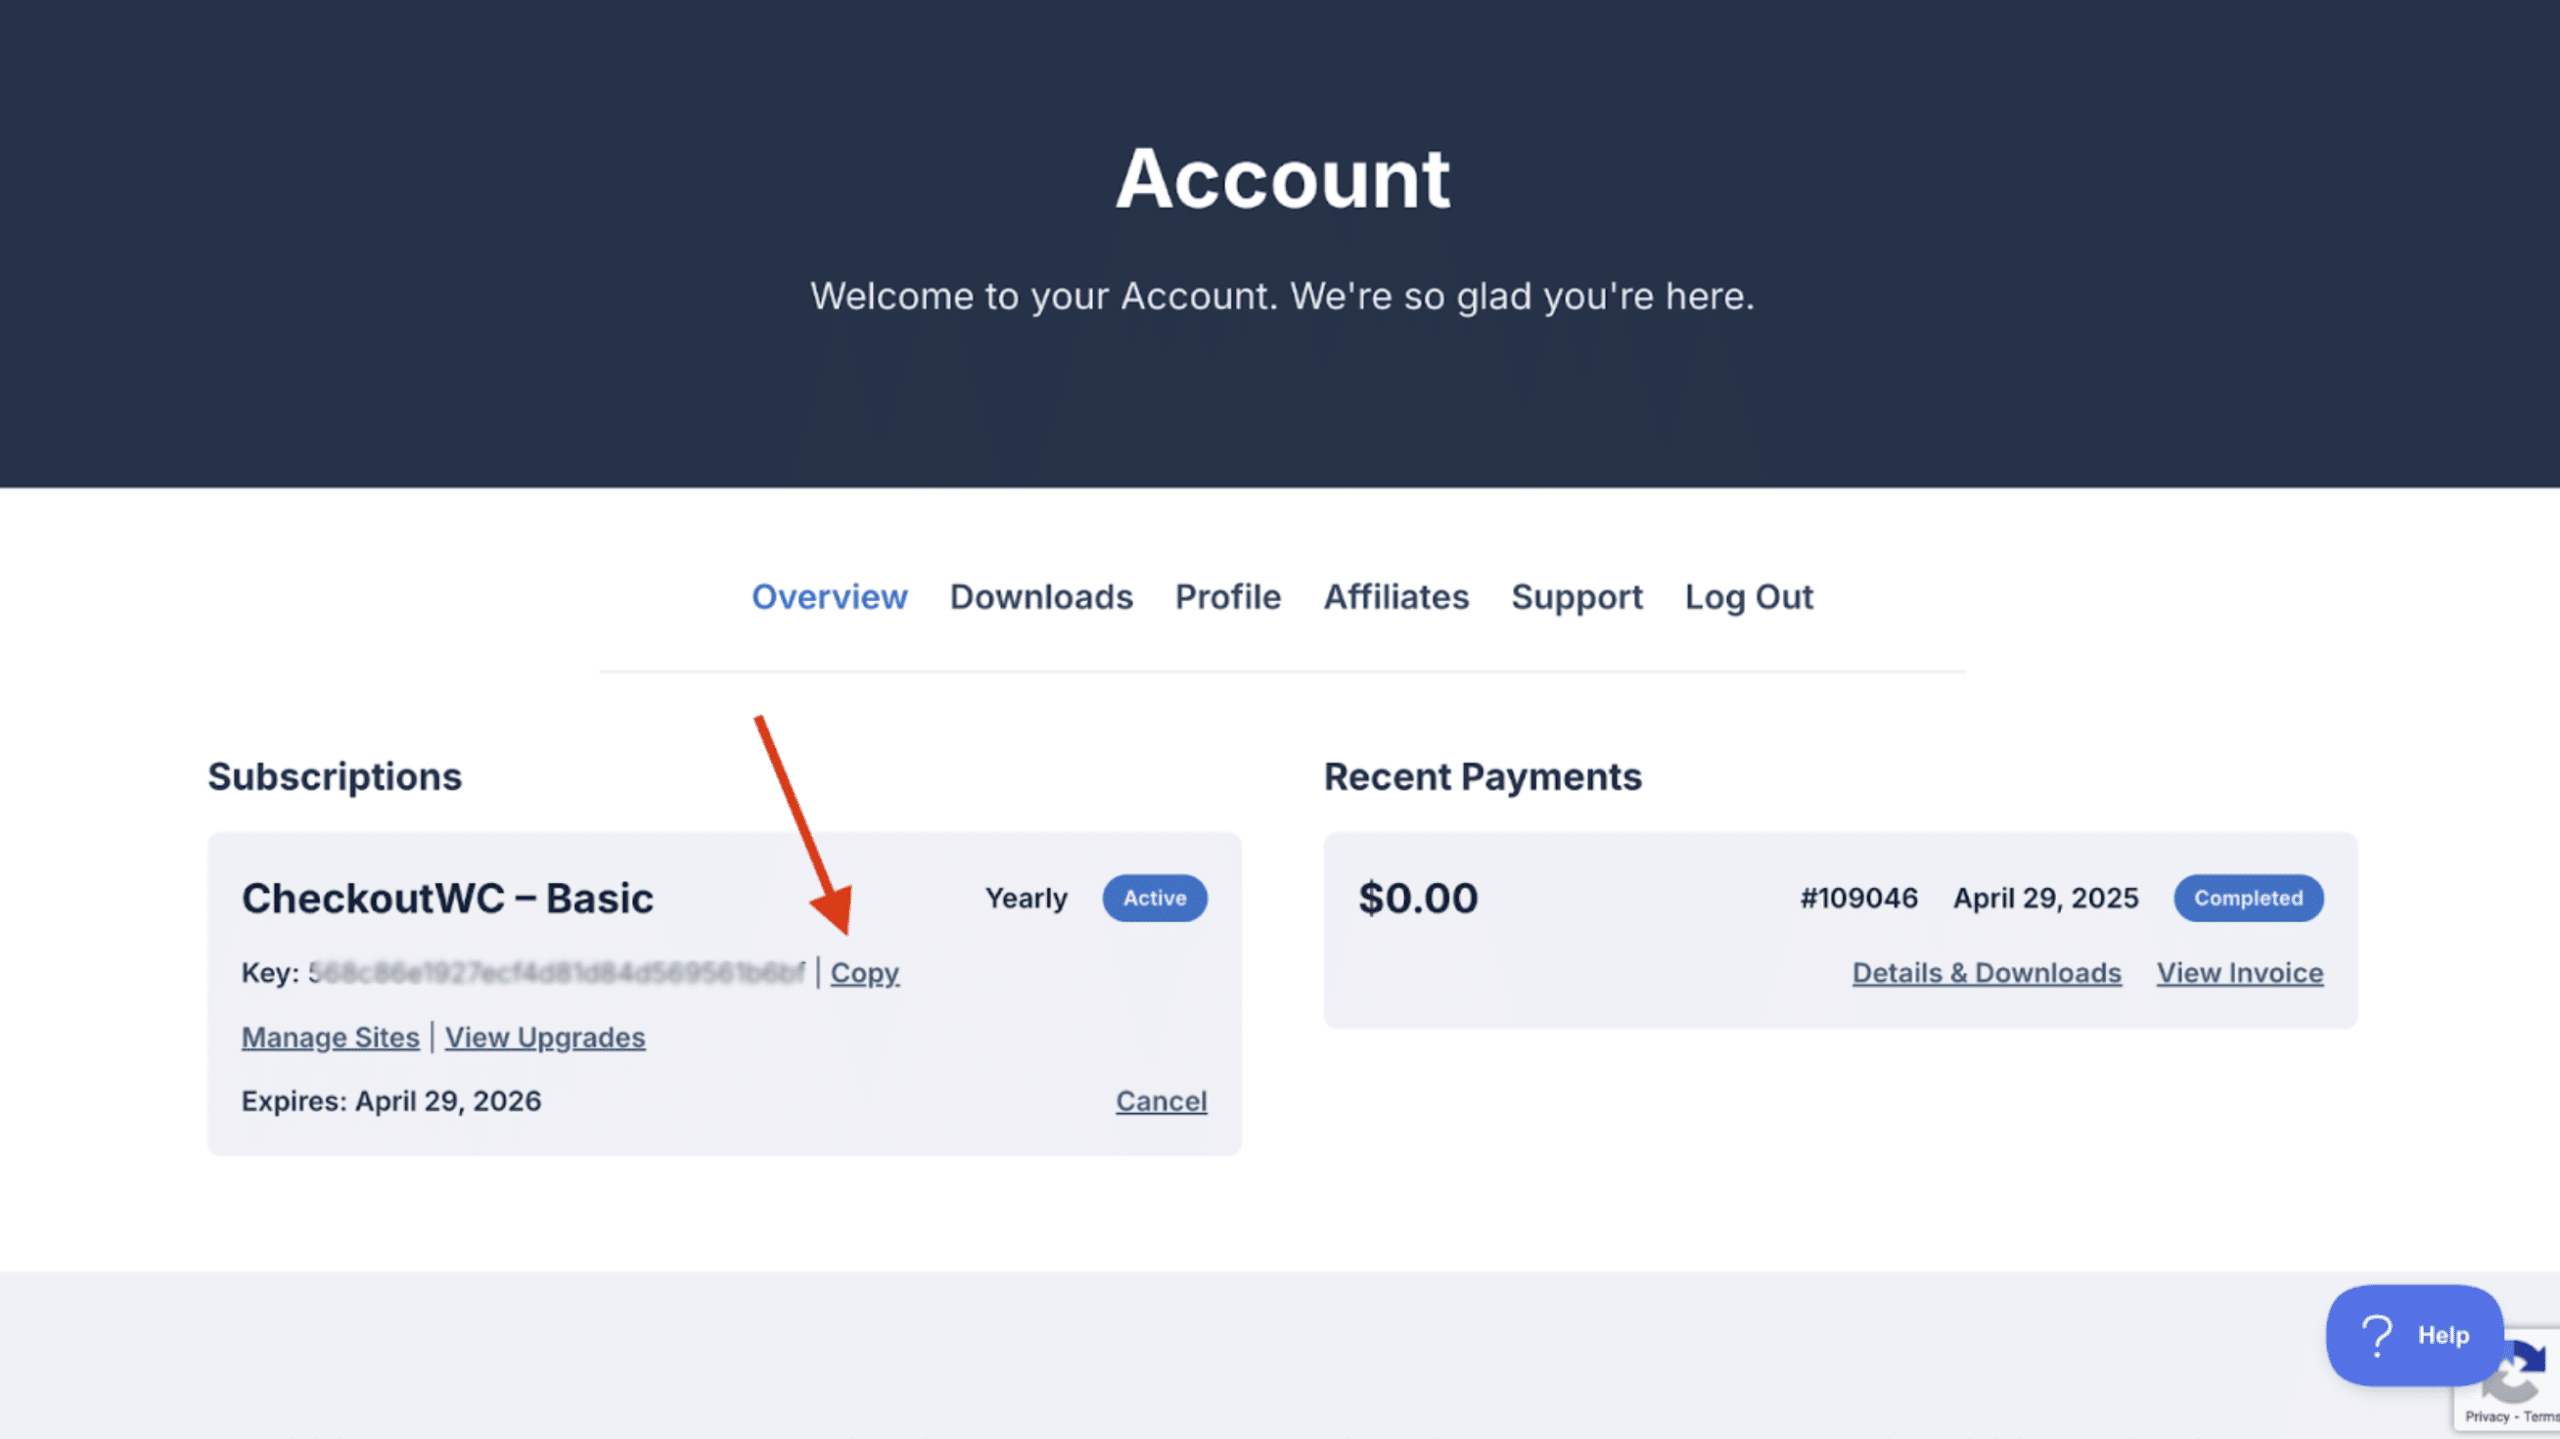
- Return to your WordPress admin dashboard.
- Navigate to CheckoutWC > Start Here..
-
Paste your license key into the CheckoutWC License Key field.
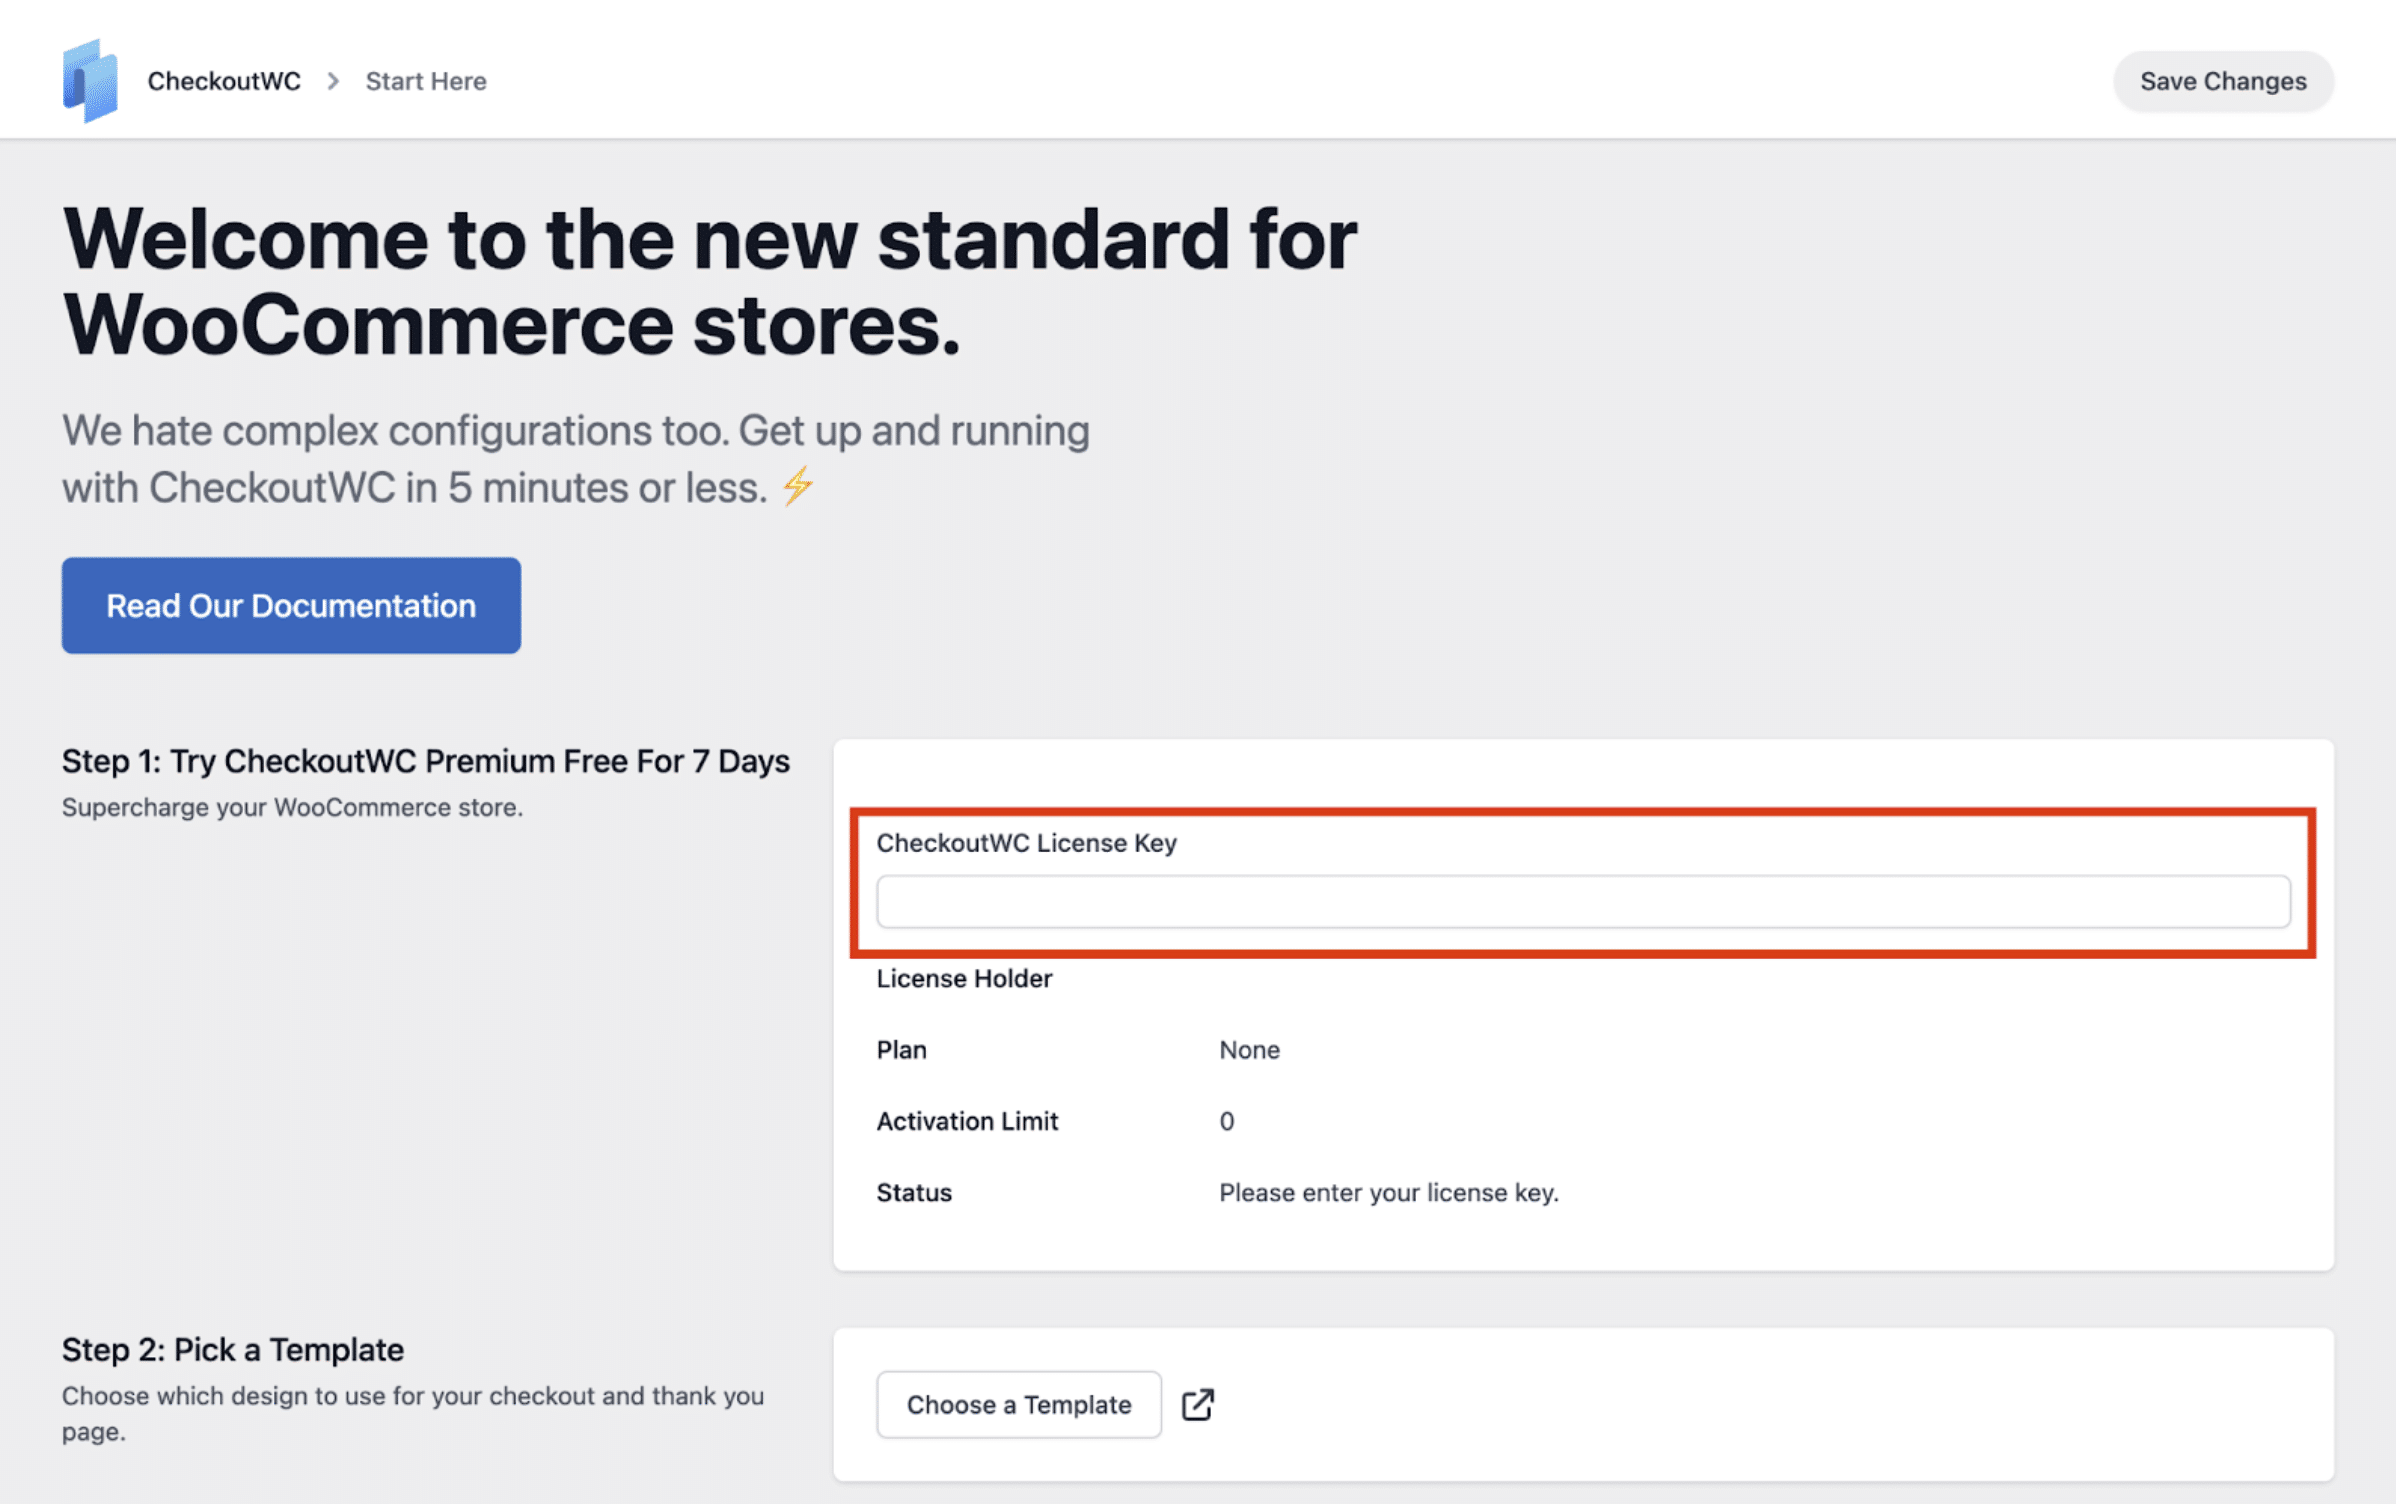
- Click Save Changes in the upper right corner.
- Verify the Status shows “Your license key is valid and active for this site.”
Choose a Template
Now that Checkout for WooCommerce is active on your site, it’s time to choose a checkout template that fits your brand.
With the click of a button, you can replace the look and feel of your store’s checkout. Our team has designed 5 templates that can be easily customized and swapped based on your store’s needs.
There are currently 5 templates available, with the default one being The Midas Theme, but you can find live demos for all of them on our demos page.
Note: We recommend previewing each template on your own store. Each design offers flexible customization options to help you match your brand’s look and feel.
To select a template:
- Go to CheckoutWC > Appearance in your WordPress admin.
-
Hover over a template to reveal the Activate button in the lower right.
Also, note that you can Preview the templates by clicking on the preview button in the lower left corner.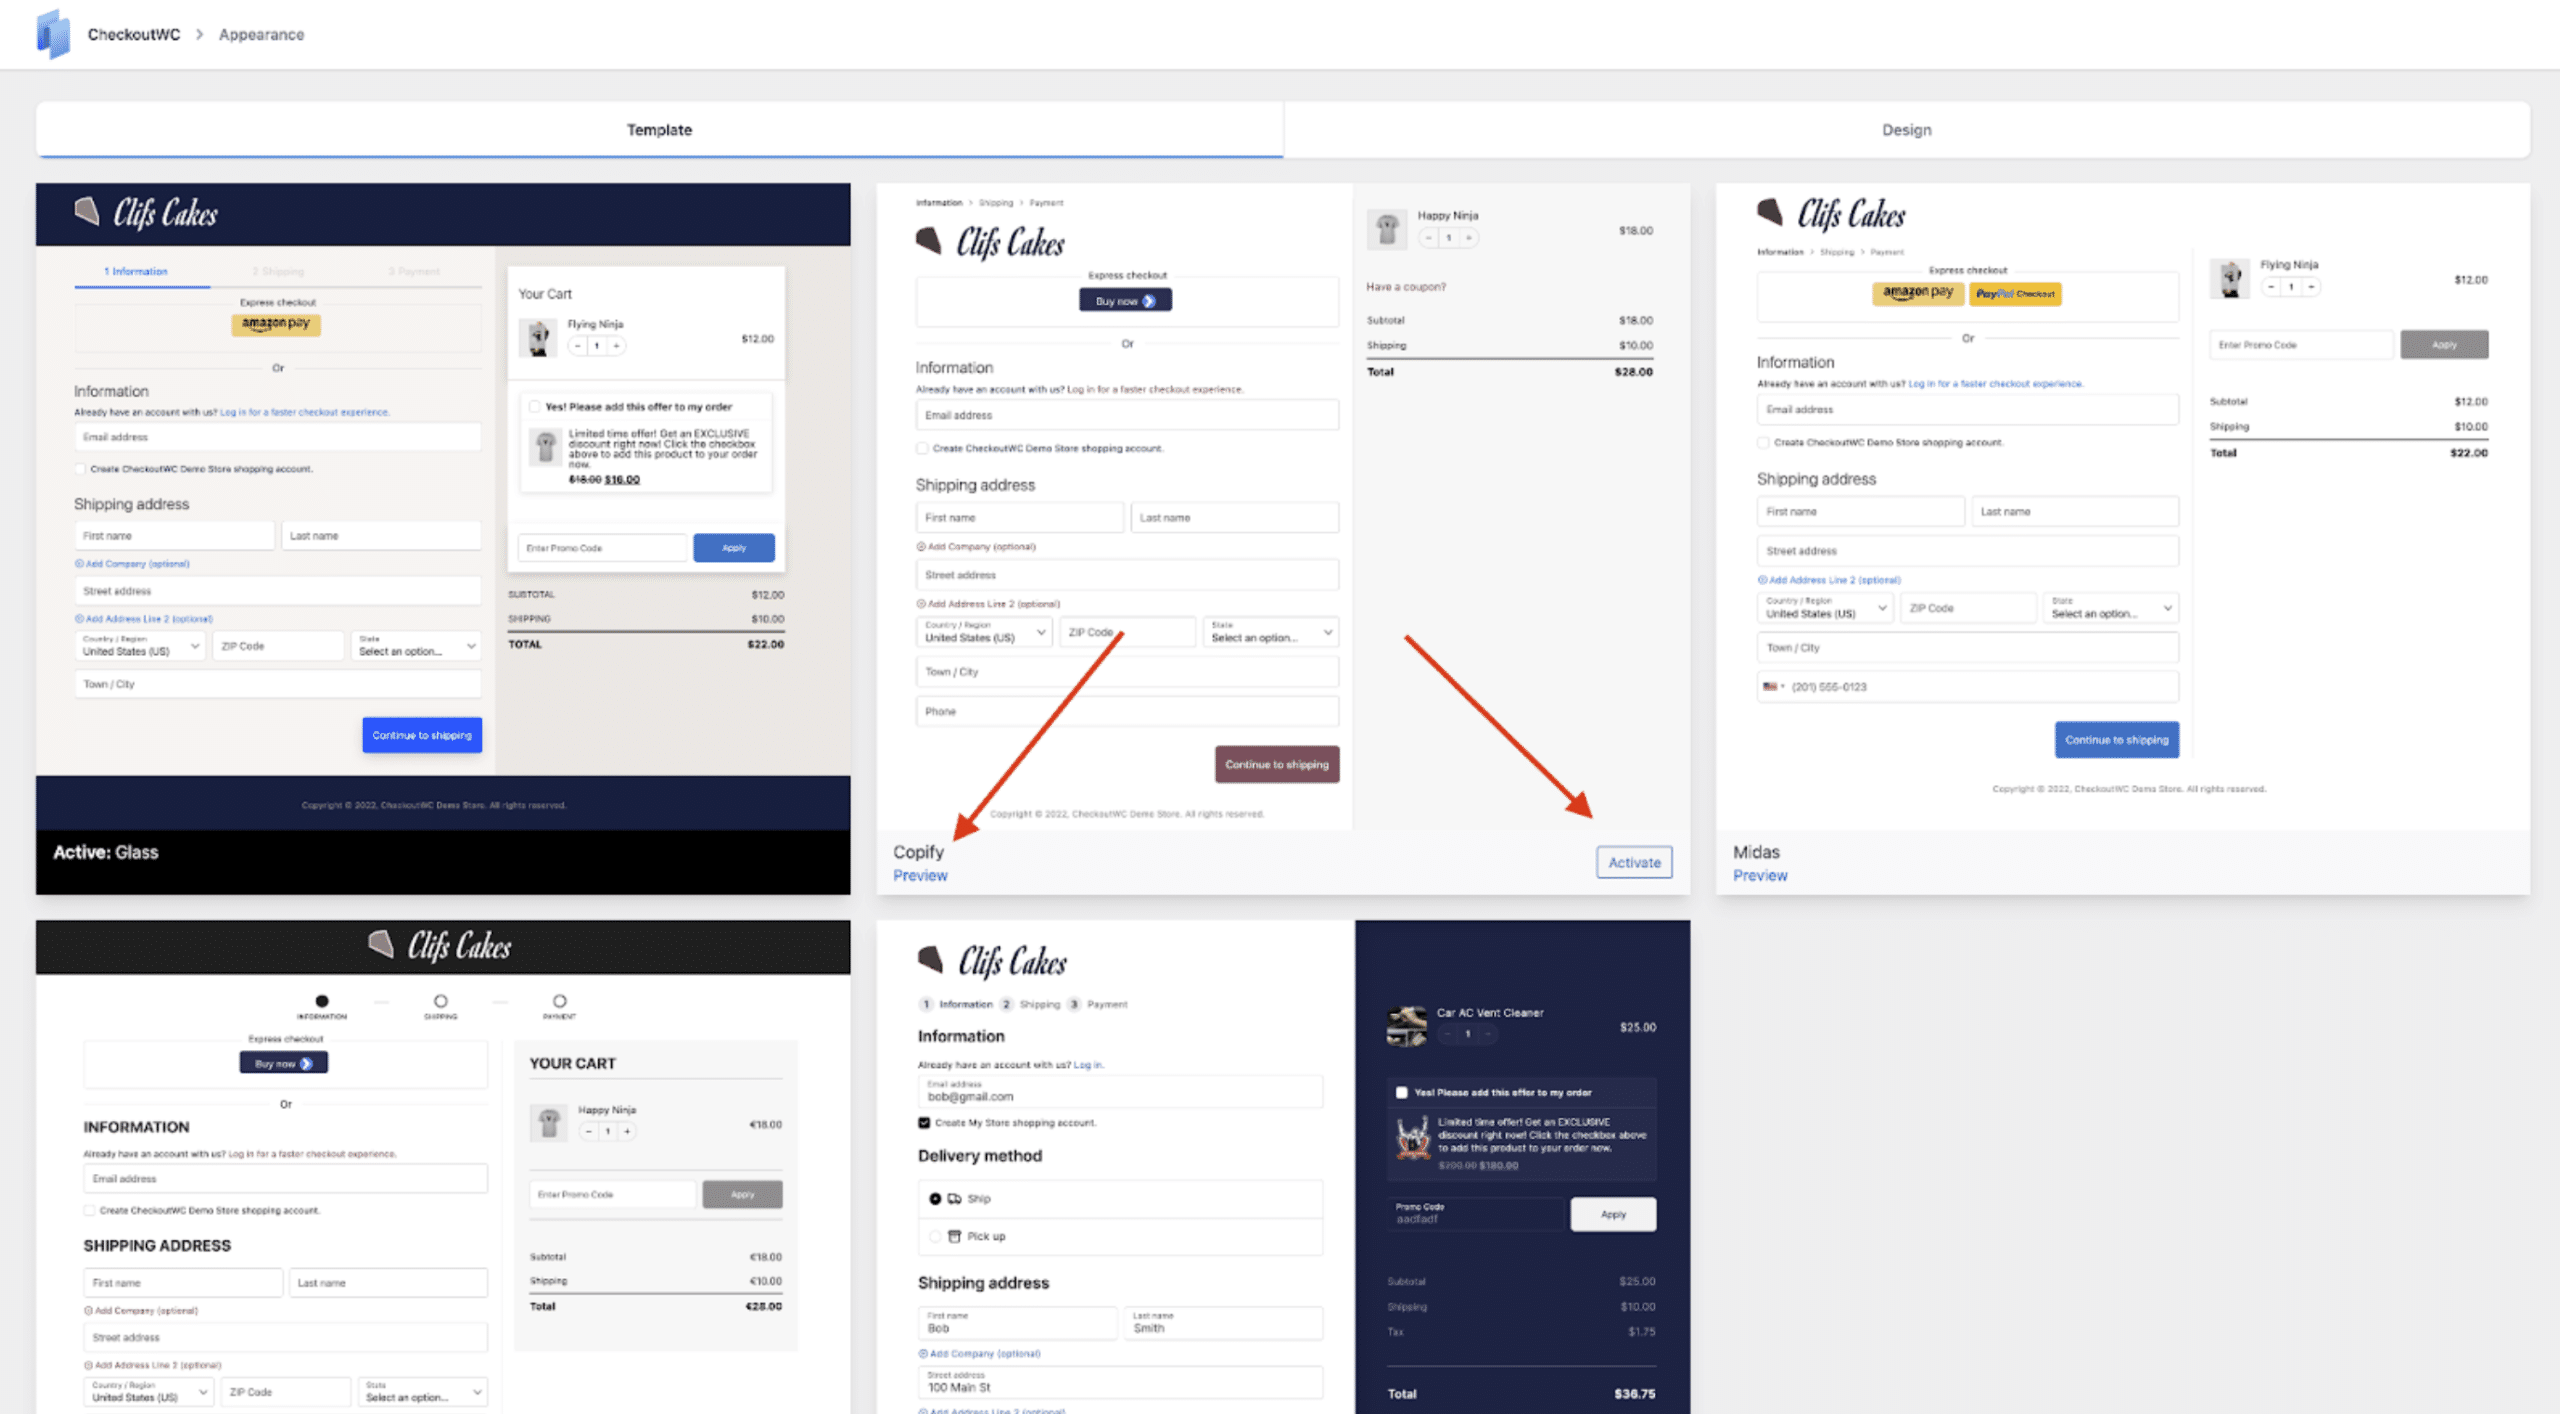
Customize Logo & Colors
After activating a template, you can further personalize your checkout design to match your store’s branding.
To customize the design:
- In your WordPress dashboard, go to CheckoutWC > Appearance.
- Click the Design tab on the top right of the page.
From here, you can:
- Upload your store’s logo.
- Change the field label style.
- Choose a custom font.
- Set your brand’s primary and secondary colors.
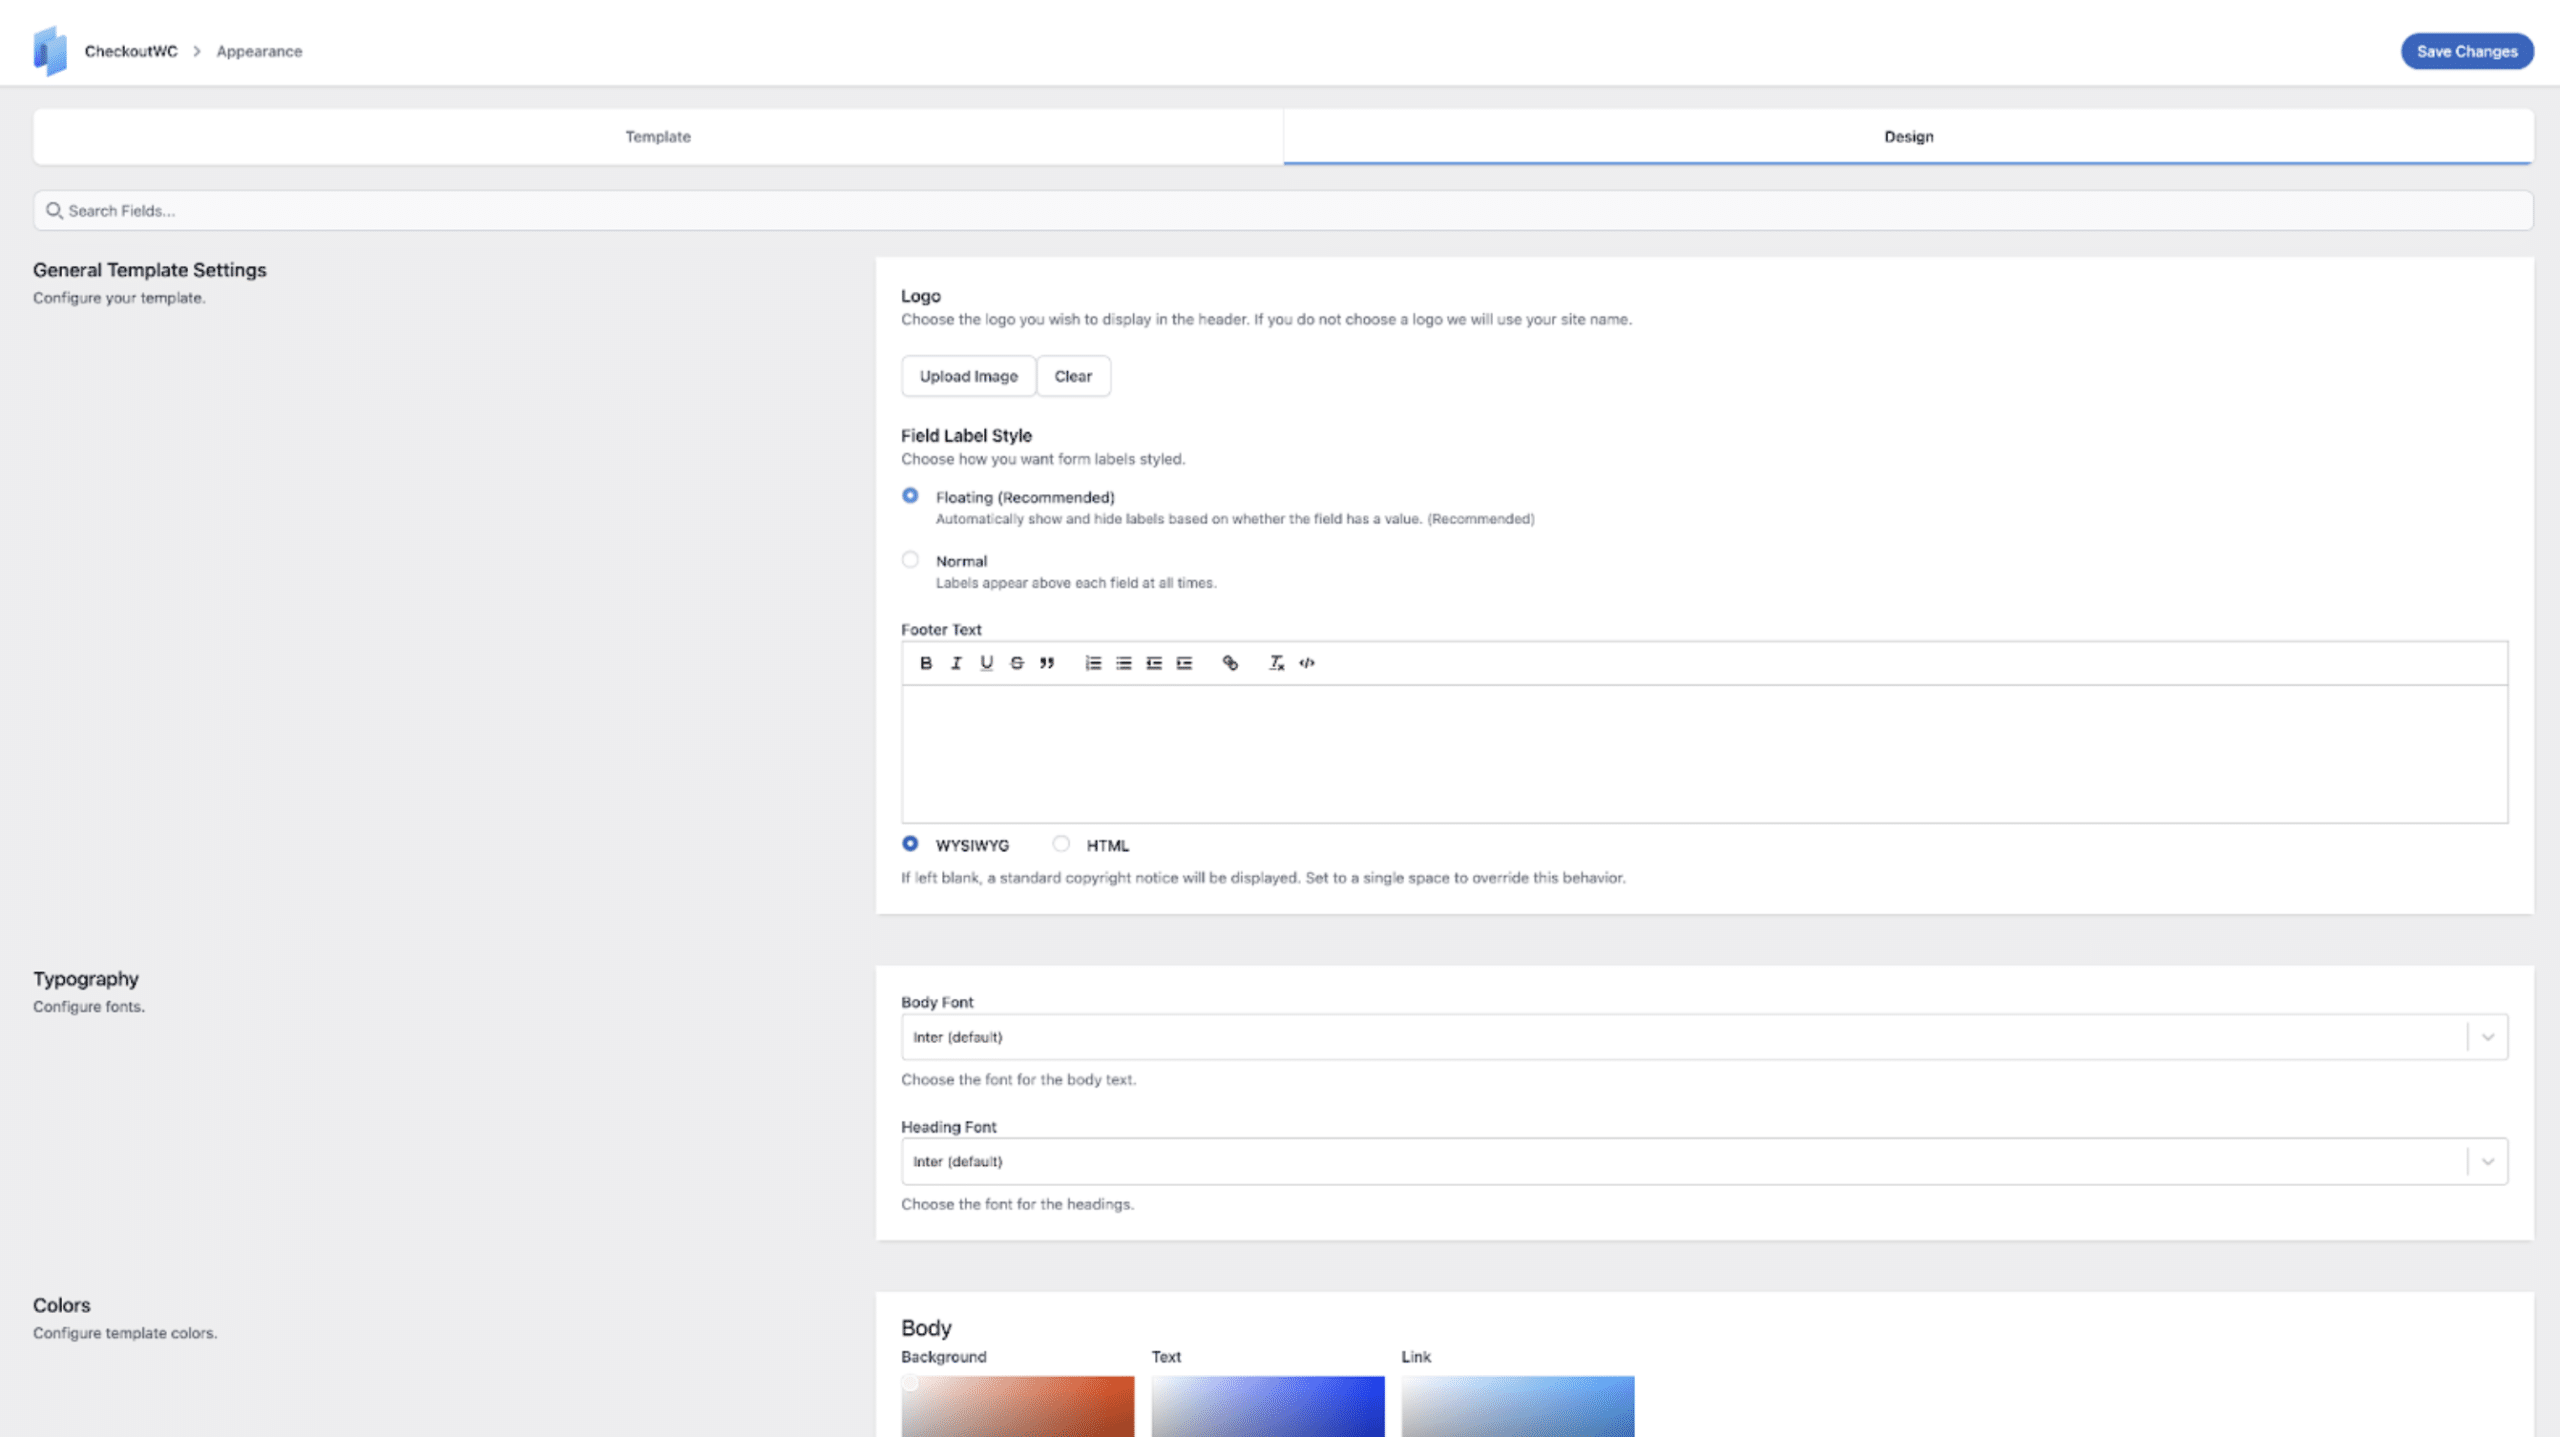
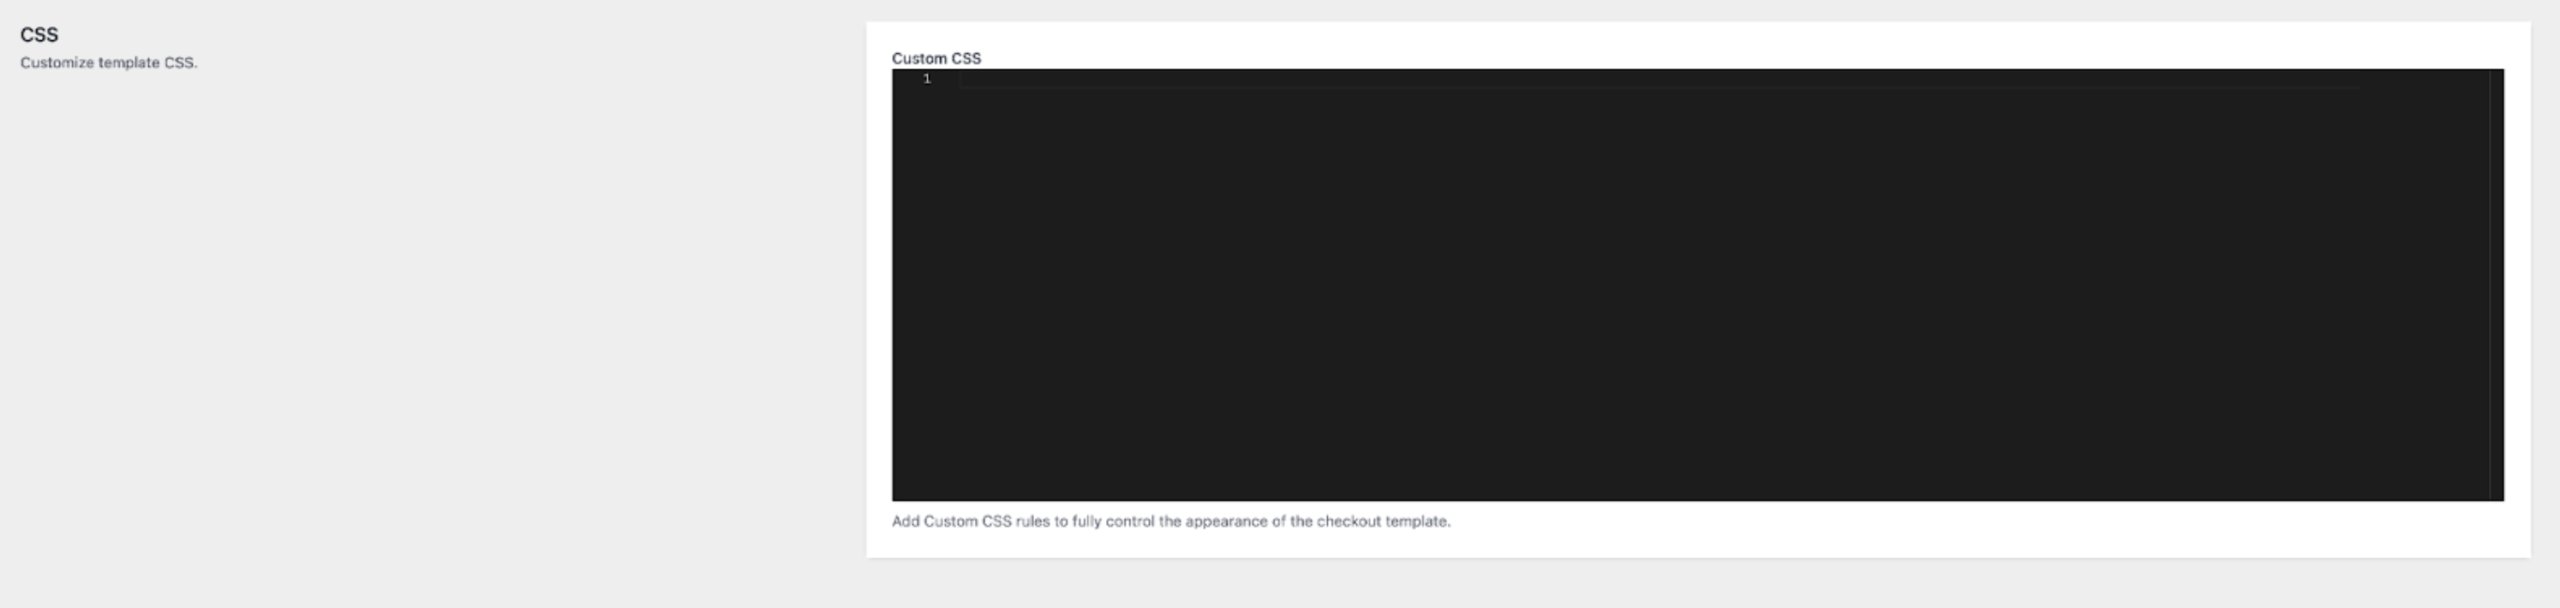
For a more advanced customization, you can add custom CSS at the bottom of the page.
You can find more information about all the options above in our design documentation.
Review the Checkout Process
Before going live, it’s important to test the checkout experience to ensure everything works smoothly.
To preview your checkout:
- Go to CheckoutWC > Start Here.
- Click on Preview Your Checkout Page.
This allows you to:
- See how the checkout template looks directly in your store, even before activating it.
- Test compatibility with your payment gateways. The preview mode automatically adds a random, in-stock product to the cart for testing.
If you’re in a staging site, we recommend placing a test order to check if:
- All elements of the checkout page display correctly.
- Your payment gateway is compatible with the Checkout for WooCommerce template.
- The page looks great across devices (e.g., desktop, mobile, tablet).
After you have completed testing, you are now ready to proceed with activating the template for your site.
Activate the Template
Once testing is complete and you’re happy with the checkout template, it’s time to go live.
To do that, you’ll need to:
- Log in to your WordPress admin dashboard.
- Navigate to CheckoutWC > Start Here.
- In Step 5: Go Live, toggle on Activate CheckoutWC Templates.
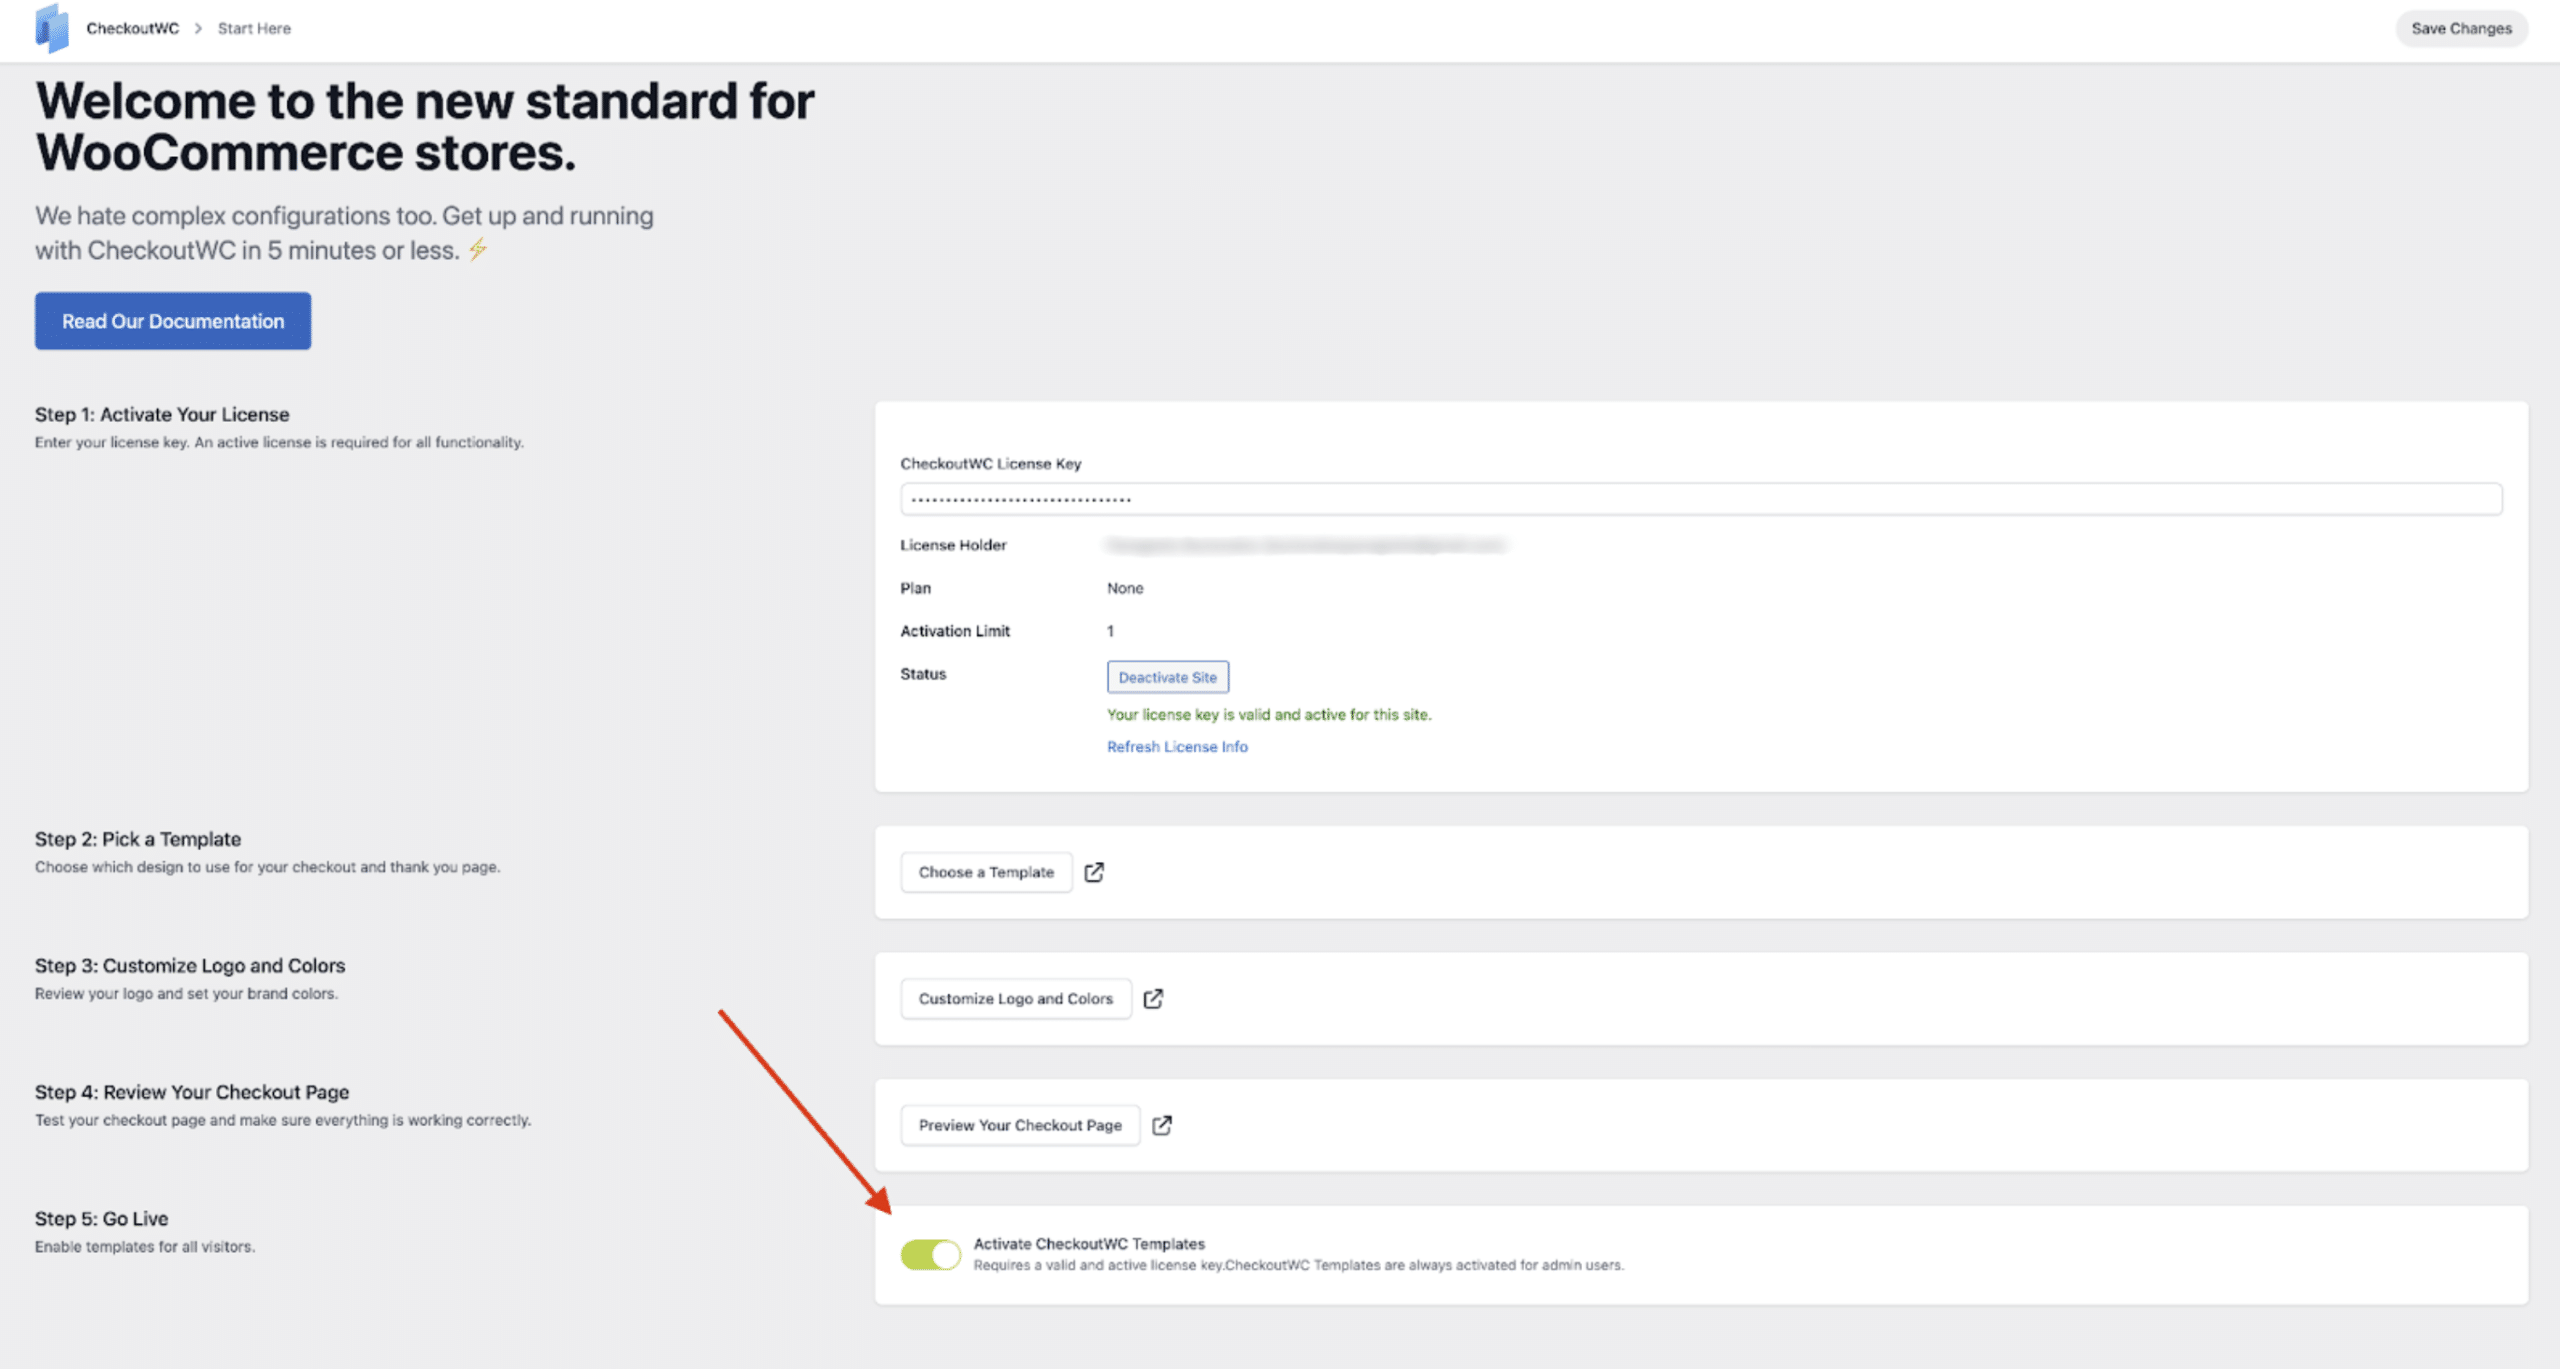
Congratulations! You just replaced your default WooCommerce page with a sleek design, fine-tuned for your store’s brand!
Got any questions or feedback to share? We want to hear from you!
We pride ourselves on offering great support, so if you want to drop us a note, you can log in to your WordPress admin dashboard and then head over to CheckoutWC > Support.
Frequently Asked Questions (FAQ)
Quick solutions to our most common customer questions:
Do I need to check my pixel configuration after activating Checkout for WooCommerce?
The short answer is yes. Even though our team has tested a number of pixel plugins, and they work out of the box, it’s a good idea to use your browser add-on (or developer tools) to confirm that the pixel is firing when you expect it to.
You can go through our list of confirmed integrations to check that your plugin is listed, however, don’t hesitate to contact us if your plugin isn’t on our list.
How can I contact customer support?
We pride ourselves on offering great support. If you encounter any problems, log in to your WordPress admin dashboard and then head over to CheckoutWC > Support and drop us a note.
We strive to be very responsive to support tickets, and we’ll get you a solution as fast as we can.
Is my plugin compatible with Checkout for WooCommerce?
Checkout for WooCommerce has been developed following WooCommerce’s plugin development standards. That means that it should work with the majority of WooCommerce extensions and WordPress plugins.
However, you can check out our list of confirmed integrations to find plugins that are specifically intended to be used alongside Checkout for WooCommerce:
Isn’t your plugin on our list? Feel free to contact us, and we’re happy to help you test your configuration and update our list.
How can I troubleshoot Checkout for WooCommerce issues?
If you have encountered any issues while working with Checkout for WooCommerce, we recommend visiting the troubleshooting category of our documentation page to find a list of common issues and how to troubleshoot them.
Next Steps
Now that the CheckoutWC page of your store is active, you can explore more features available to all CheckoutWC plans: