A/B testing lets you compare different versions of your WooCommerce order bumps to find what converts best. Instead of guessing, you get real data on which discount amounts, copy, placement, and product offers perform better with your customers. This guide explains how to set up and manage A/B tests for order bumps in CheckoutWC.
A/B Testing is available to Pro and Agency plans. If you need to upgrade your license, click here.
Table of Contents
- Why A/B Test Order Bumps?
- Prerequisites
- Create a New A/B Test
- Managing Active Tests
- Completing a Test
- Best Practices
- Troubleshooting

Why A/B test WooCommerce order bumps?
A/B testing your order bumps is one of the most effective ways to optimize your checkout conversion rate and increase average order value. Instead of guessing what will work best, A/B testing provides data-driven insights into what actually resonates with your customers.
Order bumps are prime candidates for A/B testing because small changes can have significant impacts on revenue. A slight improvement in conversion rate or a better-performing discount can translate to substantial revenue gains over time.
What can you test?
You can test virtually any aspect of your WooCommerce order bump to find what works best for your audience:
Pricing and Discounts
- Test different discount amounts (e.g., 10% off vs. 15% off vs. $5 off.)
- Compare percentage discounts versus fixed amounts.
- Experiment with “Buy One Get One” offers versus straight discounts.
- Test free shipping thresholds.
Copy and Messaging
- Headlines and descriptions.
- Call-to-action button text (e.g., “Add to Order” vs. “Yes, Add This!” vs. “Get This Deal”.)
- Value propositions and benefit statements.
- Urgency messaging (e.g., “Limited Time” vs. “Today Only”.)
- Social proof elements (e.g., “Join 10,000+ customers” vs. “Most Popular Add-On”.)
Placement and Timing
- Location within the checkout flow (before shipping, after payment, etc.). See order bump display locations for all options.
- Display conditions (based on cart contents, totals, customer history, etc.)
Product Selection
- Which products to offer as order bumps
- Complementary products versus upsells
By systematically testing these elements, you can identify the combination that maximizes both conversion rate and revenue per order. The key is to test one variable at a time to clearly understand what drives the improvement.
Prerequisites
Before setting up an A/B test, ensure that:
- A/B Testing is enabled
Go to CheckoutWC → A/B Testing → Settings → Enable A/B Testing.
- Order Bumps are enabled
Go to CheckoutWC → Order Bumps → Settings → Enable Order Bumps.
- You have an existing order bump
You need at least one published order bump to test against. If you haven’t created one yet, see Creating your first order bump.
Create a new A/B test
Before creating a new A/B test, ensure the prerequisites above are met.
Step 1: Access the A/B testing interface
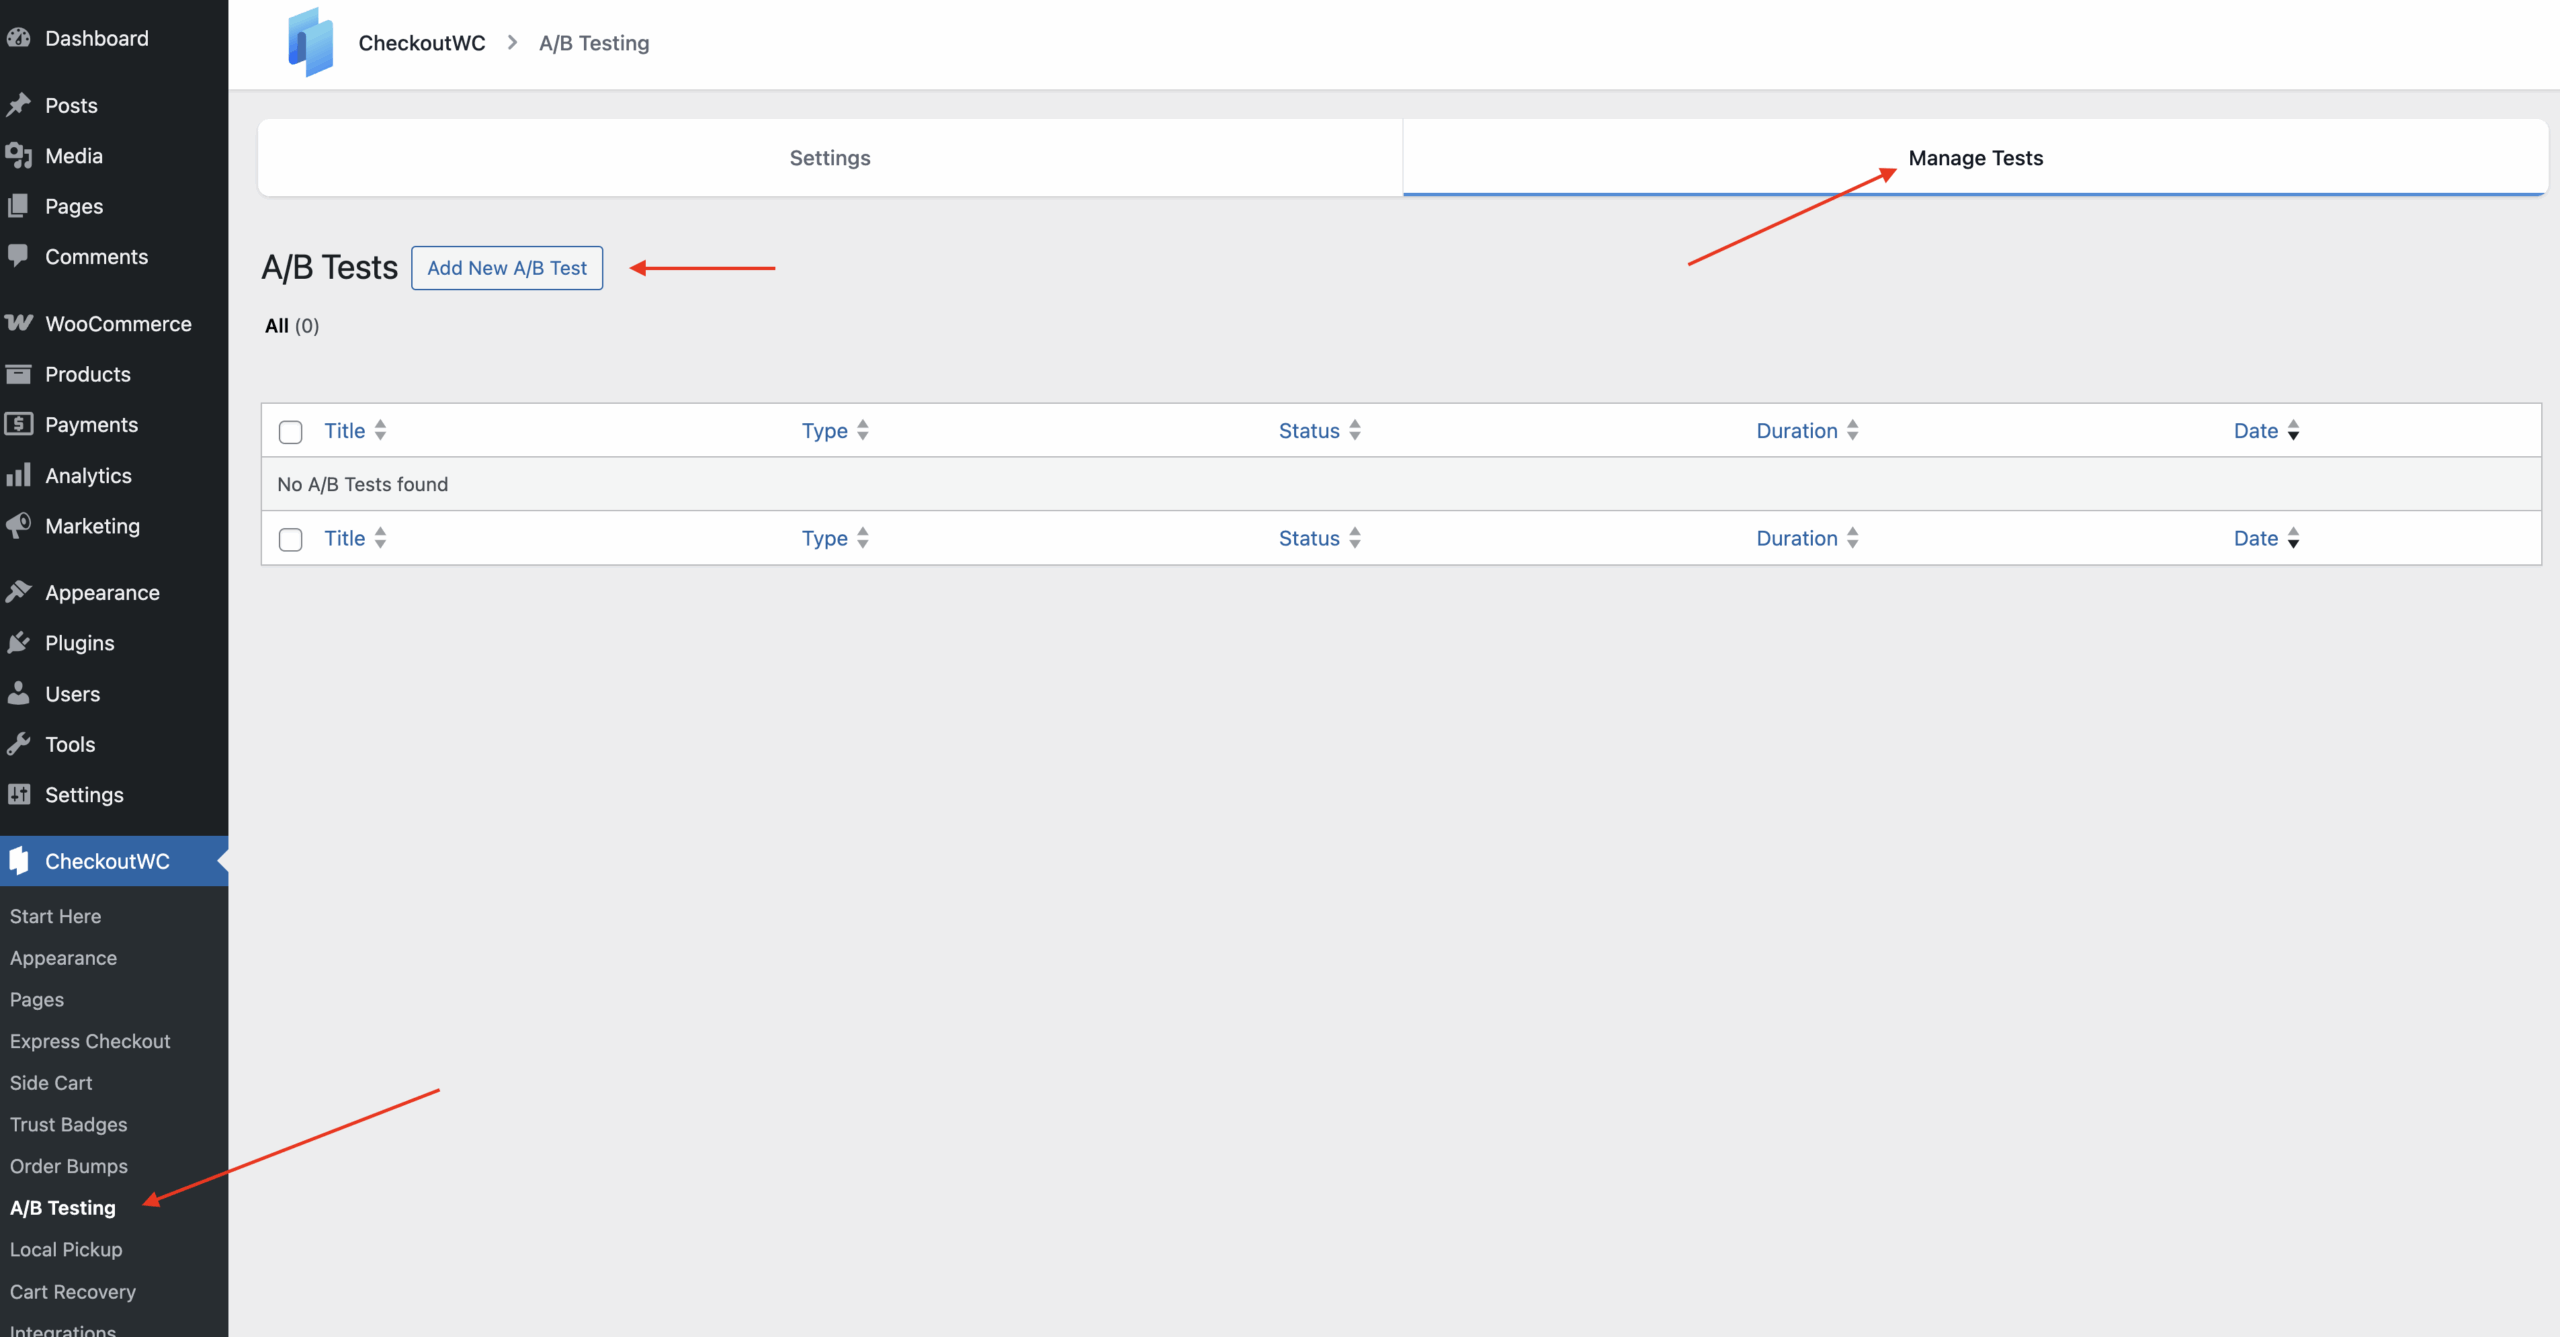
- In your WordPress admin, navigate to CheckoutWC → A/B Testing.
- Click on the Manage Tests tab.
- Click Add New A/B Test.
Step 2: Configure basic test settings
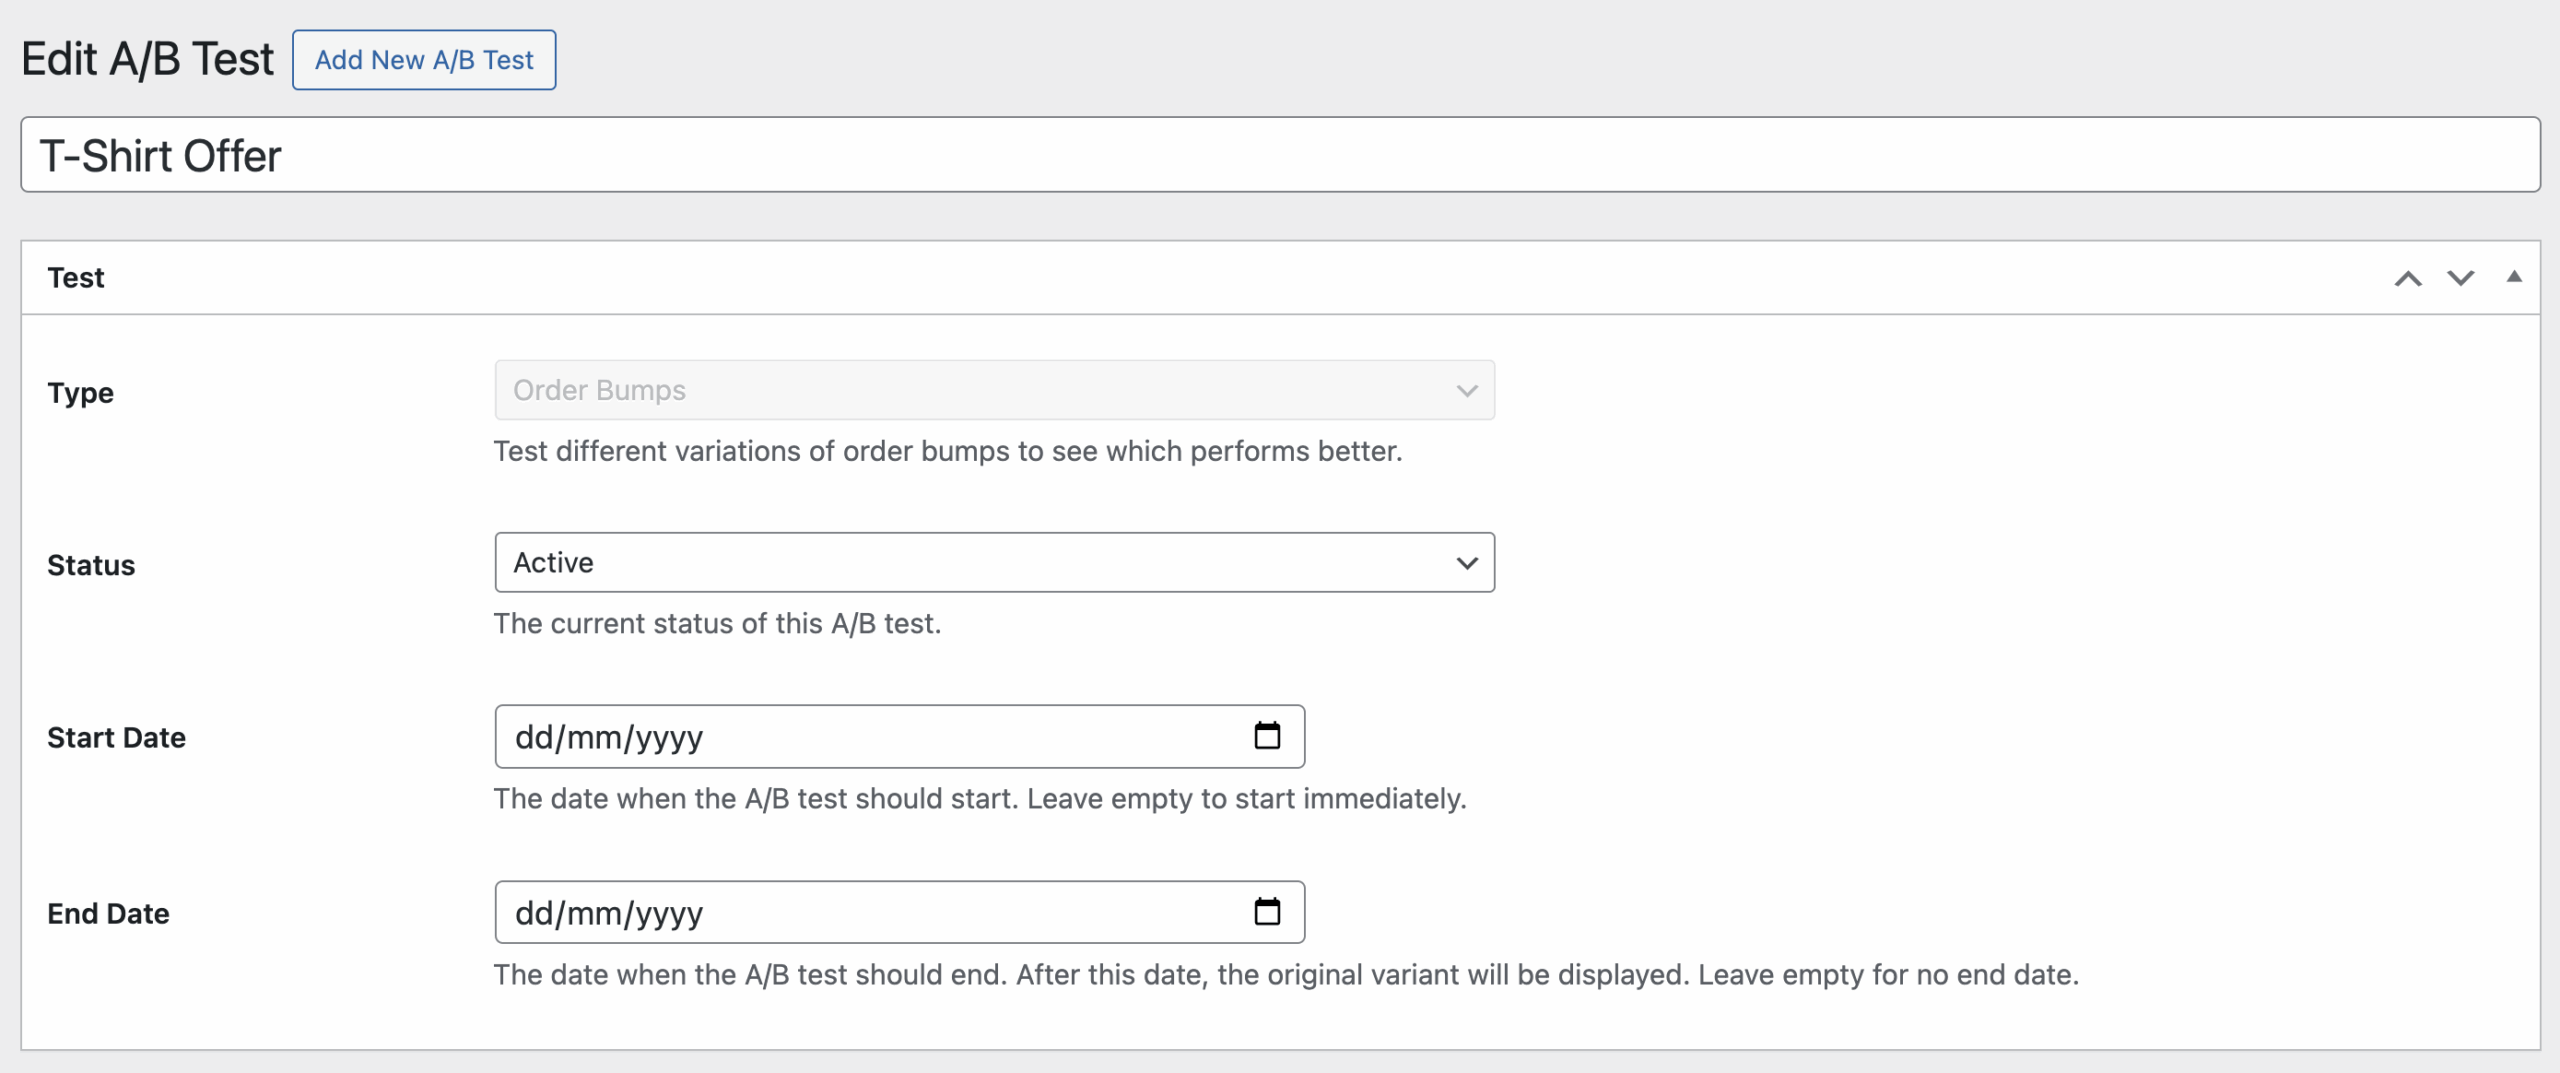
Give the test a title, this is used for your reference when viewing the test data later.
In the Test meta box, configure the following:
- Type: Select “Order Bumps” from the dropdown.
- Status: Choose one of the following:
- Active: The test is currently running and showing variants to customers.
- Paused: The test is temporarily stopped but can be resumed.
- Complete: The test has finished. Once a winner is selected, the test cannot be reactivated.
- Start Date (optional): Set when the test should begin. Leave empty to start immediately.
- End Date (optional): Set when the test should automatically end. After this date, the test status will change to “Complete” and the original order bump will be displayed.
Step 3: Select the order bump to test
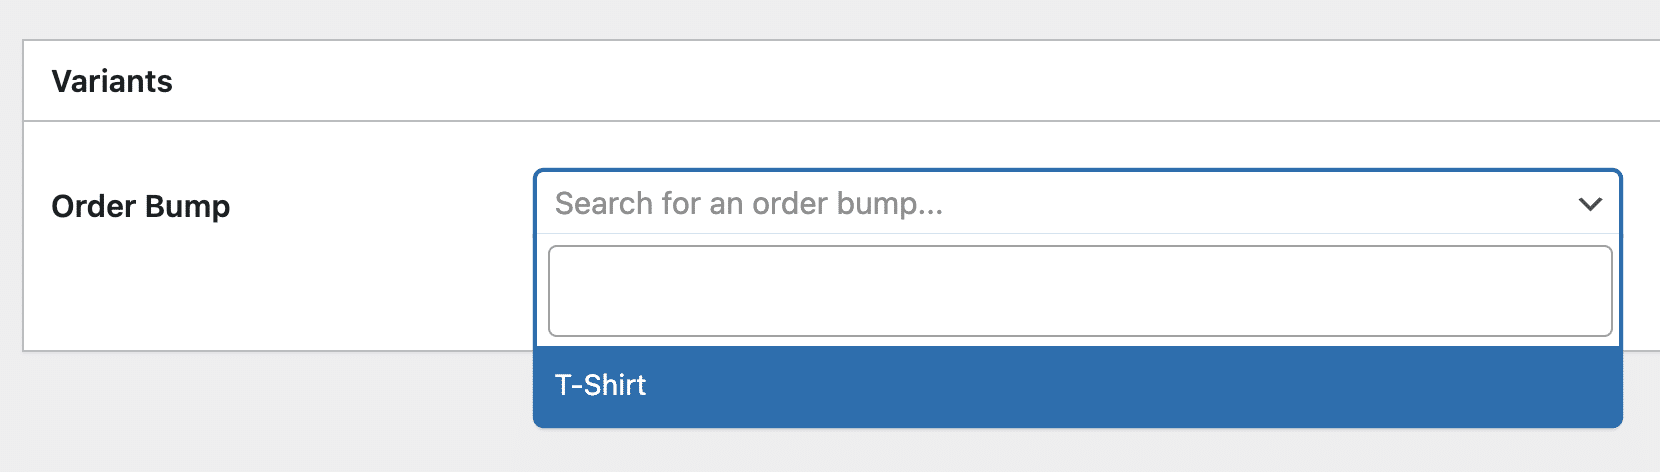
In the Variants meta box:
- Select Order Bump: Use the dropdown to choose the order bump you want to test.
- Once an order bump is selected, the variants section will appear below.
Step 4: Create variants
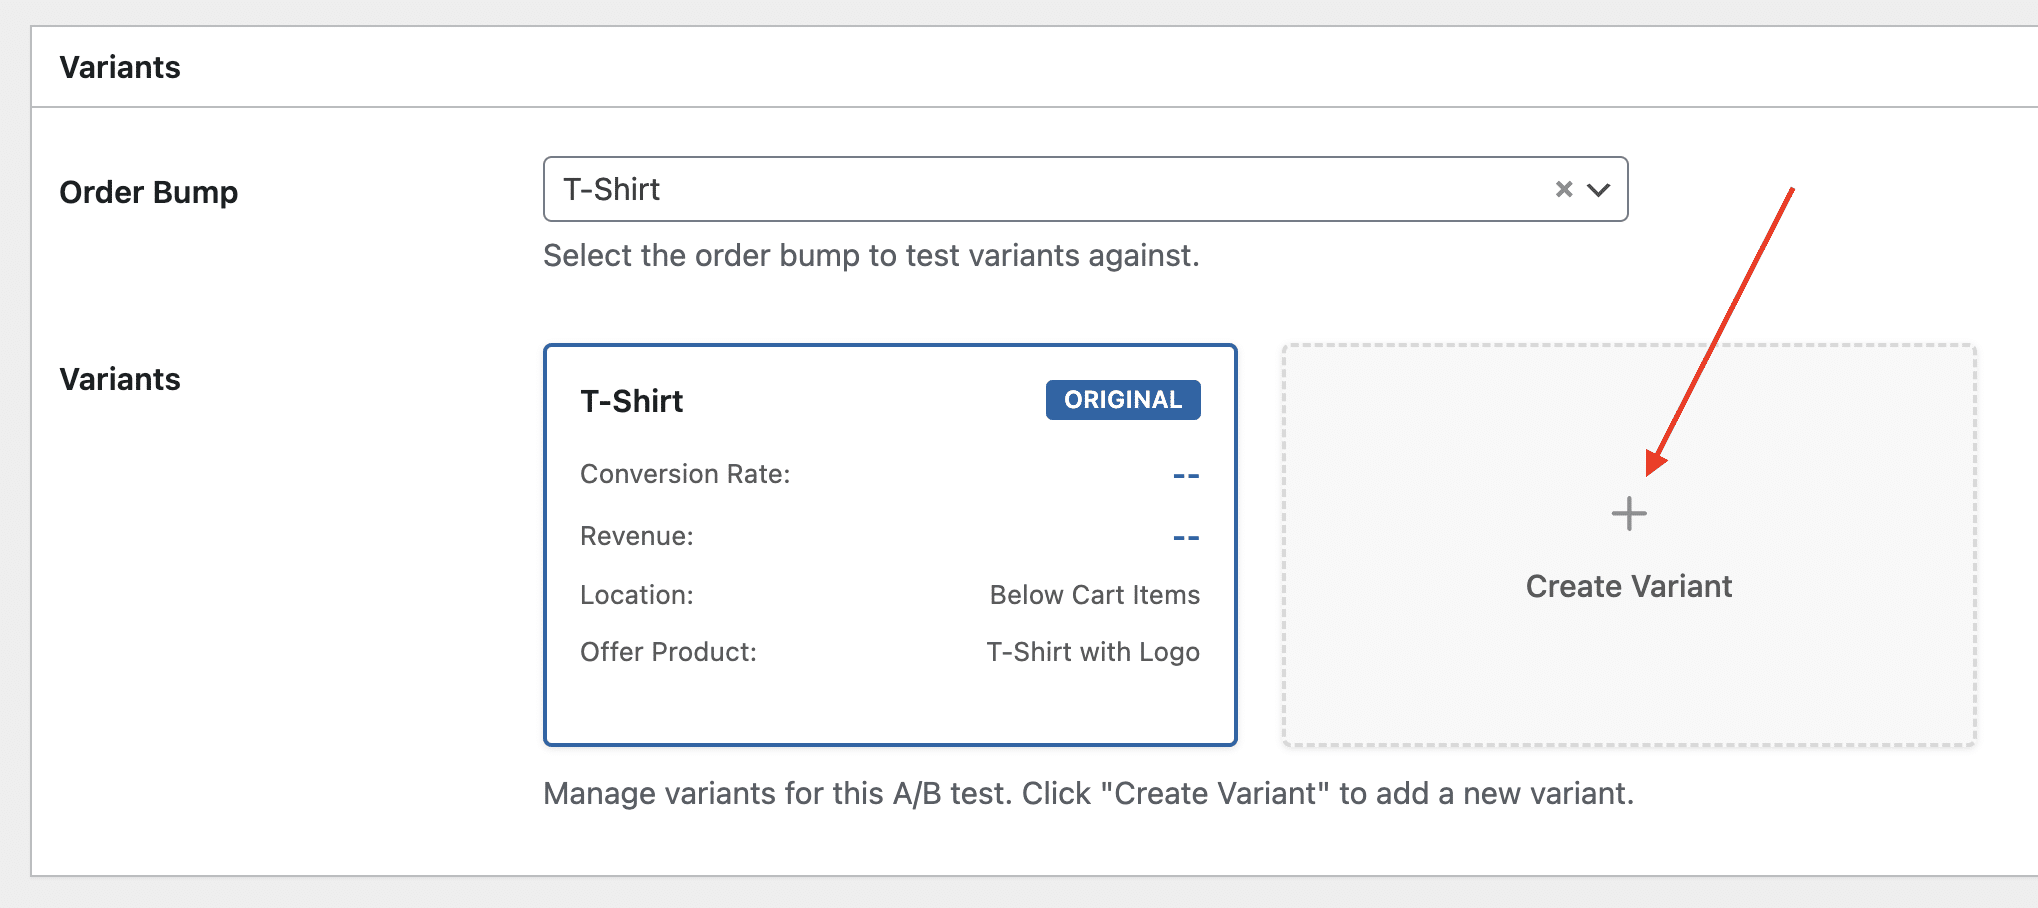
After selecting an order bump, you’ll see a variants grid showing:
- Original: The original order bump.
- Variants: Any existing variants for this order bump.
To create a new variant:
- Click the Create Variant button.
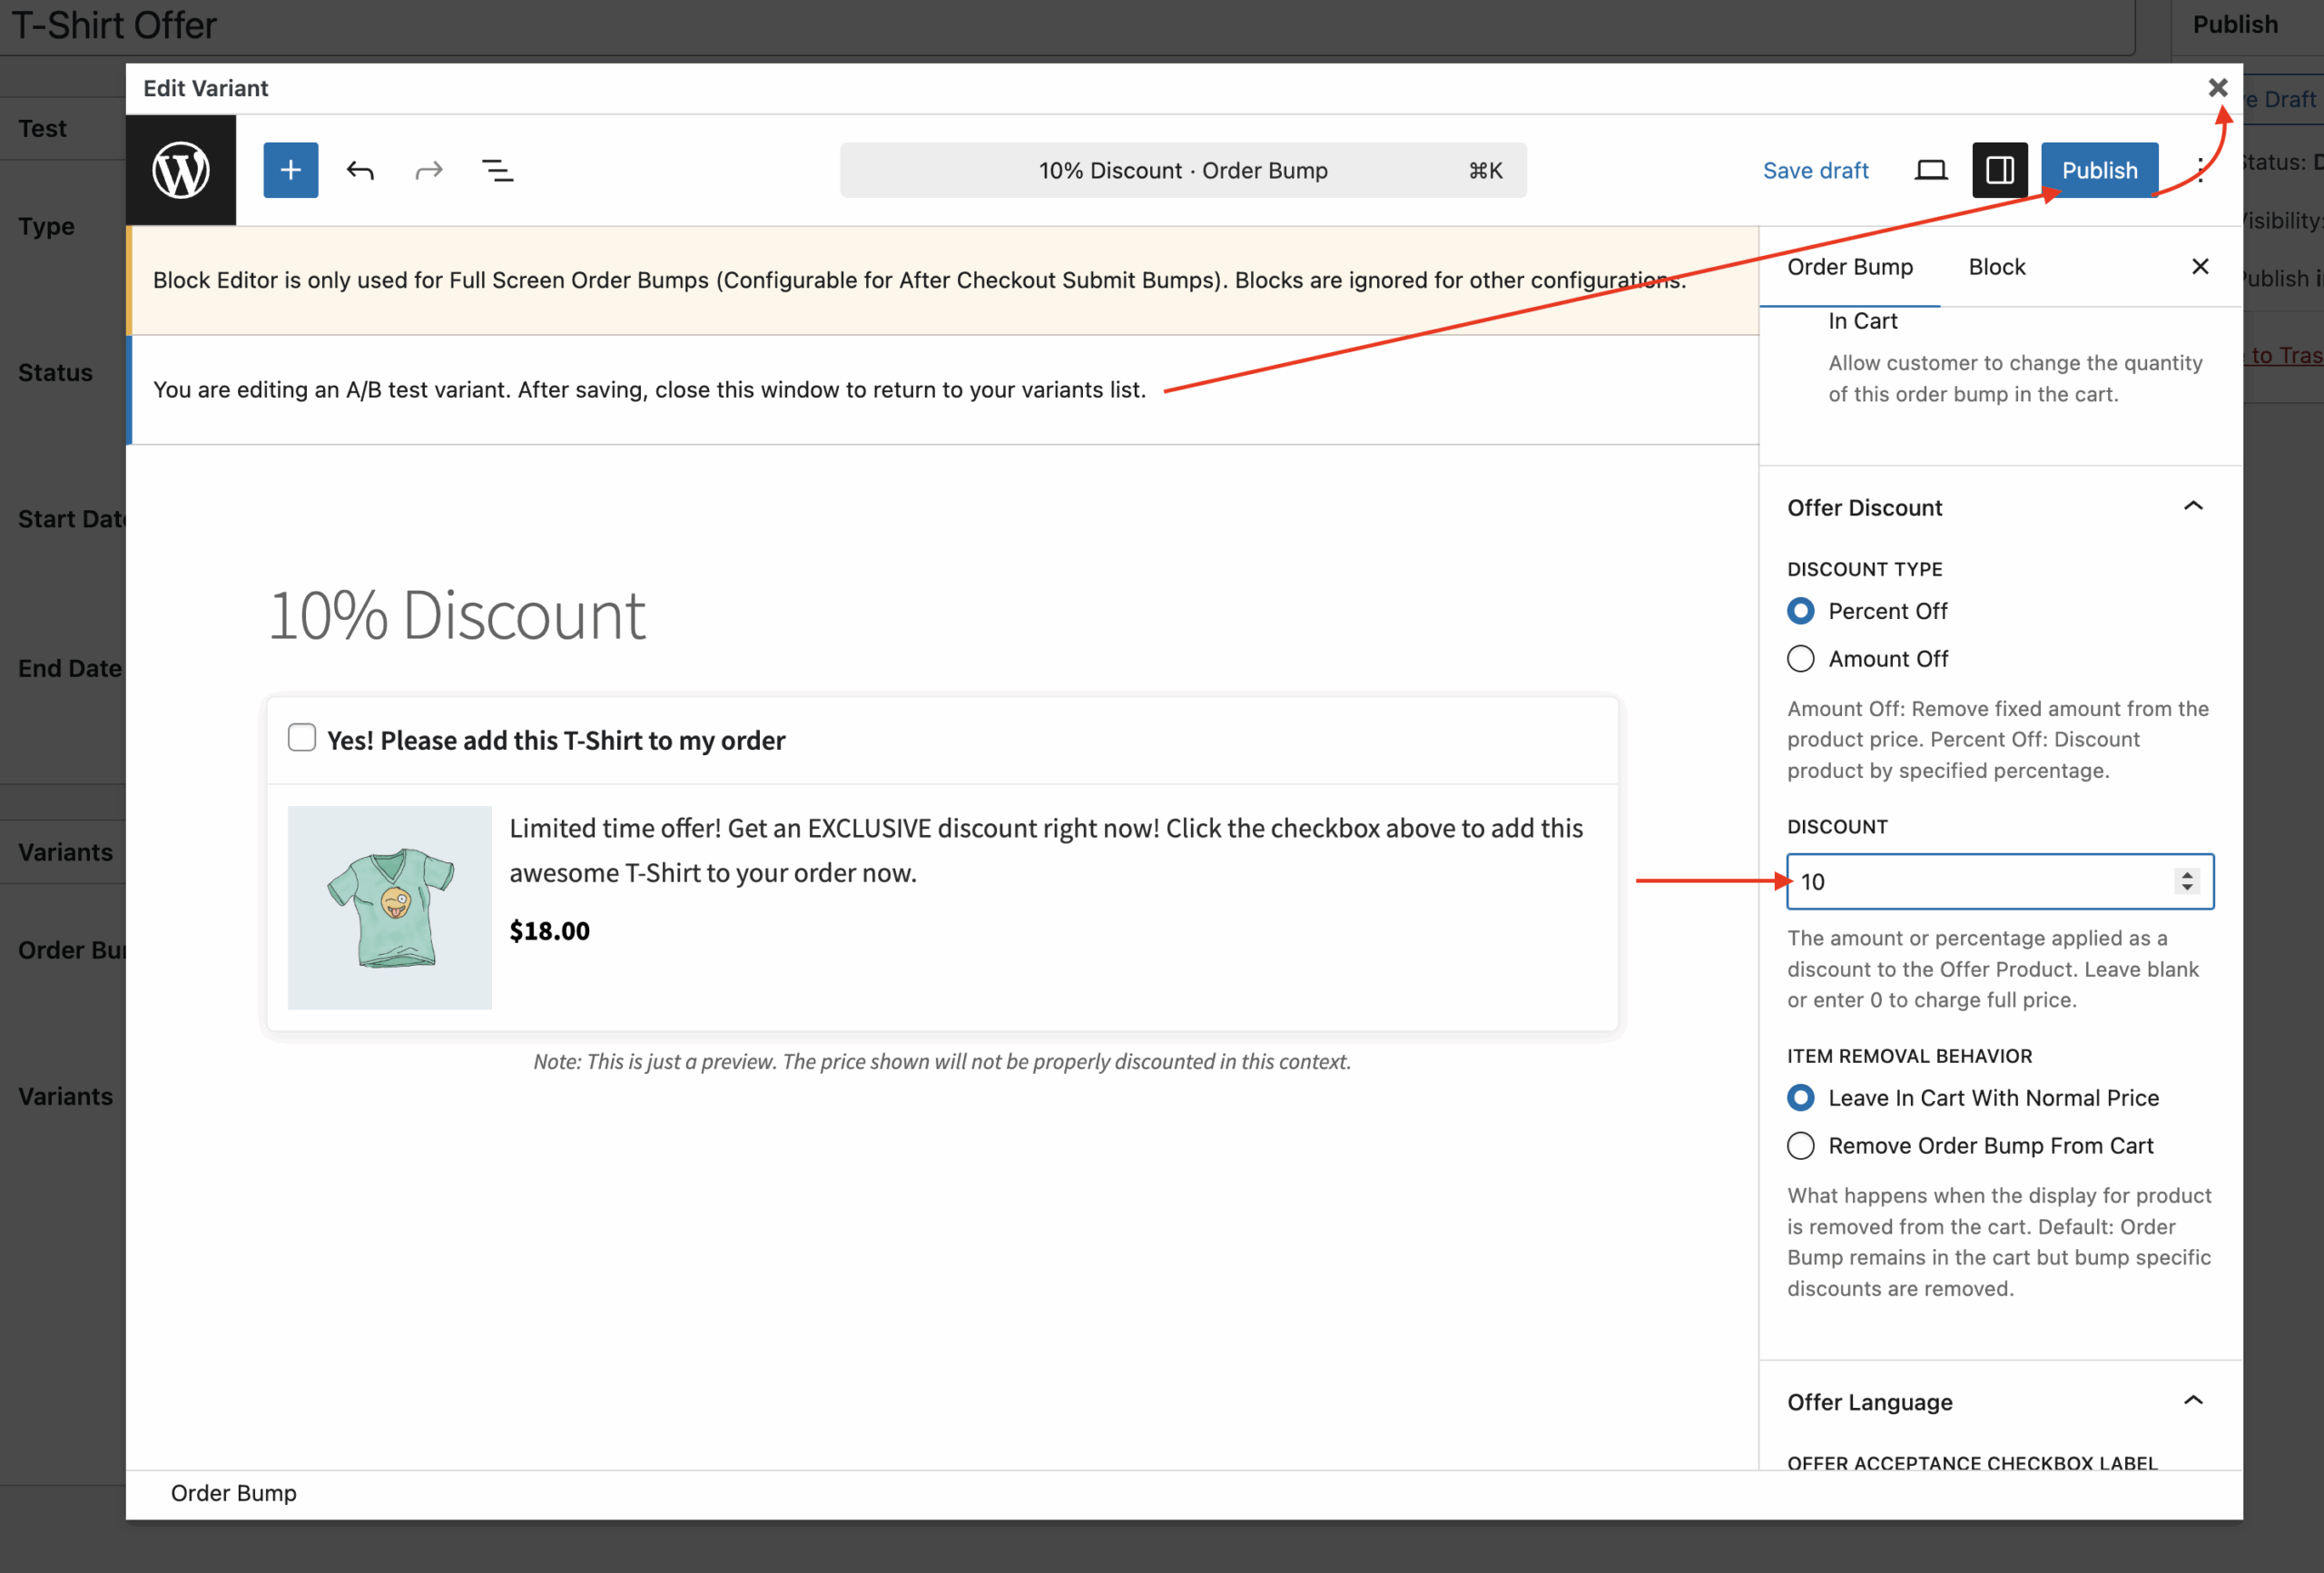
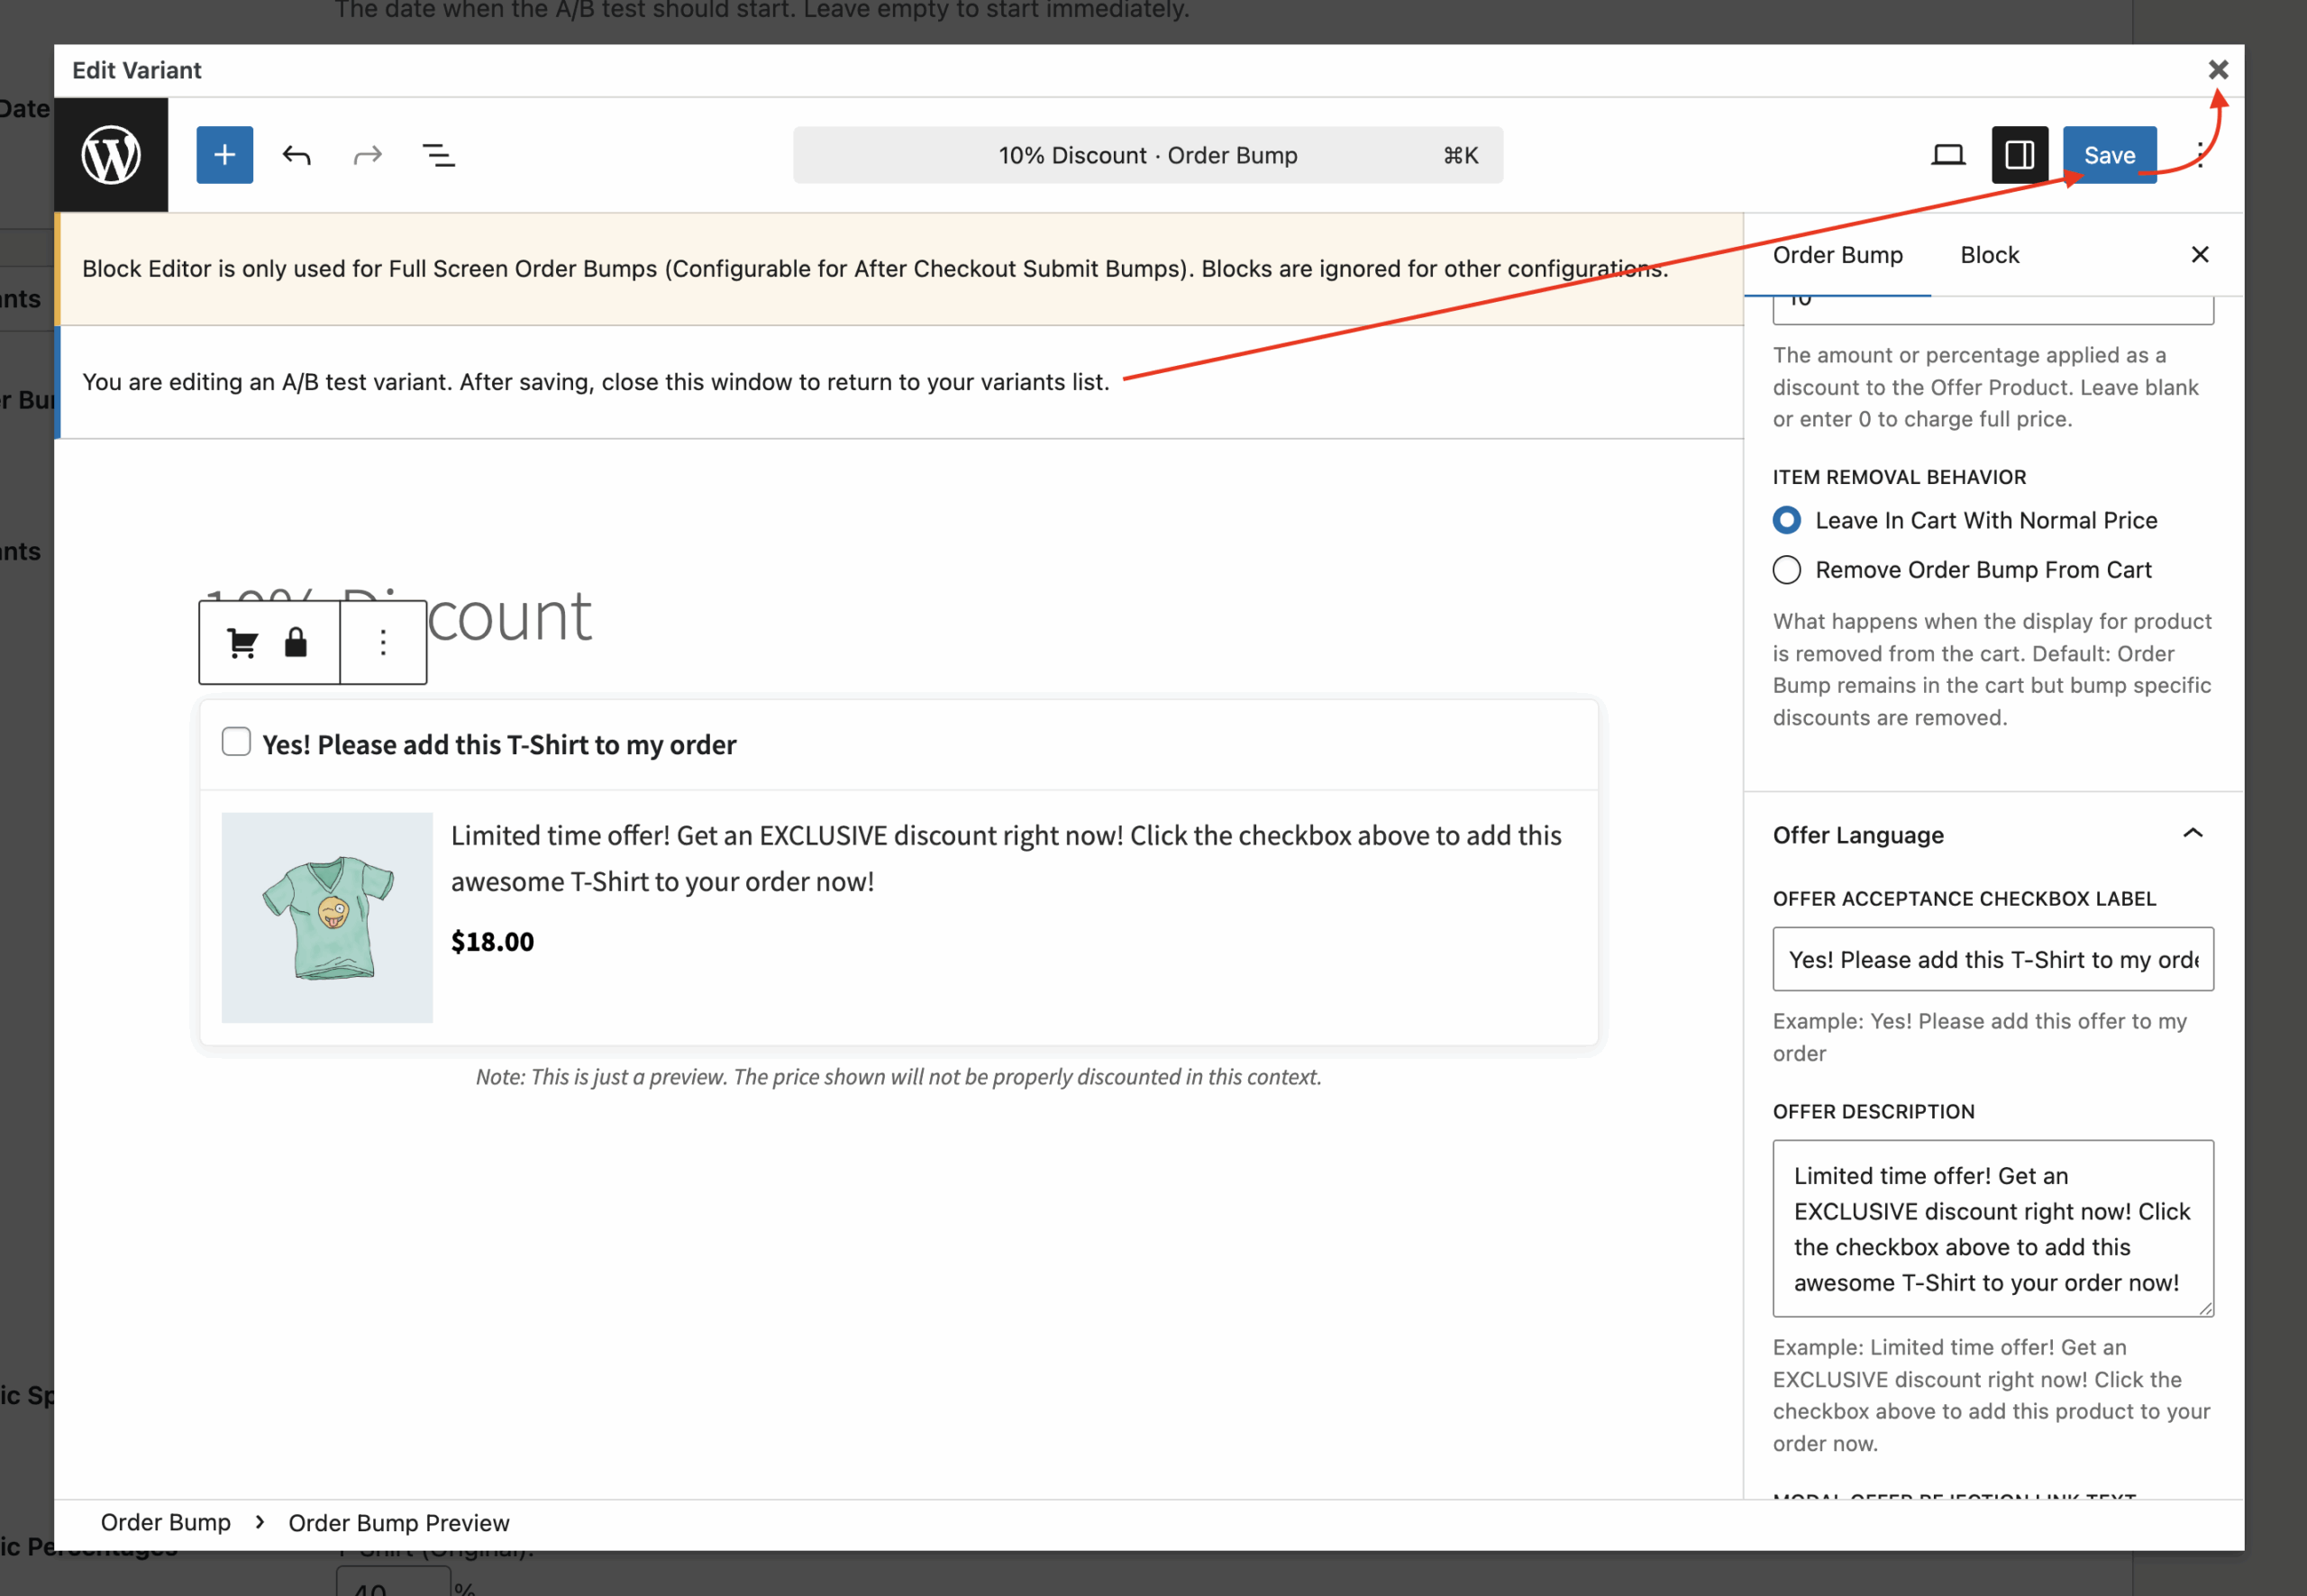
- Enter a title for this variant, then a new order bump editor will open in a modal window.
- Edit the variant’s content, pricing, images, or any other settings you wish to use for your testing.
- Save (publish) the variant. It will automatically be added to your A/B test.
- Close the variant editor to return to your A/B test.
Note: Each variant is a separate order bump that is linked to the original. You can create multiple variants to test different messaging, pricing, etc.

Step 5: Configure traffic split
The traffic split determines how visitors are distributed between the original order bump and its variants.
- Equal Split: Traffic is divided evenly between all variants (original + all variants). For example, with 1 original and 2 variants, each gets 33.33% of traffic.
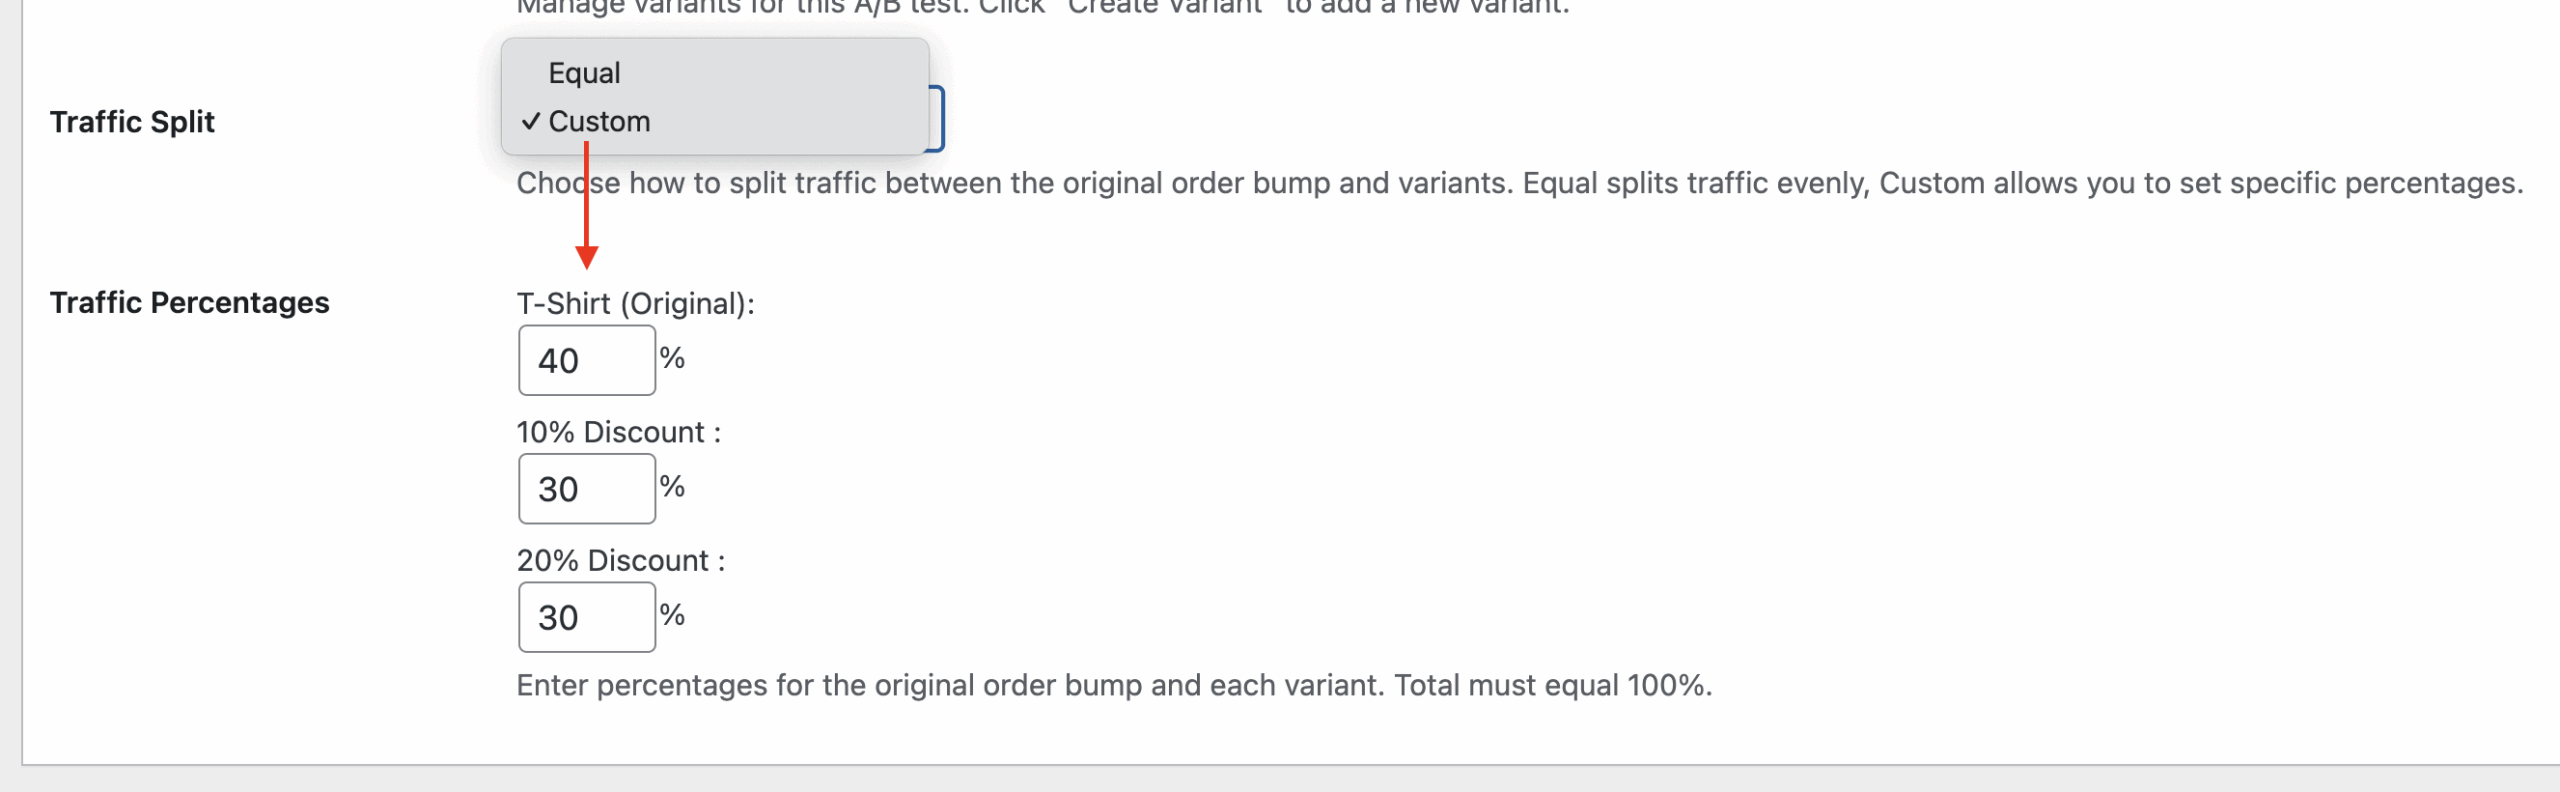
- Custom Split: You can set specific percentages for each variant. The total must equal 100%.
To use custom percentages:
- Select “Custom” from the Traffic Split dropdown.
- Enter percentages for the original order bump and each variant.
- Ensure the total equals exactly 100%. The system will validate this before saving.
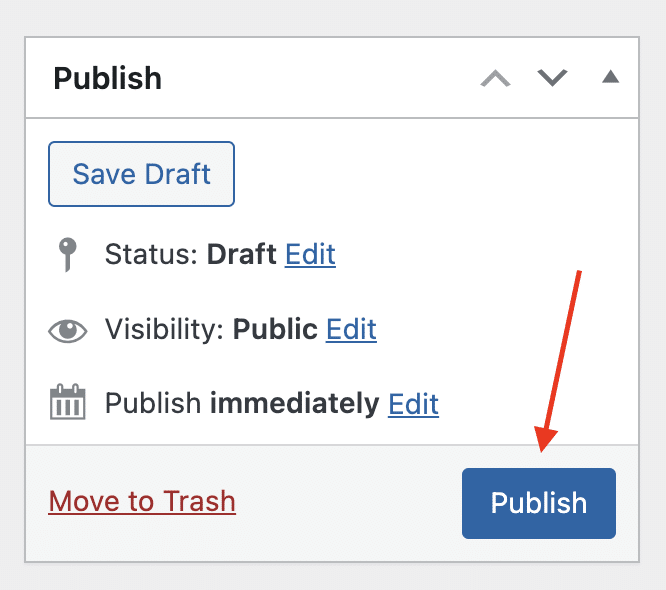
Step 6: Save and publish
Click Publish to activate the test immediately, or save as Draft to configure it further before going live.
Important: The test will only run when:
- The status is set to “Active”
- The test is published (not draft)
- The current date is within the start/end date range (if dates are set)
- A/B Testing and Order bumps are enabled in settings
Managing active tests
Viewing test status
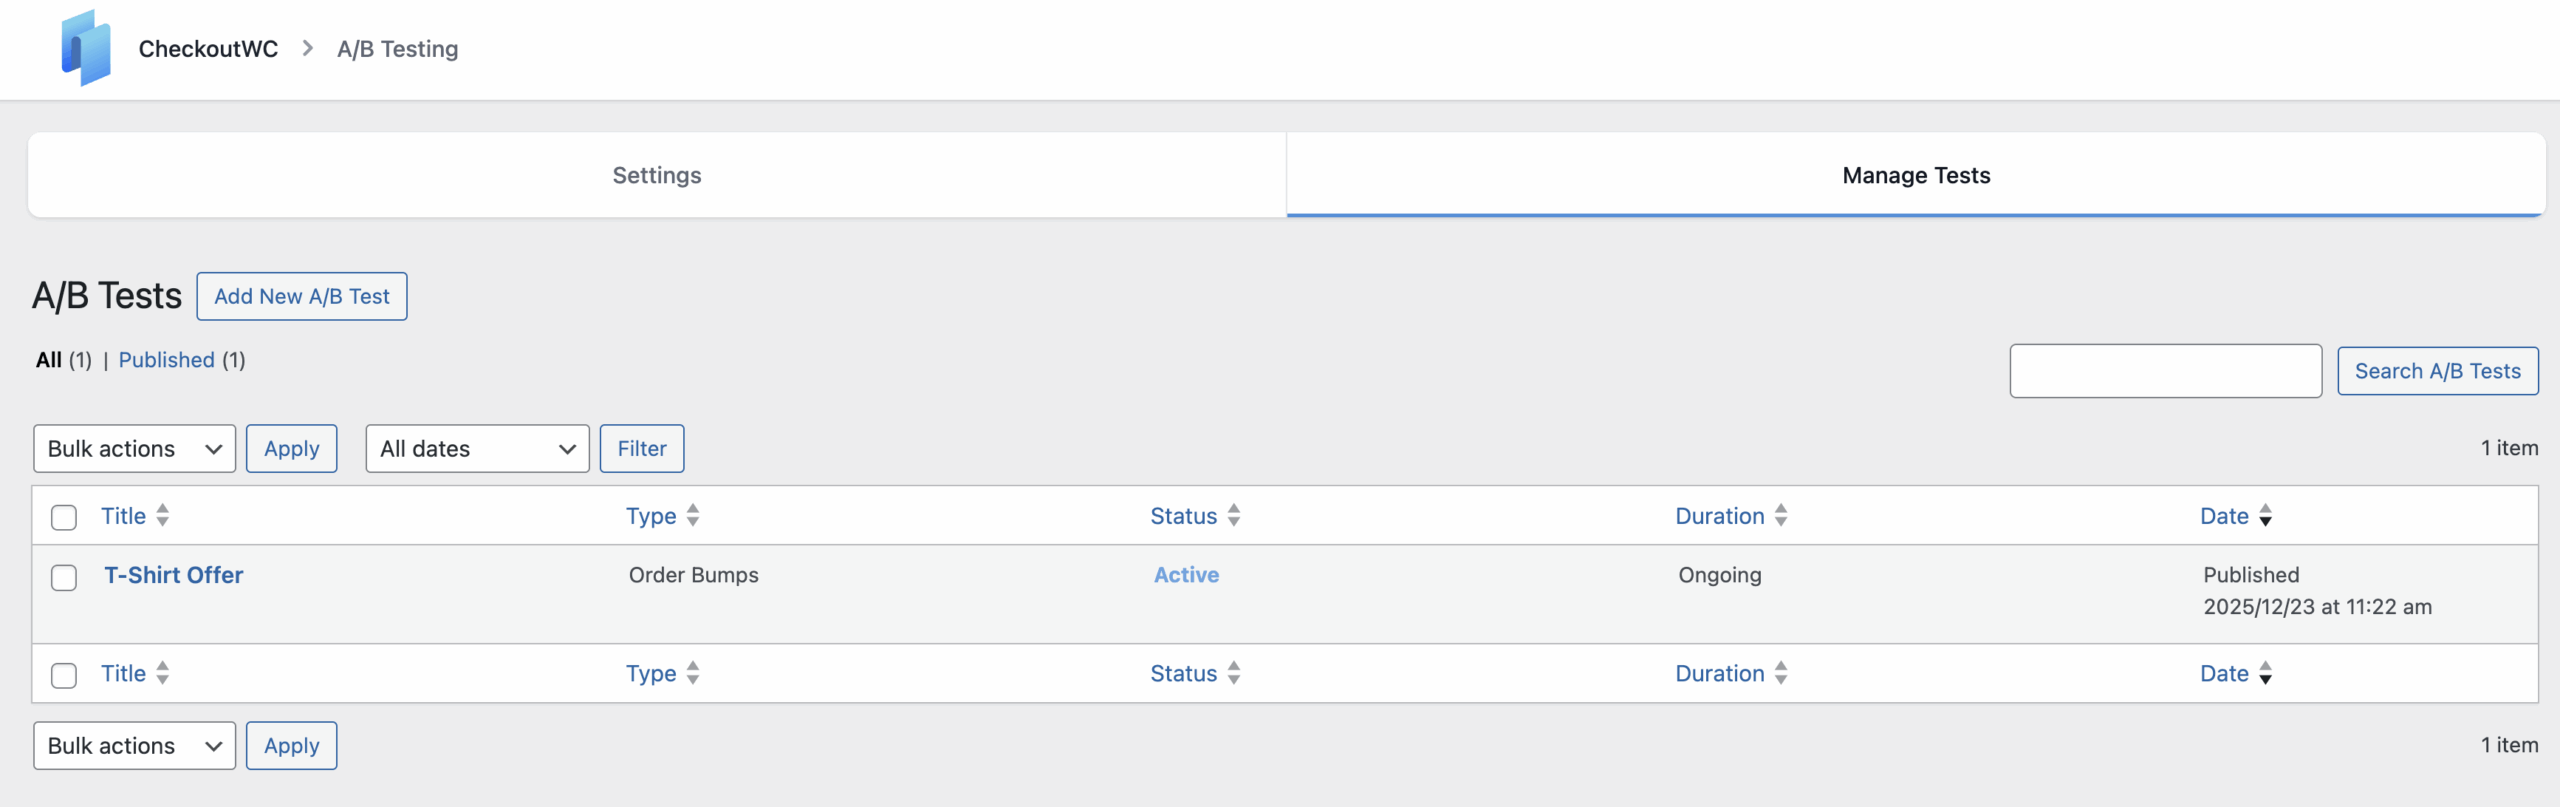
From the CheckoutWC → A/B Testing → Manage Tests list, you can see:
- Type: The test type (e.g., “Order Bumps”)
- Status: Current status with color coding:
- Blue = Active
- Orange = Paused
- Green = Complete
- Duration: Shows the date range or “Ongoing” if no dates are set
Pausing a test
To temporarily stop a test:
- Edit the A/B test.
- Change the Status to “Paused”.
- Click Update.
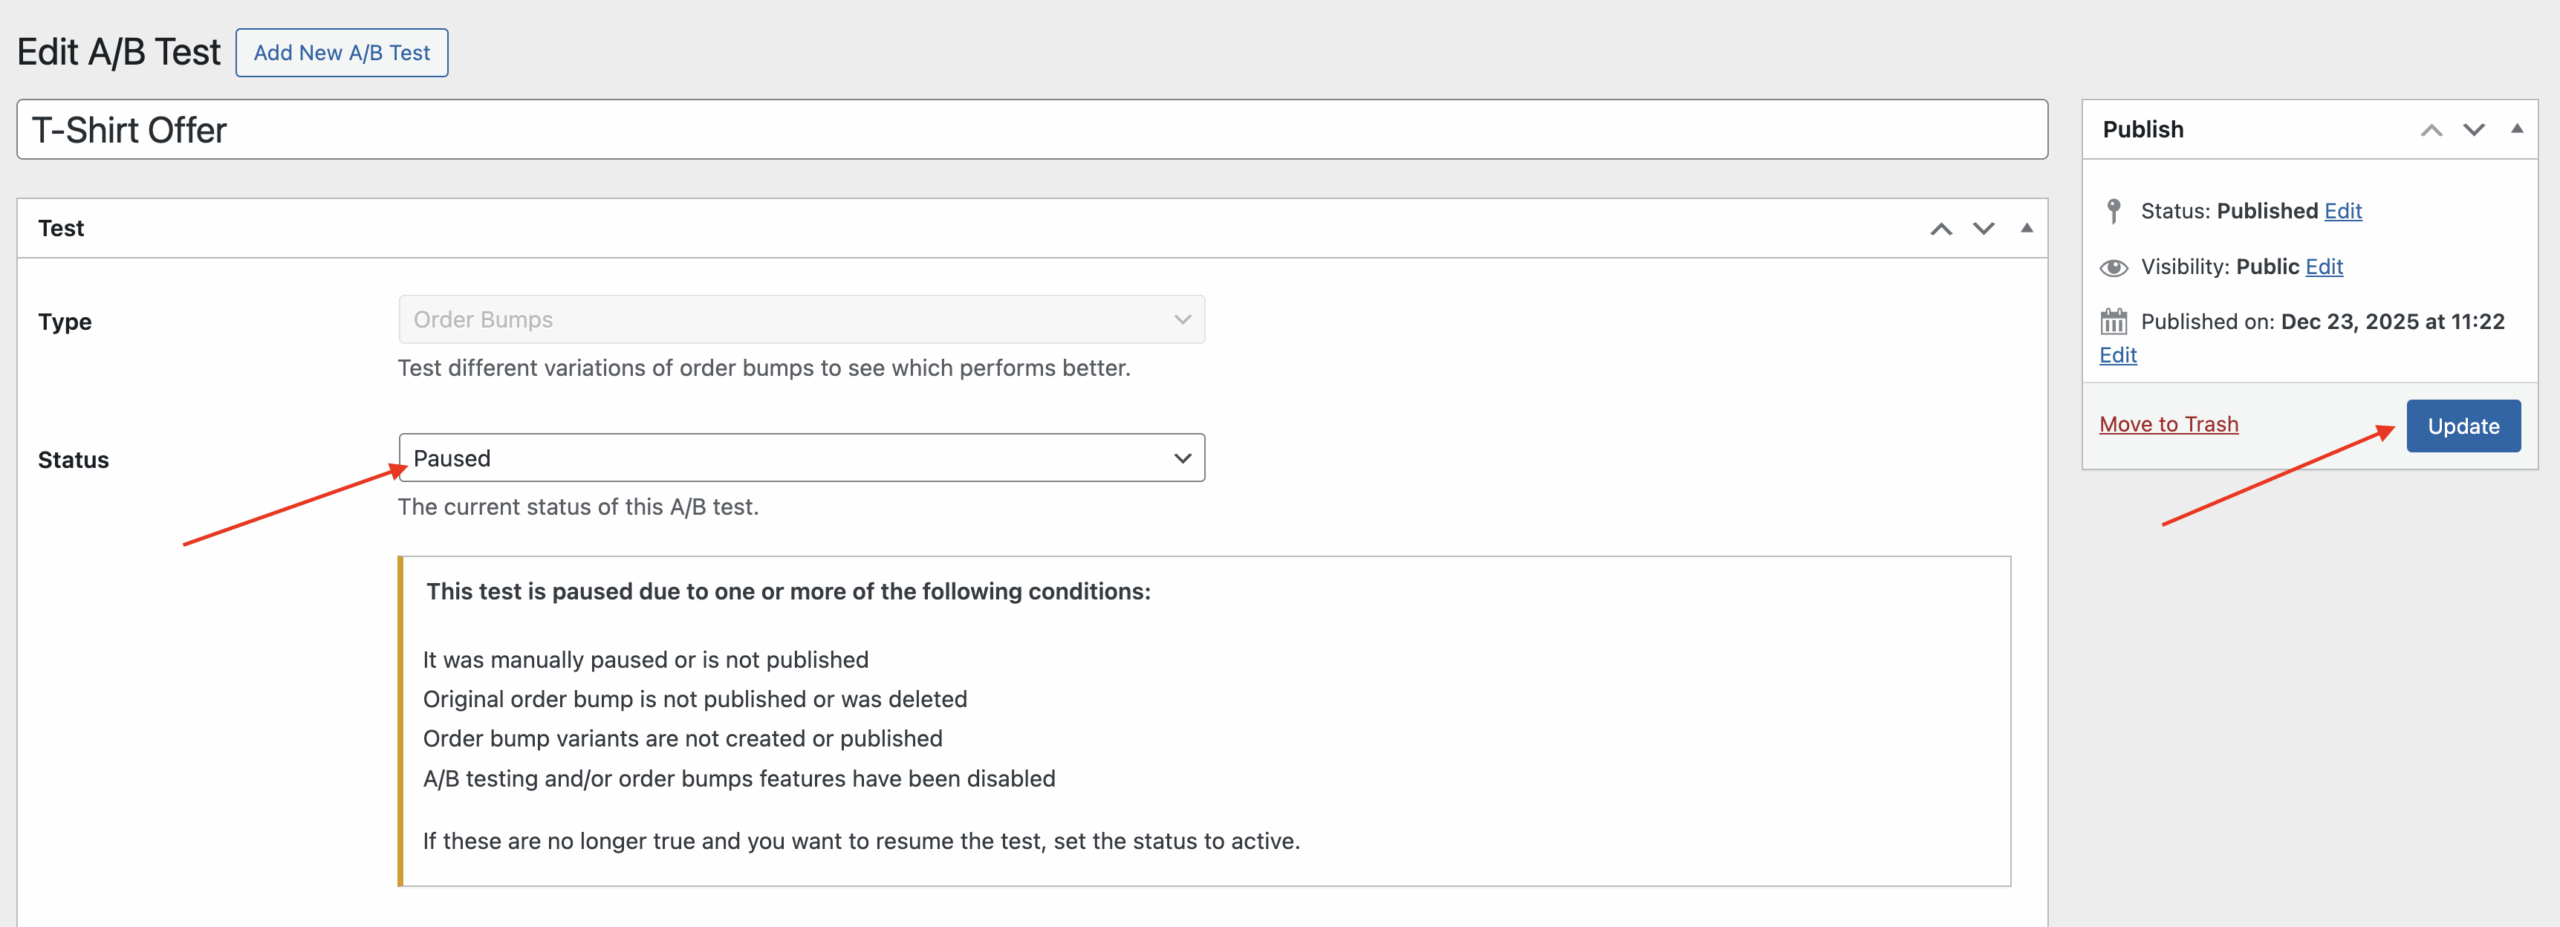
The test will stop showing variants, and all visitors will see the original order bump.
Note: A test may automatically pause itself if there is an issue, examples include, the order bump associated with the test has been deleted, or all A/B test variants have been deleted, etc.
Editing variants
To edit an existing variant:
- In the variants grid, click Edit on the variant card.
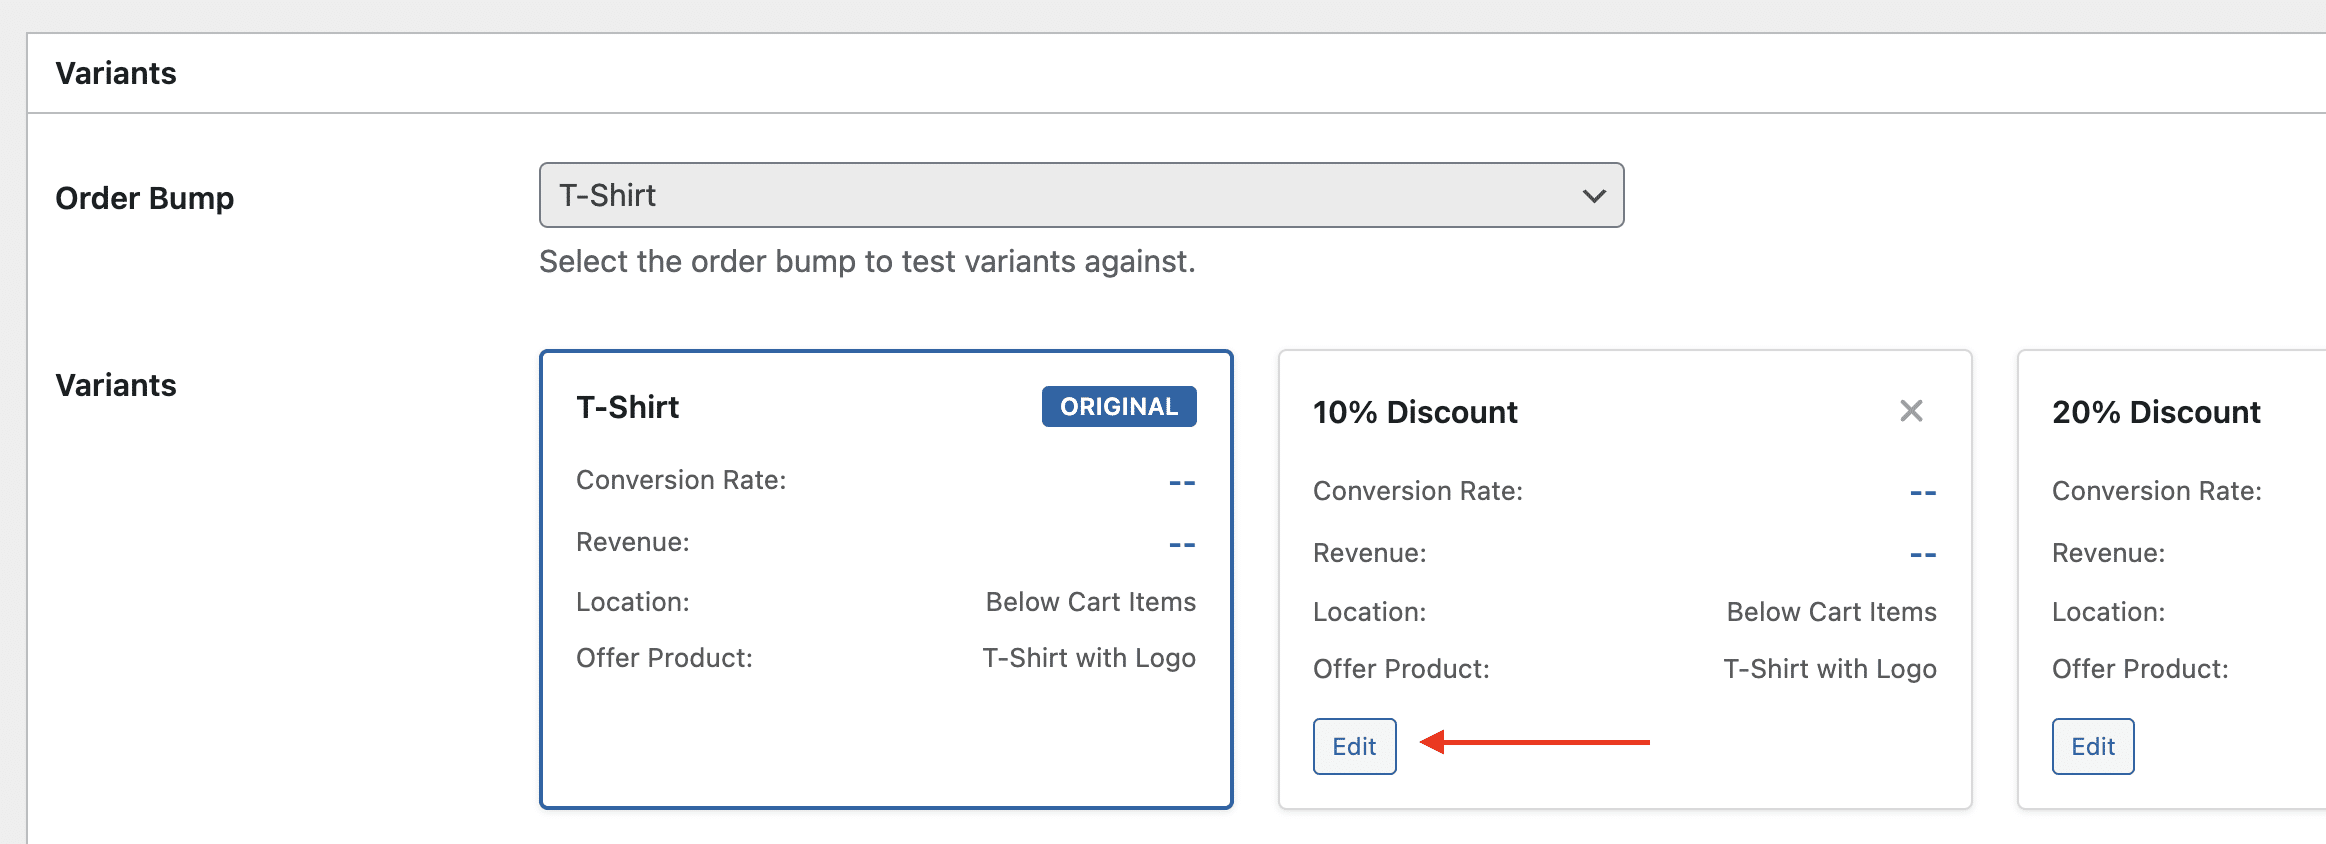
- Make your changes in the order bump editor.
- Save, then close the modal to return to the A/B test.
Deleting variants
To remove a variant from the test:
- In the variants grid, click X (delete) on the variant card.
- Confirm the deletion.
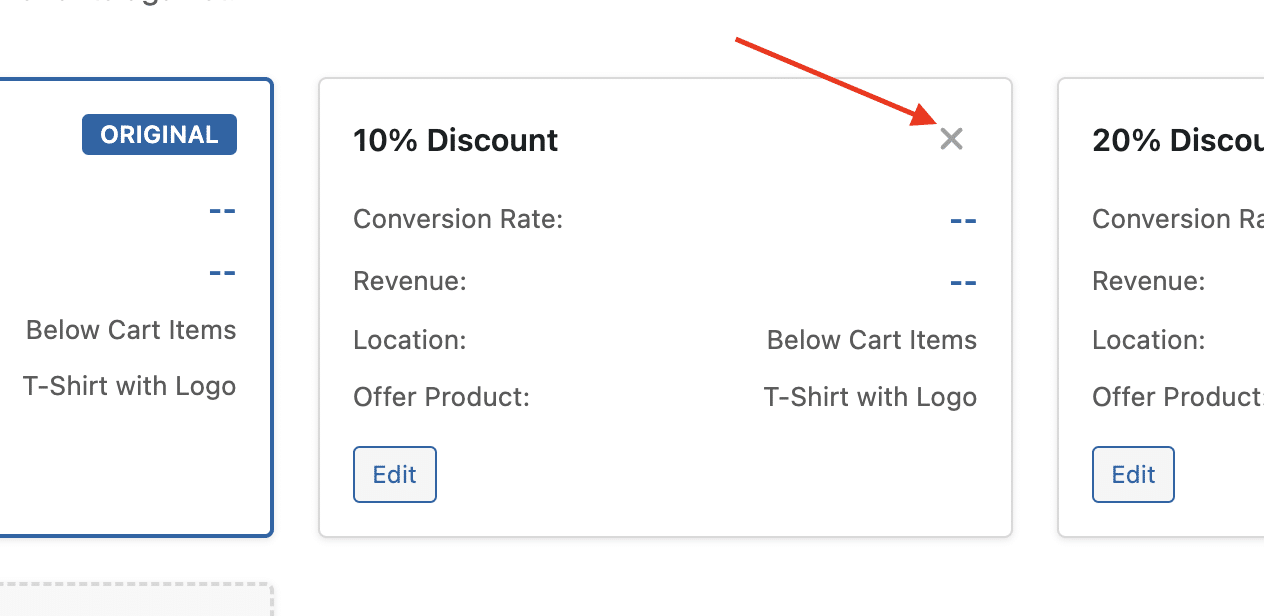
Note: Deleting a variant will permanently remove it. If using a custom traffic split, the traffic percentages will be redistributed proportionally across the remaining variants.
Completing a test
Selecting a winner
When your test has run long enough to gather meaningful data:
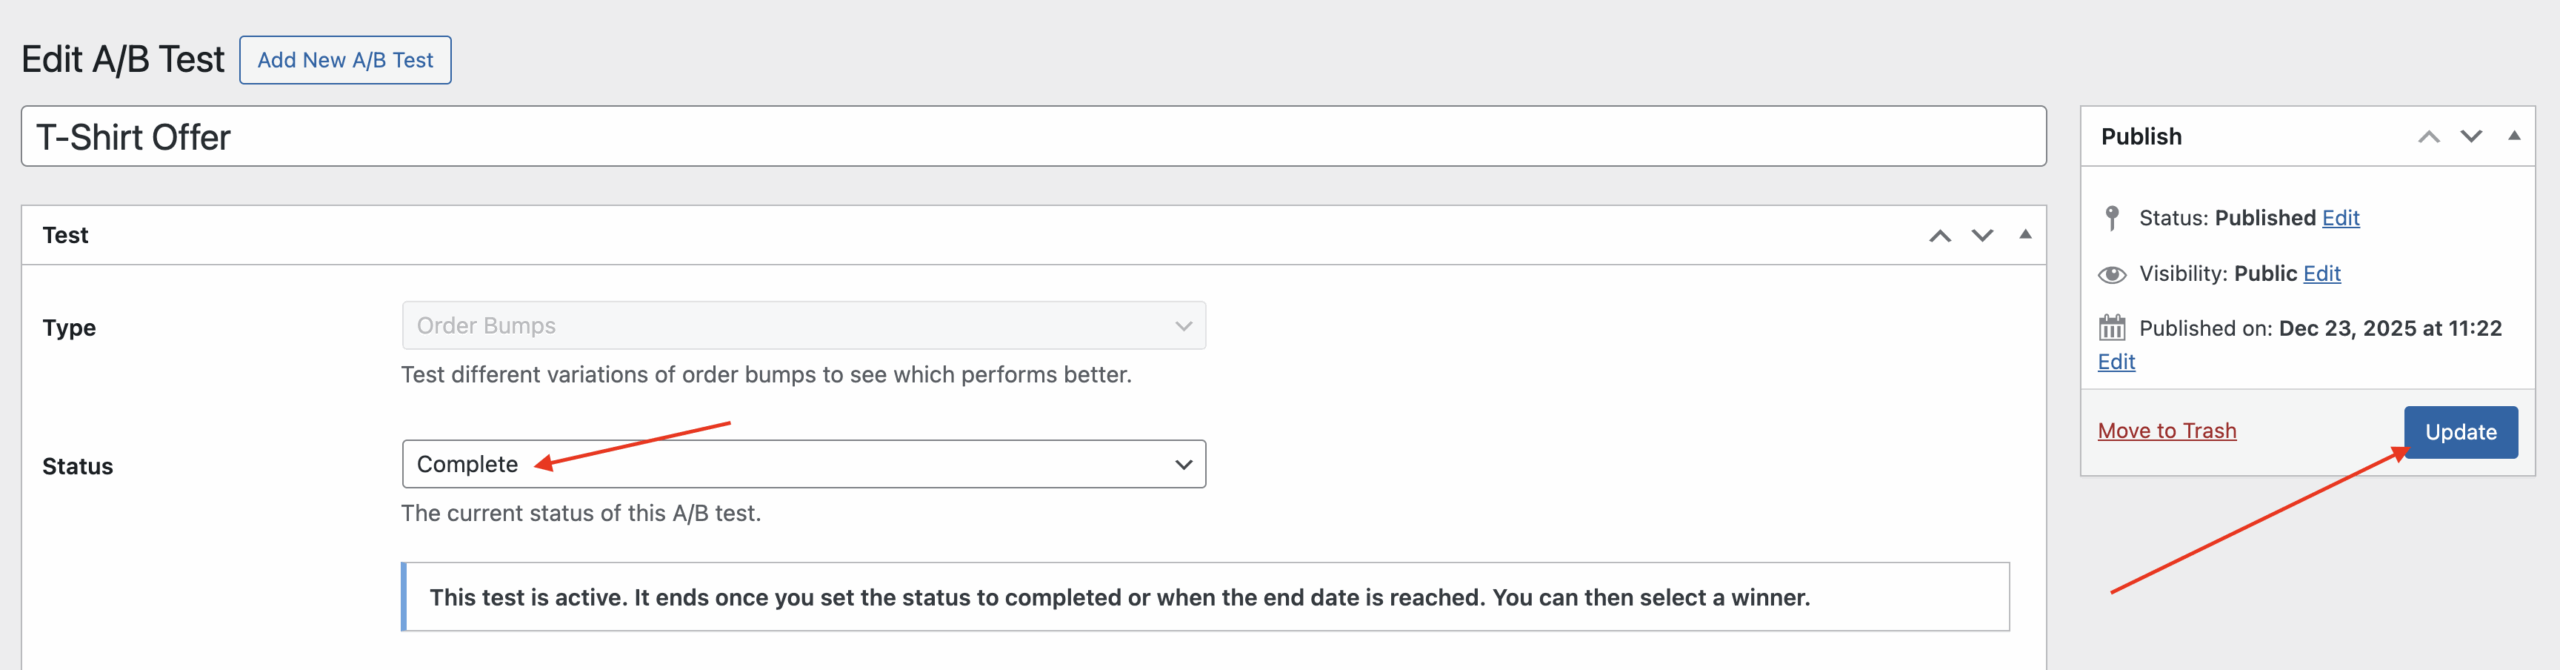
- Edit the A/B test.
- Set the status to Complete and Update the test (this will automatically change to Complete if you used an end date, and that date has elapsed).
- After updating, in the variants grid, click Select as Winner on the variant that performed best.
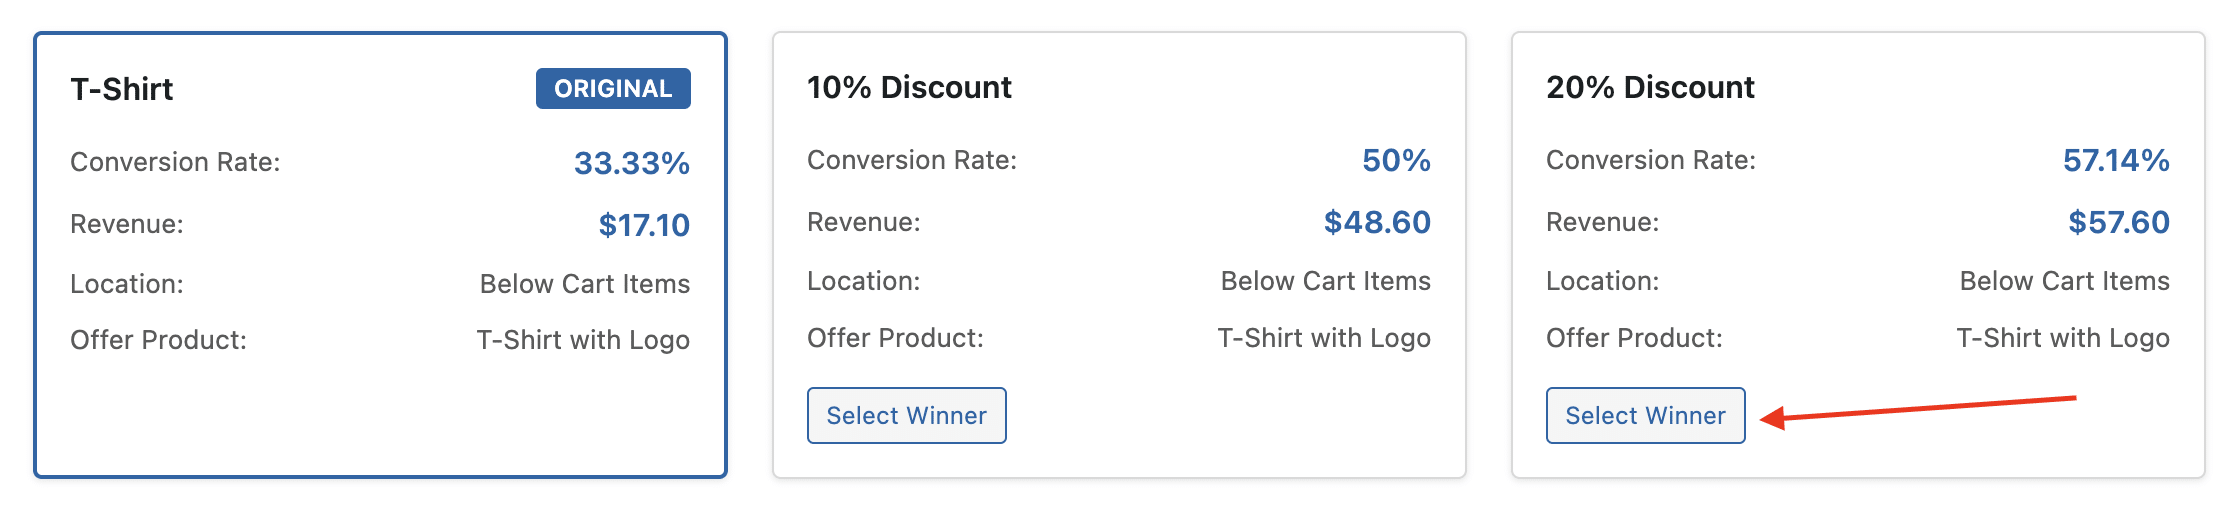
- Confirm your selection, you can optionally apply this variant’s conversion stats to the original order bump.

Once a winner is selected:
- The test configuration becomes read-only.
- The winning variant replaces the original order bump permanently.
- The test cannot be reactivated or modified.
- You’ll need to delete this test to create another one for this order bump.

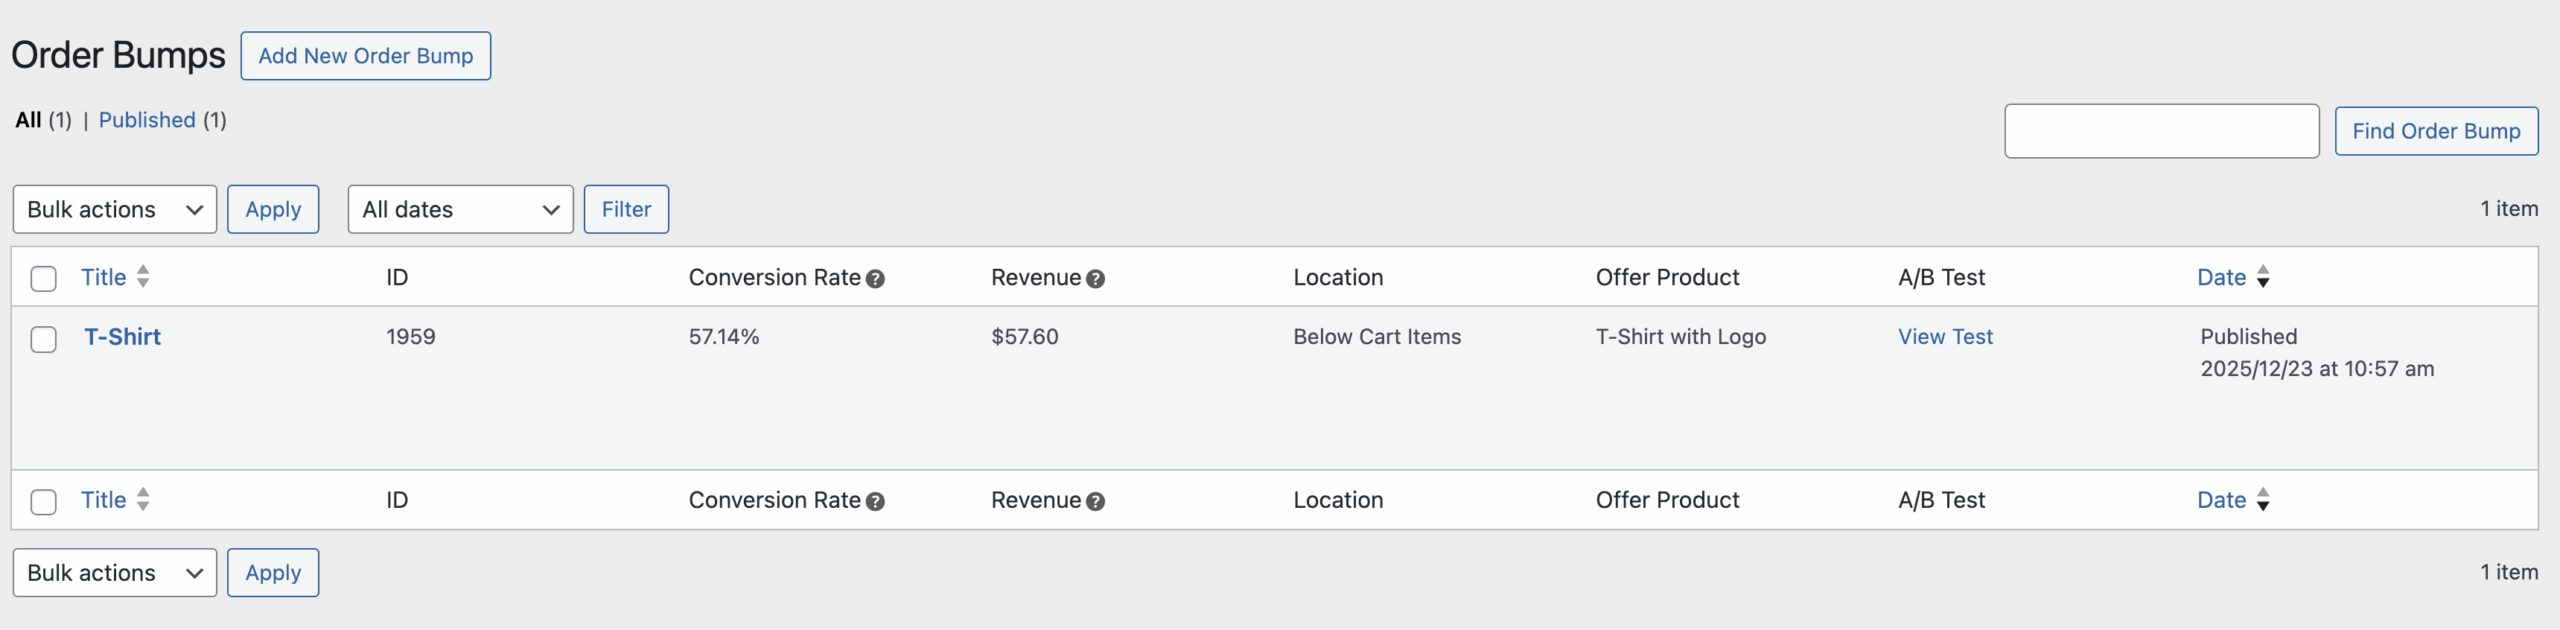
If you now navigate to CheckoutWC → Order Bumps → Manage Bumps, the original order bump has now been updated to the winner. Customers will see the updated bump from now on.
Automatic completion
Tests will automatically complete when:
- The end date passes.
- You manually set the status to “Complete”.
Best practices for A/B testing order bumps
- Test One Variable at a Time: For clear results, test one element per variant (e.g., headline, price, or image).
- Run Tests Long Enough: Allow tests to run for at least 1-2 weeks to account for weekly shopping patterns and gather sufficient data.
- Document Your Tests: Use descriptive titles and notes to remember what you’re testing and why.
- Set Clear Goals: Before starting, define what “better performance” means (e.g., higher conversion rate, more revenue per order).
Troubleshooting
Checkout not showing variants?
- Verify the test status is “Active”.
- Ensure the A/B test is published (not draft).
- Check that the current date is within the start/end date range.
Important: If you are seeing the same variant on the frontend, this is usually expected, the variant is chosen and shown on a per-session basis. To test seeing the different variants, use Chrome Incognito mode, or similar.
Can’t edit the test after saving?
- Test type and order bump selection are locked after initial save to prevent data corruption.
- Create a new test if you need different settings.
Custom traffic split not working?
- Ensure percentages total exactly 100%.
- Check that at least one variant exists.
- Verify the test is active and published.
- Variants are shown on a per-session basis, see “Checkout not showing variants?” above for more information.
Related resources
- Order Bumps overview – Complete settings reference
- Creating your first order bump – Step-by-step setup guide
- Display locations – Where bumps appear and when to use each
- Rules Engine reference – Target offers using conditions
- Introducing A/B testing – Release announcement with strategy tips